Reposted from Steam user W3stBoy. Original post: The Long Dark full map and introduction; removed on request.
Map source: Whiteberry, dissonance, Tujue and His Pasha People Map translation: dissonance Icon positions: stmSantana Map descriptions: dissonance Edits and compilation: W3stBoy
Map orientation issues
Before we start we still have to talk about map orientation. Orientation in this game is nothing short of chaos: there are four frames of reference you can use to judge direction, but absurdly, applying these four to the same map can give completely conflicting conclusions. This is the result of the developers not planning the world modeling coherently, and it’s extremely unfriendly to players. Great Bear Island orientation: using the full Great Bear Island map that appears when you pick a map at the start of a run as the frame of reference, with north up, south down, west left and east right per basic cartography. By this standard, many of the in-game charcoal maps are crooked, so it’s generally only of discussion value and is basically never mentioned in actual play. All the compasses on this version of the map are placed according to this standard.
Sun orientation: using the sun rising in the east and setting in the west on a single map as the frame of reference. Impractical — when there is a sun you won’t get lost at all, and in weather like fog or blizzards you can’t see the sun at all. What’s most fatal is that both the Great Bear Island orientation and the coordinate orientation conflict with the sun orientation to some degree.
Echo Peak orientation: a frame of reference built on the only two place names on the map that carry a direction. If it held, almost every map would have to be rotated 180°. So either the developers built every map backwards, or they made a typo; I lean toward the latter.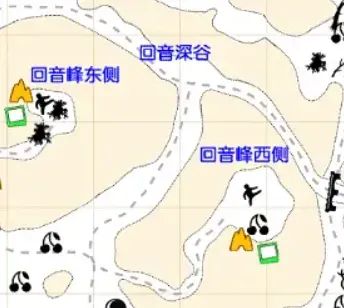 The mystery of east on the left and west on the right
Coordinate / stick orientation: a frame of reference determined by the coordinates of a single in-game map. Generally x is left-right and y is up-down, and a stick dropped from the player is always perpendicular to the x-axis (still true as of v1.94; in fact it’s not just sticks — other items have similar properties, each pointing in a different direction). This is the origin of the usual saying that the tip of a stick points north and the fork points south. Since it’s per-map, and the in-game charcoal maps and Whiteberry maps are all drawn according to coordinates, this is the frame of reference best suited to helping players confirm direction alongside the map. The problem is that a map drawn entirely by this standard conflicts very seriously with the full Great Bear Island map the developers provide, especially on Mystery Lake, Pleasant Valley and Broken Railroad. So when making the charcoal maps, the developers rotated Pleasant Valley and Broken Railroad 90° clockwise (Mystery Lake escaped for unknown reasons), making y left-right and x up-down to match the big map’s orientation. That’s why on these two maps today, sticks point right (east) at the tip and left (west) at the fork. This version of the map adds stick directions, which may feel slightly off compared to actual gameplay, but that’s really because the reference objects players usually pick are themselves not straight.
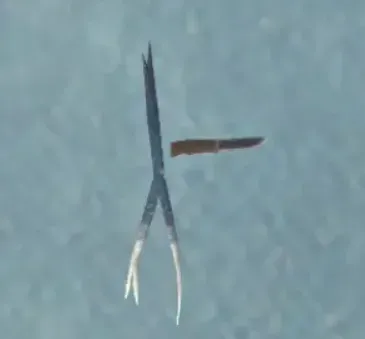
The hunting knife and the stick, always perpendicular to each other after being dropped by the player
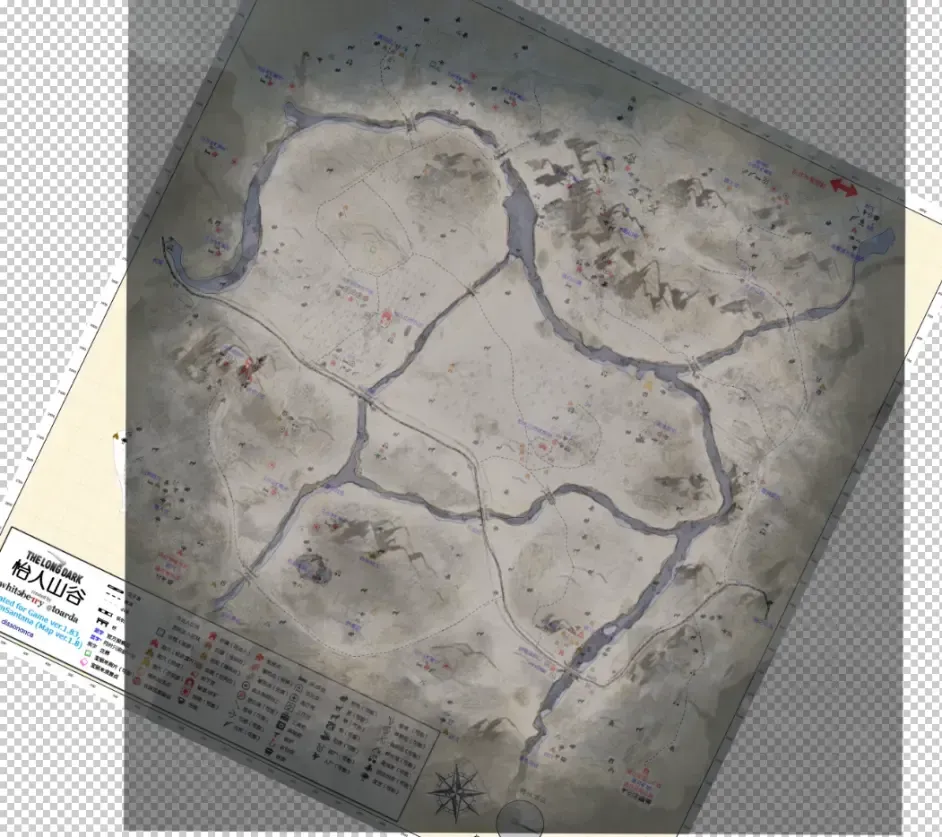
The orientation discrepancy between the big map and the small maps
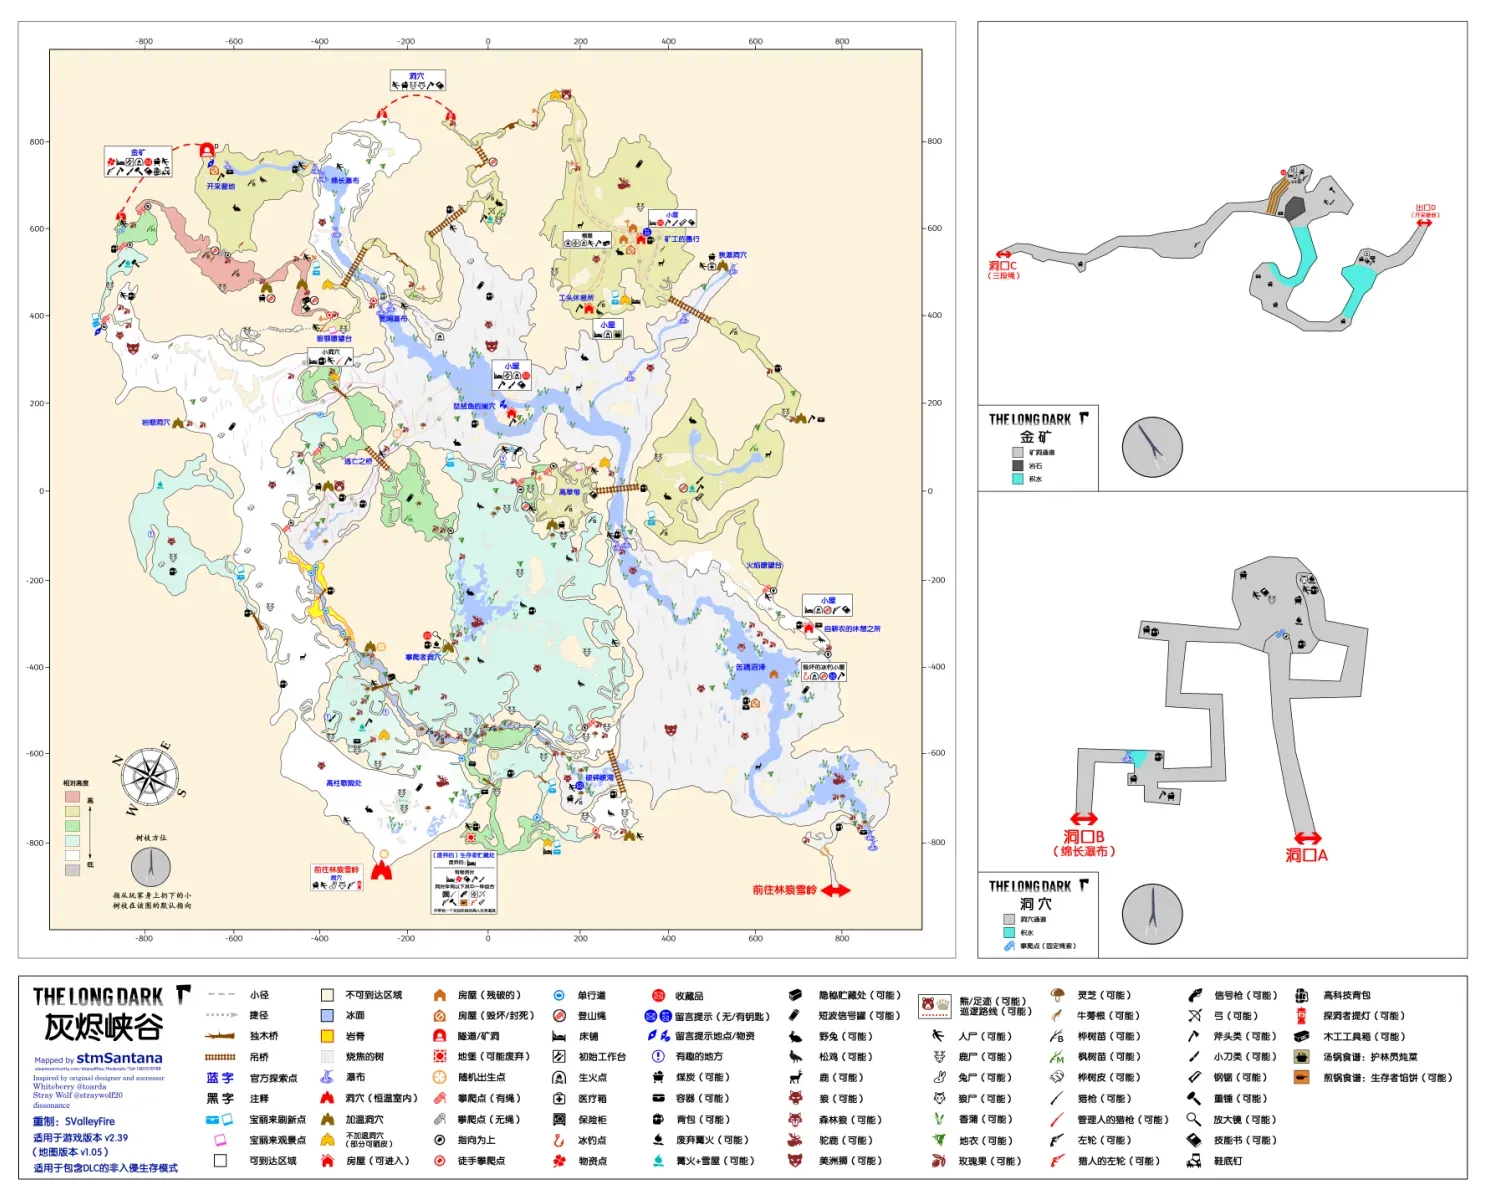
Great Bear Island map overview
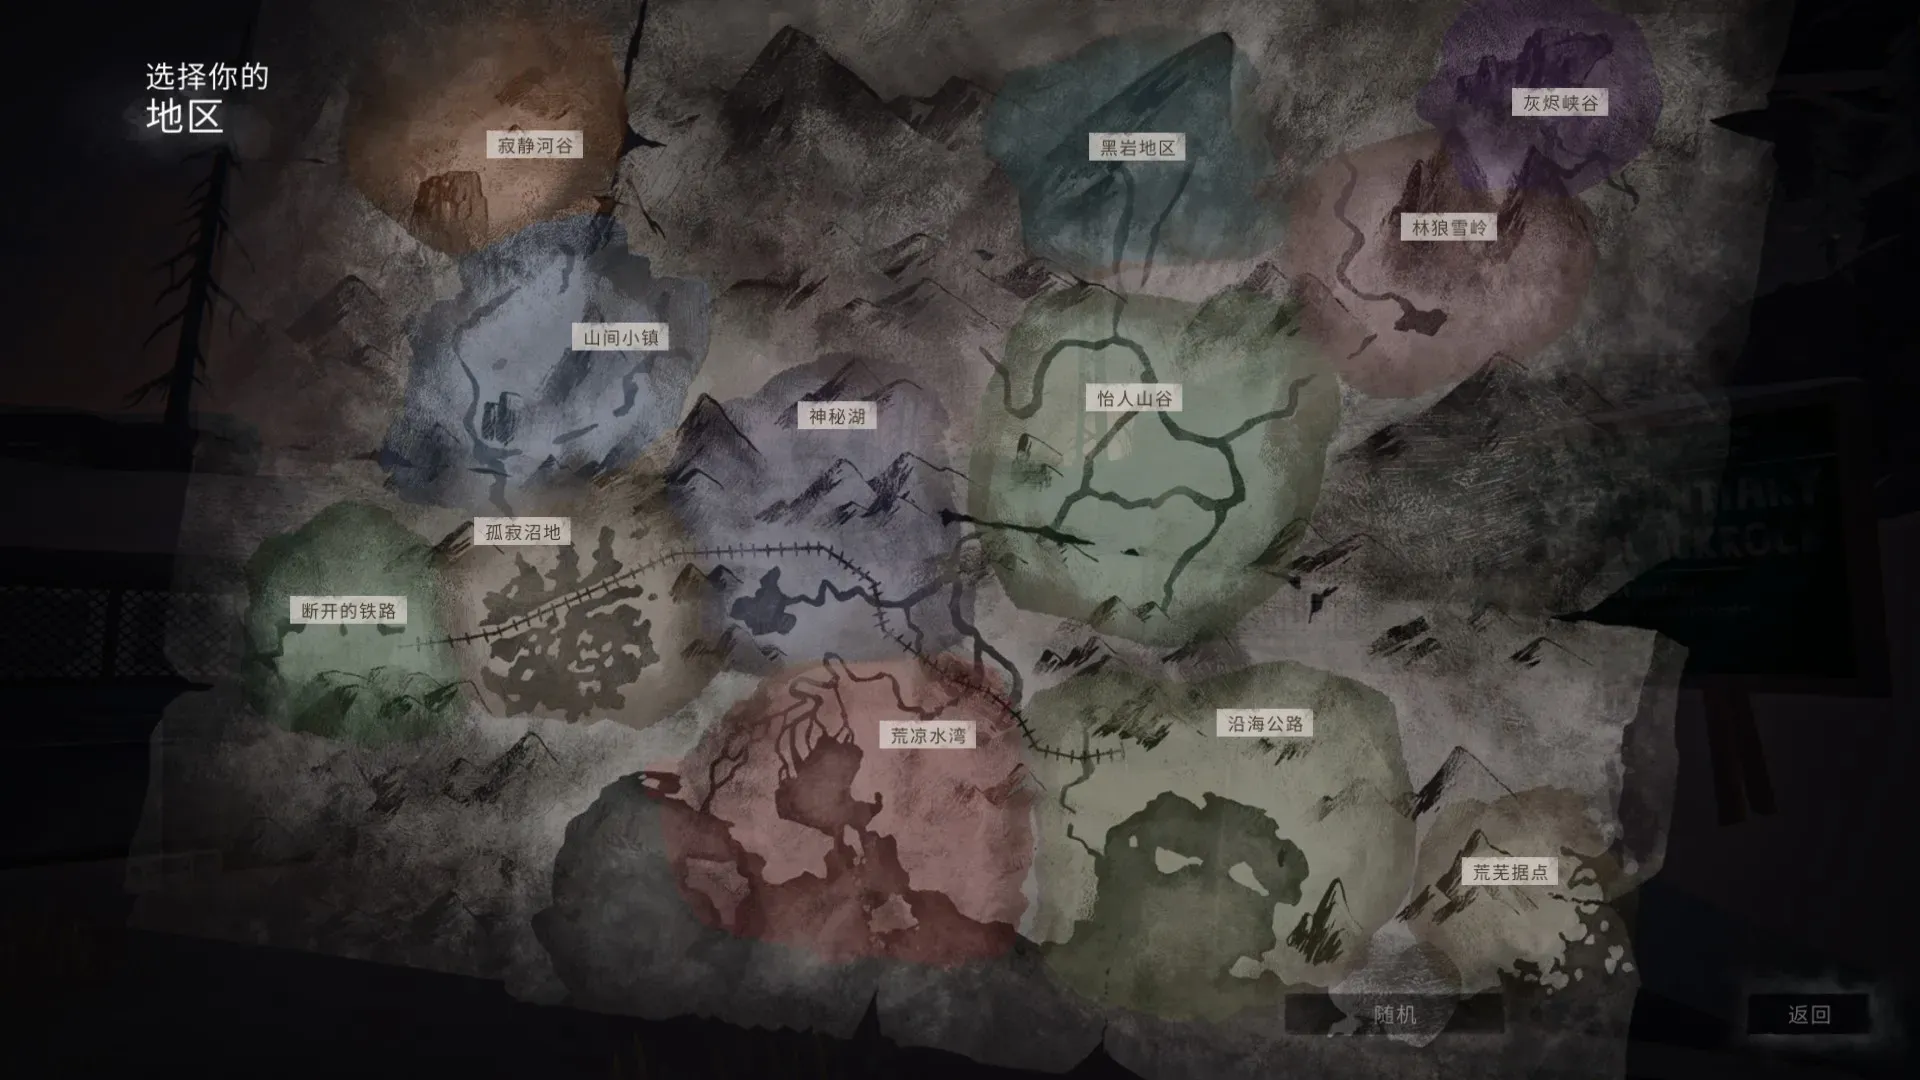
In-game map overview
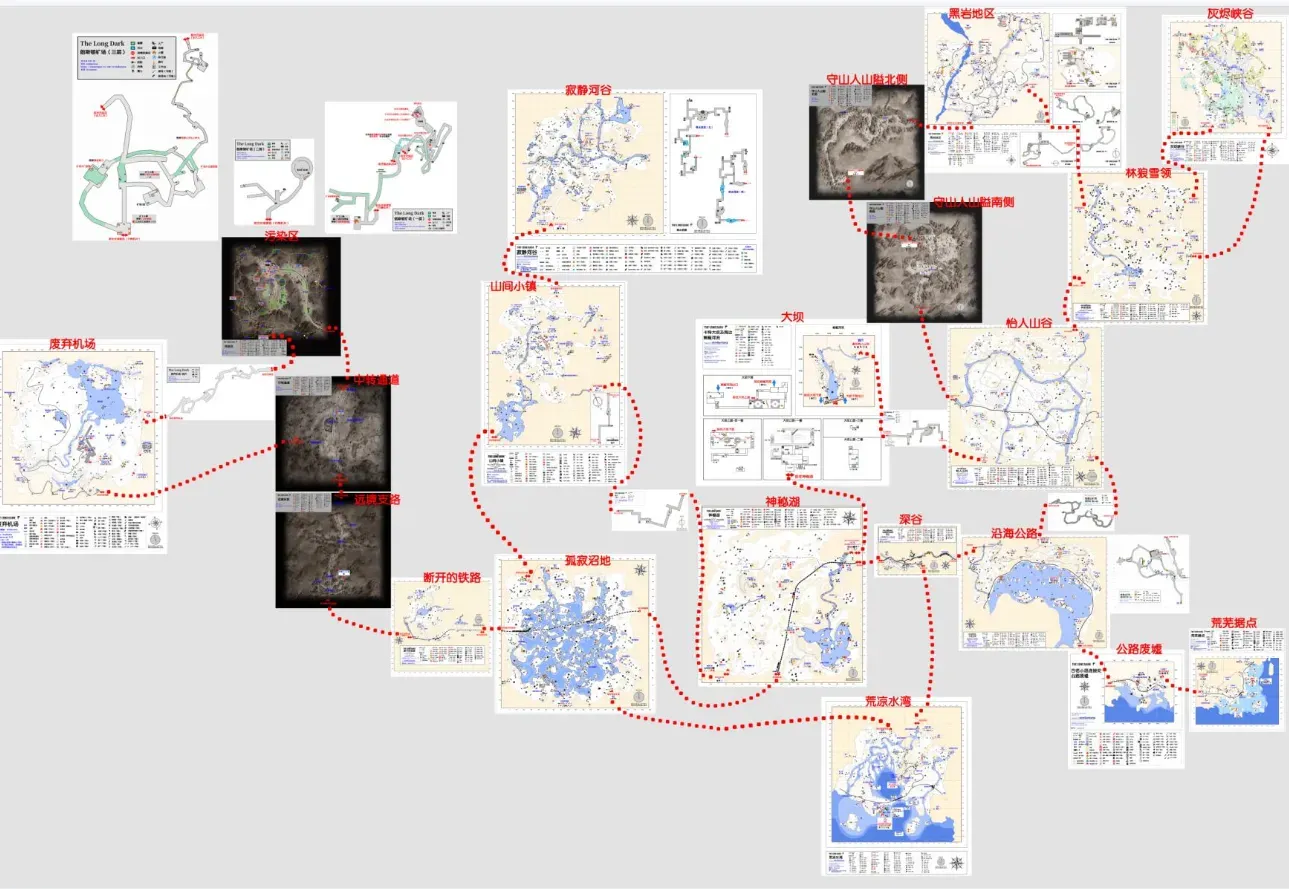
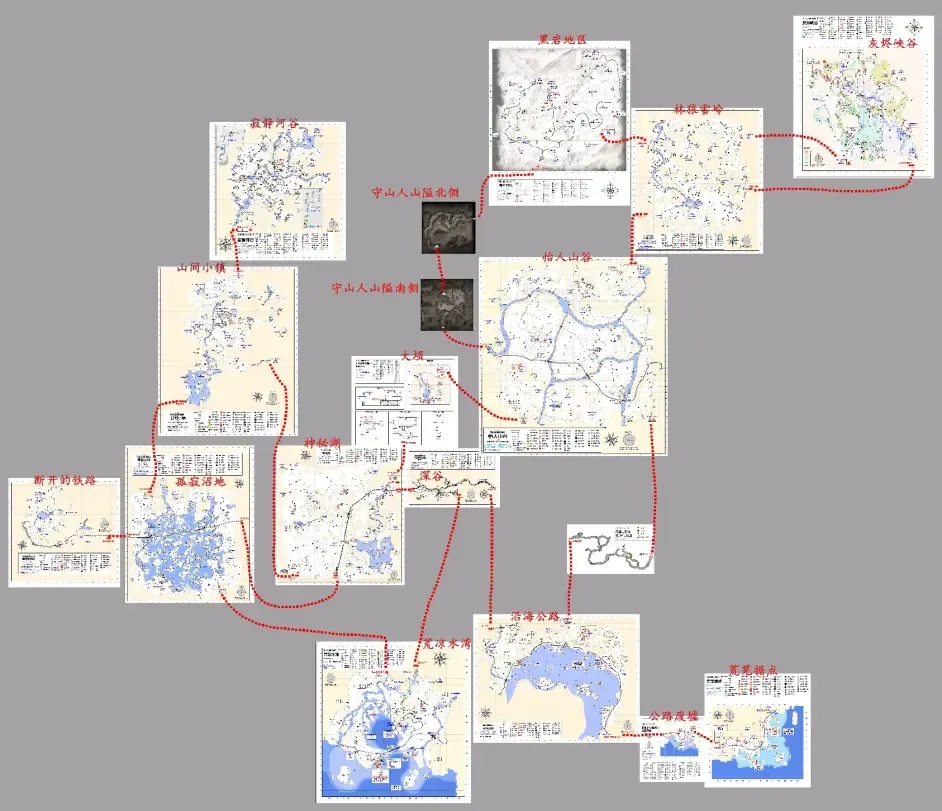
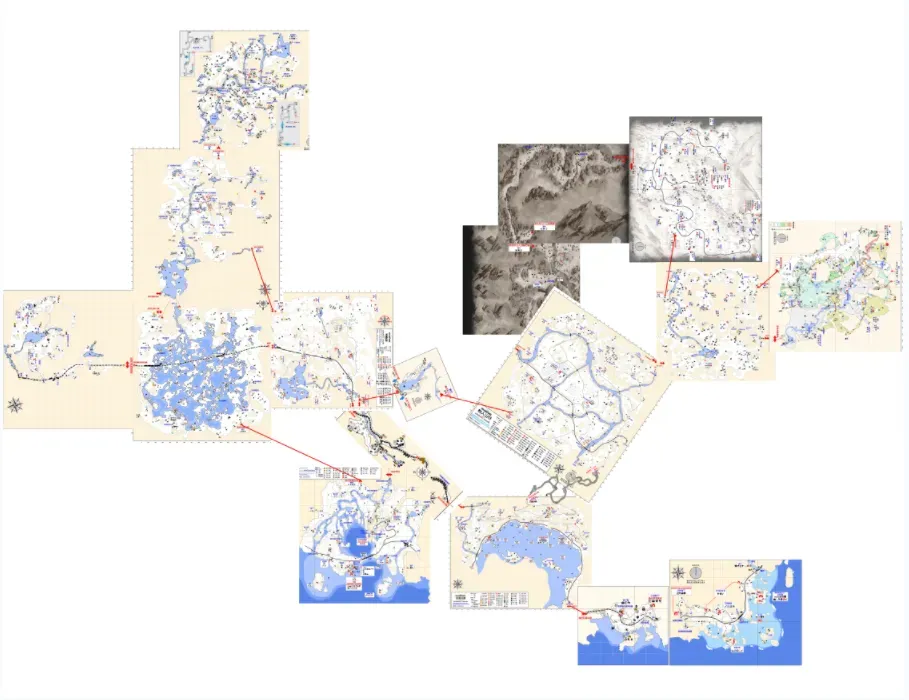
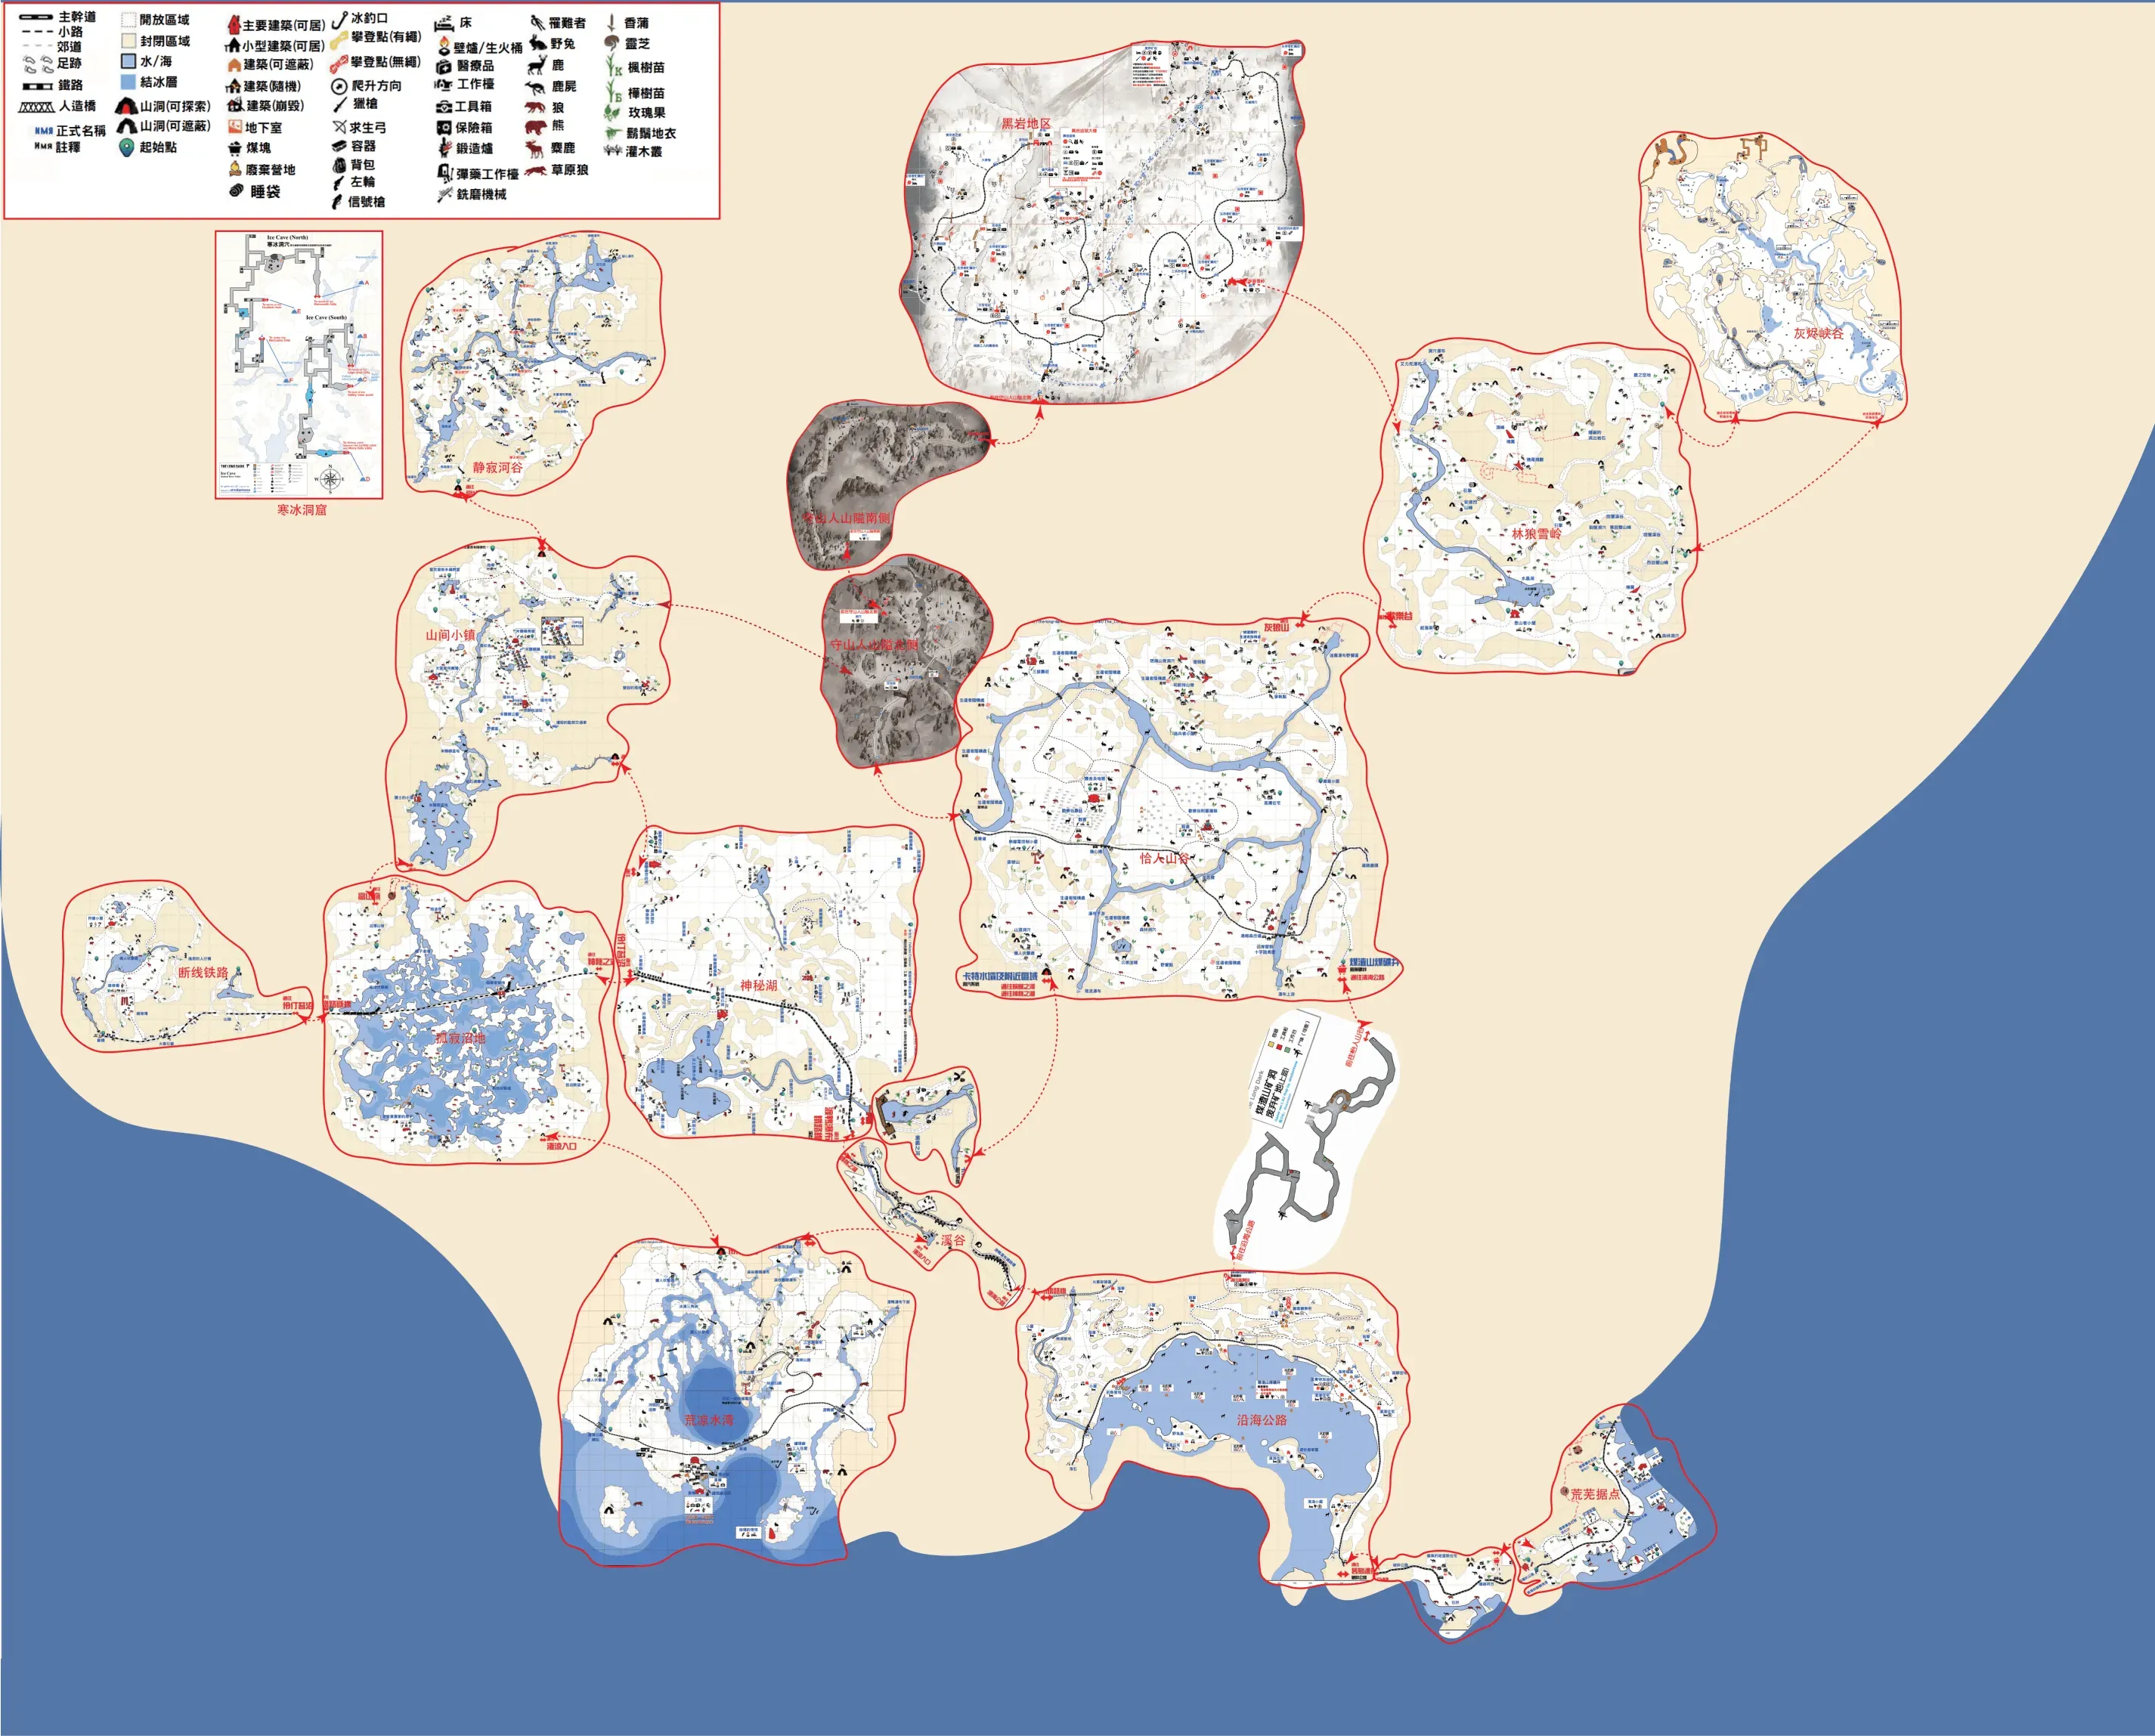
Simple stitched map
 Simple map overview (Blackrock is not included yet; it’s located above Pleasant Valley and to the left of Timberwolf Mountain)
Some of the stitched maps are too large; if you need the originals, leave me your email in a comment.
Note that the purple arrows have no climbing rope attached by default, so you can’t get through on your first visit. So for your first exploration of Bleak Inlet I recommend entering from the Ravine, which is the only way you can explore Bleak Inlet’s upper level and find the password note for the cannery workshop.
Below is an introduction to these 12+4 maps based on my personal gameplay experience. The default perspective is Survival mode on non-Interloper difficulty; Interloper will be noted separately.
Mystery Lake & Map 1
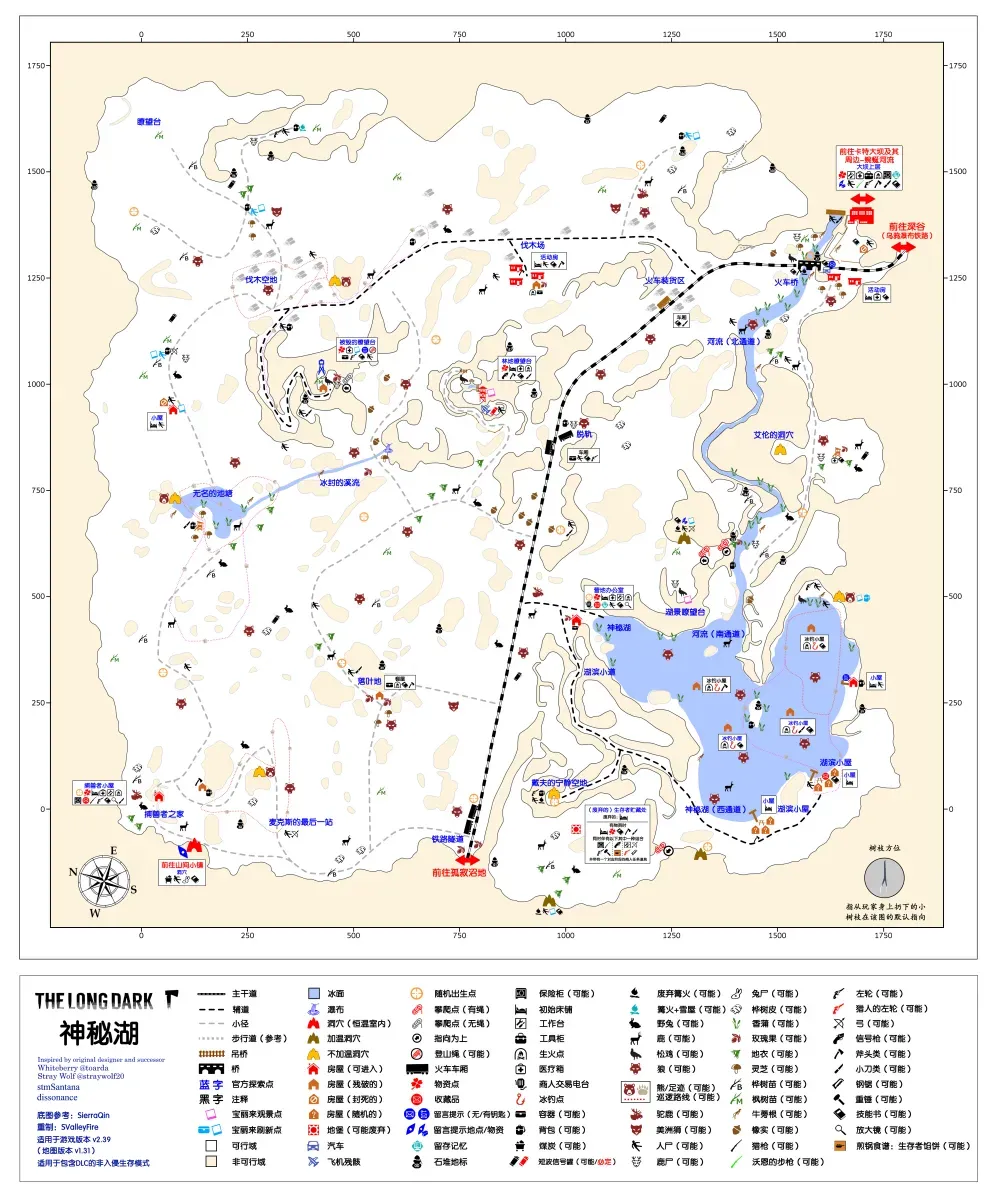
Mystery Lake, also called Map 1, traditional Chinese name 神秘之湖. As the earliest map released in the game, it’s the eternal home of newbies.
Geography: located in the middle of Great Bear Island, connected to many maps, making it something of a transport hub. The whole map is split in two by the railway: one half is mainly forest and mountains, the other mainly lake and river channels. Mystery Lake has many evenly distributed constant-temperature buildings, making it very suitable for beginners.
Climate: has the best weather on the whole of Great Bear Island. Base temperatures are high, the weather has no strong bias, and blizzard probability is moderate. Very suitable for survival.
Important resources: on non-Interloper difficulty this map spawns a Survivor Cache (commonly called a bunker) at one of nine random spots. Every bunker contains a bed and various supplies, divided into six types — weapons, tools, medical supplies, clothing, firewood and food — which vary depending on the spawn location.
A hunting rifle is guaranteed to spawn, with six mutually exclusive spawn points (i.e. only one will spawn at a time across all points; same below): the lakeside trail, next to the corpse behind the lakeside cabins, inside the derailed train car, the destroyed lookout, the forestry lookout, and under the train bridge. There is also an independent spawn point at Trapper’s Cabin (i.e. unrelated to the other points). Additionally, if the spawned bunker type is weapons, you can find two extra hunting rifles inside the bunker.
There are three independent revolver spawn points: the warm cave at Lake Overlook, the table in Trapper’s Cabin, and inside the safe (revolvers inside any safe are independent probability; same below). Additionally, if the spawned bunker type is tools, you can find an extra revolver inside the bunker. (Strictly speaking, the revolver in the warm cave at Lake Overlook isn’t an independent spawn but a pattern spawn, but that pattern involves cross-map exclusivity, so when treating a single map as a chapter it’s reasonable to class it as independent.)
The hunting tower at the unnamed pond has a chance to spawn a bow, the deer carcass nearby may have arrows, and the hunting tower near Alan’s Cave may also spawn arrows.
Mystery Lake has four bear caves, none of them warm caves, spawning one bear at random (two on Interloper). There are two mutually exclusive moose spawn areas (at most one will have moose sign at a time, though it’s possible neither has sign), at the cabin north of the unnamed pond and near the train bridge. There is also an independent moose spawn point (no moose sign) in the open area in front of Trapper’s Homestead; it can coexist with a moose spawned at the mutually exclusive points, but once killed it won’t respawn (can’t be disproven). On the ice there are four ice fishing huts, one of which randomly has a door (but never the one closest to the office; an ice fishing hut with a door gives a 3° temperature bonus) and can catch two kinds of freshwater fish. Plenty of cattails can be gathered along the lake and the river.
Being a forest map, fuel is widely distributed, but coal is scarce: the only coal spawn points on the whole map are in the connecting cave to Mountain Town, and a few places such as the frozen creek allow the odd pickup, which is negligible.
Breaking down furniture yields a certain amount of cloth; scrap metal is genuinely a bit scarce, but Mystery Lake is close to the dam, so it isn’t a problem.
Tools like the hunting knife, hatchet and prybar don’t necessarily spawn in the main buildings; wandering to outdoor ice fishing huts or corpses may actually turn up surprises. On non-Interloper difficulty Mystery Lake basically never spawns a hacksaw or heavy hammer; if you want these two tools you’ll have to look on other maps.
In standard Interloper you can’t spawn in Mystery Lake, and Mystery Lake has no guaranteed match or hacksaw spawns, so if you pick Mystery Lake as your start in a custom Interloper run, be prepared for the possibility of not finding matches. On Interloper there is always one prybar, spawning randomly among six mutually exclusive points: next to the container on the right side of the railway tunnel, at the door of the outbuilding of the cabin above the unnamed pond, beside the trailer at the logging camp, under the bed at the forestry lookout, on the shelf of the second ice fishing hut east on the Mystery Lake ice, and inside the hunting tower in front of Alan’s Cave.
Other: according to the developers’ naming rules, the dam does not belong to Mystery Lake. Strictly speaking, the yard in front of the dam belongs to Mystery Lake; once you enter the dam itself the map name switches to Carter Hydro Dam & Environs (Winding River). So the dam is not covered together with Mystery Lake in the resources section.
Base recommendations: (aimed at non-Interloper; may differ on high difficulty; completely subjective, not objective, just for reference; same for later maps) Camp Office Rating 5/5 Pros: centrally located and convenient, a standalone two-storey building with good daylight. Has a workbench and a two-burner stove inside. Rich small and medium game nearby, plenty of cattails on the lake, and you can fish at the ice fishing huts. Fuel is plentiful and it’s not far from a warming-up point, with countless sticks along the lake shore. Very close to a warm cave, only a few steps to Lake Overlook, making cabin fever easy to clear [Note 4], and there’s even a climbing rope nearby that you can hang to burn stamina and heal quickly.
Cons: average container capacity, relatively far from large animal spawns, relatively far from coal, and the slope up to Lake Overlook is steep enough to cause sprains.
It’s not entirely without flaws, but combined with Mystery Lake’s perfect weather, this is the most newbie-friendly base.
Trapper’s Homestead Rating 4.5/5
Pros: built-in workbench and two-burner stove, and the most efficient healing bed on the map (42% per 10 hours on Interloper). The flat ground at the door may spawn a moose and deer herds, the bear cave is right next door, rabbit spawns are behind the house, and the trap trigger area is very close to the building itself. The cave mouth on the way to Mountain Town is a windproof fire spot that gets the cold bonus [Note 5], and the cave has a small amount of coal.
Cons: on the edge of the map, so getting anywhere else on this map isn’t very convenient. Small space, low container capacity. Relatively far from a warm cave, making cabin fever harder to handle. Currently there’s a pot-loss bug (as of v1.94): when entering or leaving Trapper’s Homestead the pot you’re carrying may vanish for no reason, mechanism unknown.
Some people like to call this place the Hunter’s Cabin, but I’d recommend the official translated name. It’s the first building in the whole game, with map file name SafeHouseA, and has the map’s only nighttime lights effect (only visible from outside). If the nearby bear cave spawns a bear, this is a base where you can live very comfortably.
Trailer / Dam / Ravine Rating 3.5/5
Pros: at the junction of Mystery Lake, Pleasant Valley and Coastal Highway, a hub among hubs, making it very convenient to move resources between maps. There’s a moose spawn at the door; to clear cabin fever you can use the car outside (non-Interloper only — the car is windproof and gives +5° warmth, which stacks with a bedroll’s bonus) or the warm cave in the Ravine. Plenty of birch bark nearby and the bed heals faster than average (36% per 10 hours on Interloper).
Cons: cramped, low container capacity, no built-in stove, and you have to run to the dam for the workbench. There’s a wolf spawn right outside, and wolves currently have a bug where under certain conditions they can pass through the dam’s chain-link fence.
Good as a transit station / forward base. On Interloper, if your health is low you can also regroup and recover here, and long-term residence isn’t impossible, but the wolf at the door is always a pain.
(Other places aren’t impossible to live in either, but I don’t really recommend them for newbies; applies to all maps)
Notes
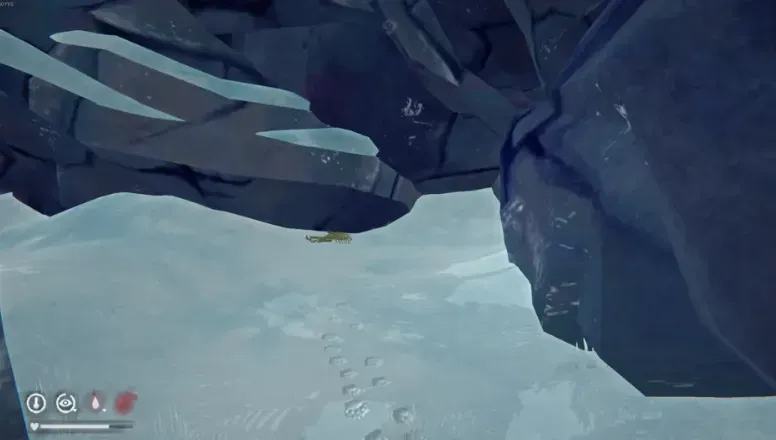
Note 1: Warm caves. Caves marked brown on the map, which in game generally look like this: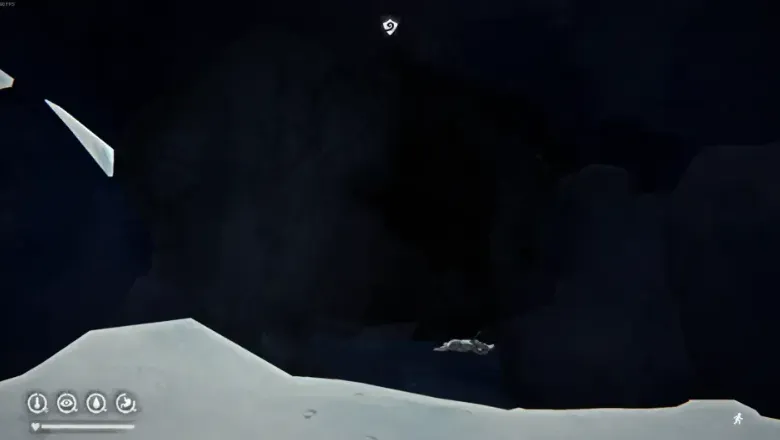 This kind of cave generally has two layers, but visually there’s no clear boundary. The outer layer is windproof and blocks any wind direction (including wind blowing inward). The inner layer is the warm layer, which has a drying check and can be used to dry hides and sticks. It also has a base +8° temperature modifier that increases along with climate decay (the gradually freezing world), reaching +28° in the late Interloper game. Being active in any layer of a warm cave lowers cabin fever risk, making it the cheapest and fastest place to clear cabin fever.
Note 2: Whether a bear cave spawns a bear can be judged by whether there are bones inside; bones mean that in this save a bear periodically respawns at this location.
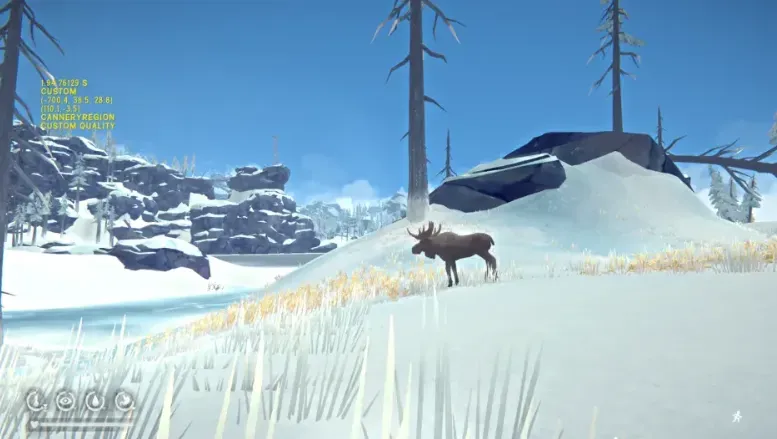
Note 3: Moose & moose sign. Moose are fairly rare, because not only is the spawn location random, but whether it spawns at all after the location is fixed is also random — basically a lottery. And once spawned it easily disappears; sometimes you go inside and sleep and it’s gone, so if you see a moose it’s best to deal with it immediately, as delay brings trouble. Moose sign is the main marker of a moose spawn point; a map has at most one, and once it appears it means the moose in this save periodically respawns at that location. But note that not all spawn points have moose sign. Moose
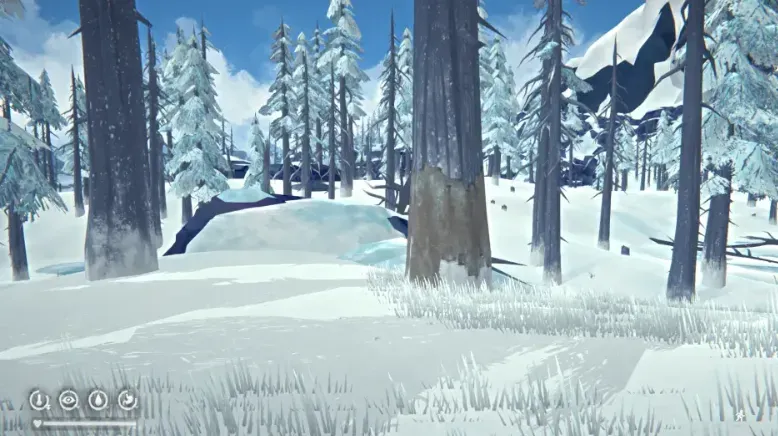
Moose sign
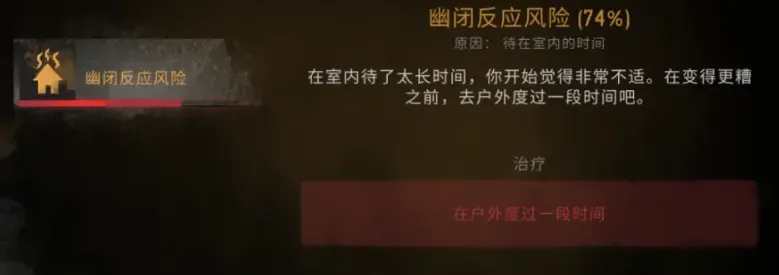
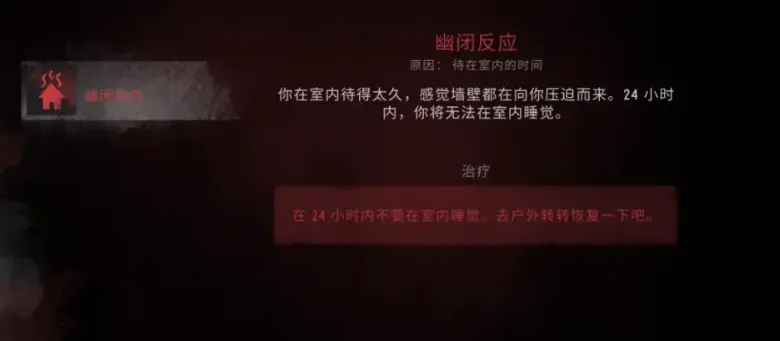
Note 4: Cabin fever. A negative status in the game: cabin fever risk accumulates in all constant-temperature locations (and the mountaineer’s hut), converts into cabin fever risk at a certain point, and triggers cabin fever when the risk reaches 100%. The debuff lasts 24 hours. Note that if you don’t go outside at all, after 24 hours the debuff refreshes its check and continues to exist. If you don’t spend enough time outdoors during the debuff, then after 24 hours the debuff converts into a corresponding amount of cabin fever risk, which easily builds up and erupts again. To clear the risk completely, after triggering cabin fever it’s best to stay outdoors the whole time, so that at the refresh check you’ll most likely return to normal.
Note 5: Cold bonus. The phenomenon where a campfire burns longer because the ambient temperature is low; since it can generally only trigger outdoors it’s also called the outdoor bonus, though that name isn’t accurate. The cold bonus has two trigger conditions. One, the campfire and the character are on the same map; two, the pure ambient temperature at the character’s coordinates is below -10° (the so-called pure ambient temperature is the air temperature shown when you press F without running, having a fire, a lamp, a torch or a flare, and without the Cold Fusion badge). The bonus works like this: starting from -10°, for every 1° colder the campfire’s fuel efficiency rises by 5% (i.e. every 100 minutes of displayed fuel time supports 105 minutes of game time), reaching a maximum of 100% at -30° (i.e. every 100 minutes of displayed fuel supports 200 minutes of game time).
Coastal Highway & Map 2
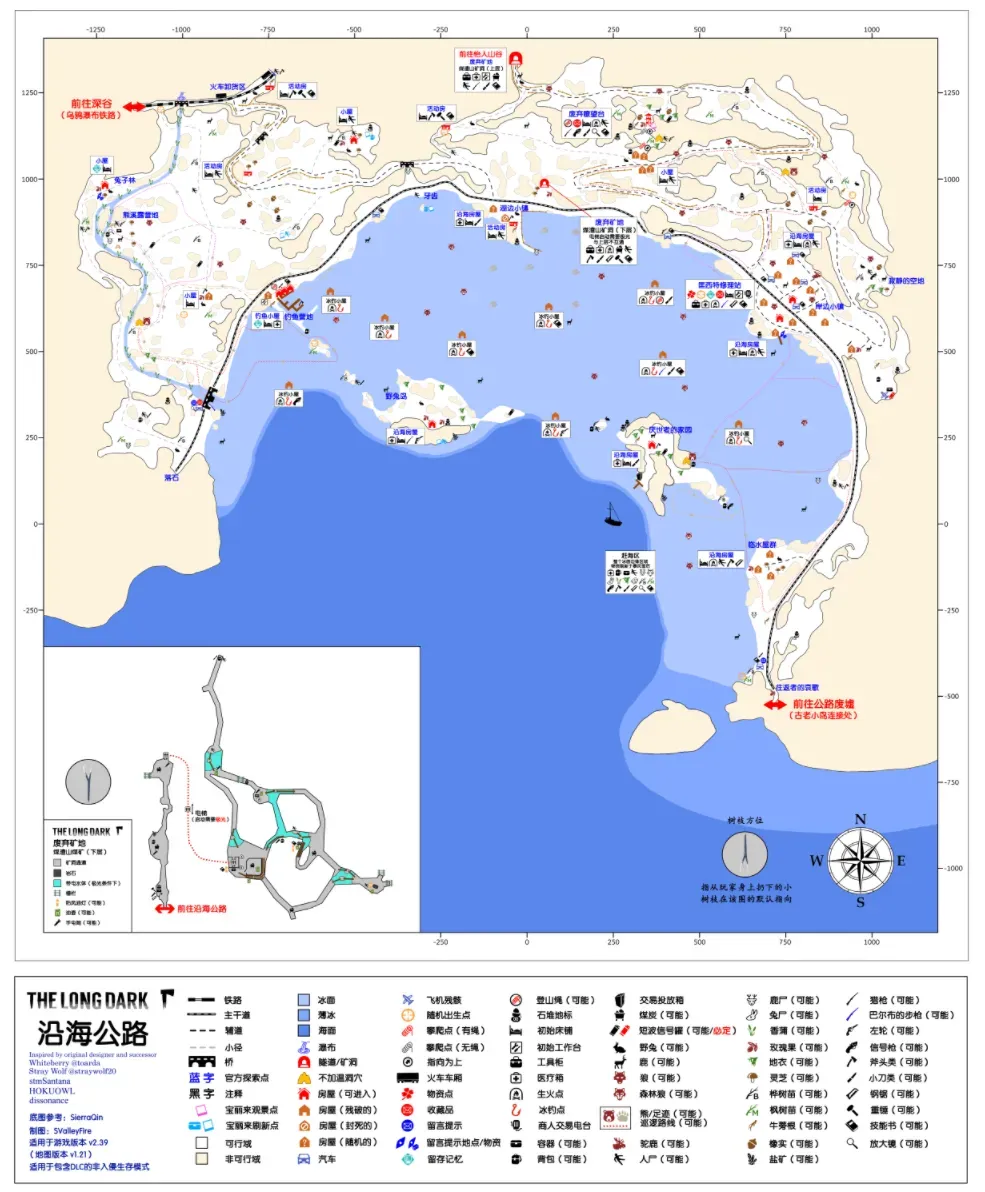 Coastal Highway, traditional Chinese name 濱海公路, commonly called Map 2 & the Highway. The most livable coastal map, bar none.
Geography: on the southern coast of Great Bear Island. As the name suggests, a stretch of highway divides the map into a mountain area and an ice area, with many constant-temperature shelters along the road. The mountain area is higher in the north and lower in the south with fairly complex terrain; the ice surface is frozen seawater with two small islands in the middle, and lots of thin ice along the boundary between the ice and the open sea.
Climate: still in the best tier among all maps — high base temperatures, no strong weather bias, moderate blizzard probability, very suitable for survival.
Important resources: two hunting rifles are guaranteed to spawn. One spawns randomly among five mutually exclusive points — inside the car at Returner’s Lament, next to the corpse at the Hermit’s Home, inside the ice fishing hut between Jackrabbit Island and the Hermit’s Home, the abandoned lookout, and next to the corpse in front of the railway waterfall. The other spawns in the Cinder Hills Coal Mine (lower level).
One revolver is guaranteed: in a backpack in the Cinder Hills Coal Mine (lower level). There are also two independent spawn points: Quonset Gas Station and the Coastal House (Jackrabbit Island).
On non-Interloper difficulty, Quonset Gas Station is guaranteed to have a hacksaw, and the Cinder Hills Coal Mine (lower level) spawns at least one 4L fuel can.
Coastal Highway has three bear caves, none of them warm caves, each with a fixed bear (3 bears). There is only one independent moose spawn point (no sign), near Quonset Gas Station; once killed it won’t respawn (as of v1.94, can’t be disproven). Wolves and deer are widespread on the ice, and there are nine ice fishing huts, two of which randomly have doors; they catch two kinds of saltwater fish. Cattails only grow in the water system extending from the waterfall near the Ravine entrance; they don’t grow in the saltwater area.
The thin-ice areas by the sea have a chance to spawn flotsam, which is currently the only way in the game to repeatedly obtain some non-renewable resources, commonly called beachcombing. The more important items that can spawn by the sea are scrap metal, cloth, leather, maple saplings and birch saplings.
Coal is abundant, with the Cinder Hills Coal Mine as a coal-producing treasure: the upper level has nearly 40 pieces when fully spawned, the lower level about 10.
There are a fair number of houses; breaking down furniture including curtains and sofas yields plenty of cloth, and both Quonset Gas Station and the mine have metal shelving that can be sawed apart for a certain amount of scrap metal.
In standard Interloper you can’t spawn on Coastal Highway, and Coastal Highway has no guaranteed match spawn, so if you pick Coastal Highway as your start in a custom Interloper run, be prepared for the possibility of not finding matches. Also, on Interloper the Cinder Hills Coal Mine (upper level) is guaranteed to have a stim.
Other: the ice has few landmarks, and it’s easy to lose your bearings in a blizzard or fog. I recommend carrying sticks for orientation: on the ice, just walk in the direction the tip of a stick points and you’ll definitely find the highway.
There are many cabins marked as randomly collapsed. Testing shows that on non-Interloper difficulty the collapses are random among several patterns — not every house has an independent probability — while on Interloper the collapsed houses are fixed.
Since this map has no warm caves at all (it’s the only map without one), clearing cabin fever relies mainly on cars and on making a fire and fishing in the ice fishing huts (Interloper).
There’s one inappropriate translation: the original text is Log Sort, the simplified Chinese name “lakeside town” is a bit absurd, and the traditional Chinese name “log sorting” is basically machine translation. I think calling it a log warehouse / log storage yard makes more sense.
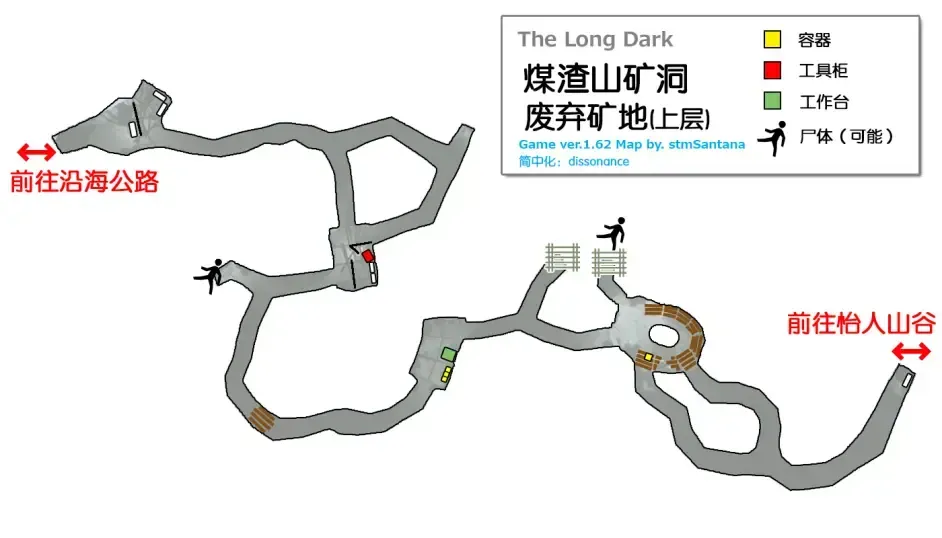
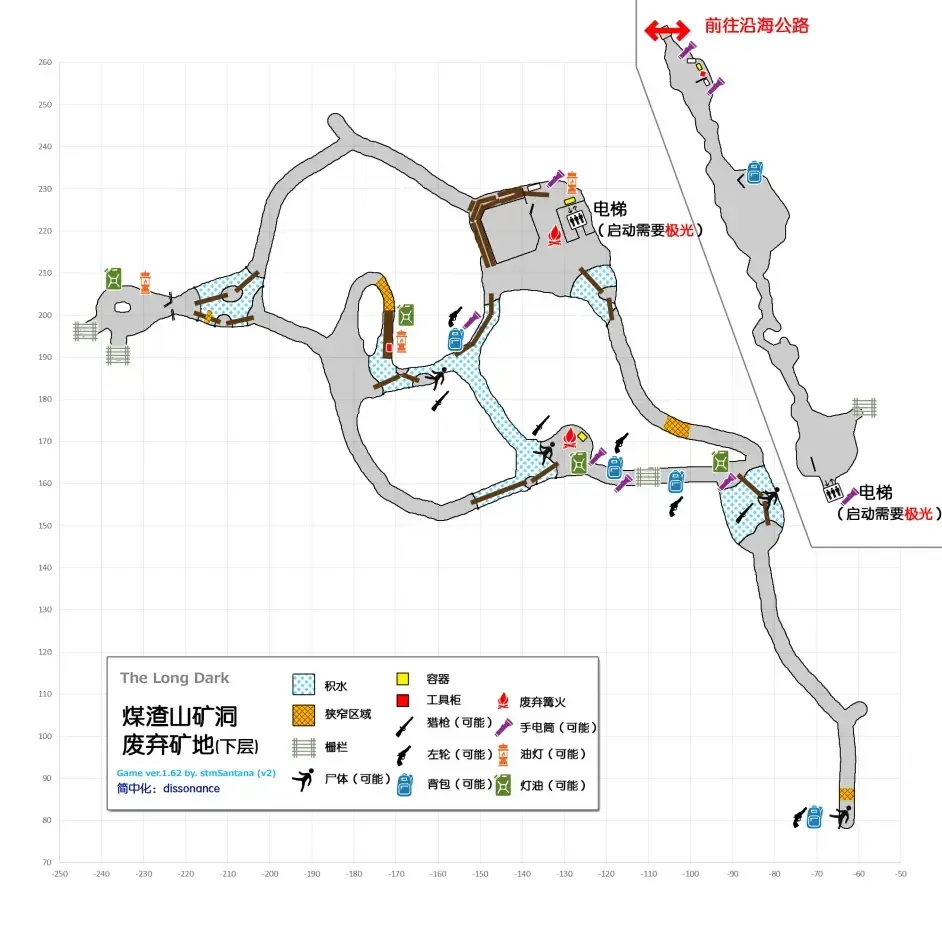
The two Cinder Hills Coal Mine — Abandoned Mine entries on the map are actually the same map, but the upper and lower levels don’t connect; entering one and then the other won’t increase the explored locations in your stats. The lower level has an elevator that only starts on aurora nights, after which you can explore most of the lower level. Note that the areas reachable only by the elevator also require the elevator to get back, which means that if the aurora disappears during exploration and the elevator loses power, the player will be trapped in the lower level of the Cinder Hills Coal Mine. So newbies should back up their save before exploring the lower level on an aurora night to avoid getting stuck. Upper level
Lower level
Base evaluations: Quonset Gas Station Rating 4/5
Pros: central location, fairly spacious, with a workbench and burn barrel inside. The coastal town outside is the map’s only moose spawn, and there’s a bear cave in the hills behind. There’s a car at the door, usable on low difficulty to clear cabin fever risk, and it’s close to the mine, making coal collection fairly convenient.
Cons: a bit far from rabbit spawns. A wolf den: open the door and there’s a high chance of wolves left and right. If avoiding wolves is the premise, this isn’t a good place.
A very newbie-friendly base, with no flaw except the many wolves. Commonly called the gas station, which somewhat clashes with the one in Mountain Town, but that one usually gets “Euro Truck” put in front of it.
Coastal House (coastal town) Rating 4.5/5
Simply put, these are the houses near Quonset Gas Station. Since there are wolf spawns on both sides coming out of the gas station and the terrain is fairly complex, getting killed right outside the door isn’t impossible, so finding a house in a corner and using the gas station’s facilities to survive is a fairly safe approach. I’d recommend this red one: being in the corner it gives a good view for clearing wolves, and it’s close to the bear cave in the back hills, so it’s much safer to come and go, hence +0.5.
Fishing Camp Rating 3.5/5
Pros: made up of 3-4 cabins with decent total space, and an outdoor workbench. The road at the door is a bear patrol route, it’s close to the ice fishing huts, and deer herds are common on the ice.
Cons: individual cabins are very small, containers are few, and there’s no indoor stove.
A compact base with its own bear. The outdoor workbench isn’t suitable for large items like clothing, but it’s basically enough for replenishing arrows and snares.
Coastal House (Jackrabbit Island) Rating 3/5
Pros: a single-storey one-bedroom, two-living-room place with a bathroom, decent space and quite a few containers. It sits at the highest point of the island with an open view; right outside are stick spawns and a rabbit area, and with plenty of snares it’s easy to keep fed. You can also make full use of the cold, low-value hours to earn income while clearing cabin fever. There are three ice fishing huts around the island, so fishing is convenient, and it’s very close to the coast, good for beachcombing.
Cons: on the edge of the map, so getting elsewhere isn’t very convenient. No indoor stove or workbench; the nearest workbench is at Fishing Camp and it’s outdoors. Relatively far from large animal spawns and the mine.
A base with fairly polarized reviews. For a newbie this is just a run-down house you can find anywhere, basically worthless. But its value rises with difficulty: cheap cabin fever control and convenient beachcombing are crucial for late-game Interloper living.
Coastal House (Hermit’s Home) Rating 2.5/5
Basically the same as Jackrabbit Island. The workbench requires going to Quonset Gas Station; it’s close to a bear spawn, +0.5; you can run into wolves right outside the door, -1.
Notes Note 8: Thin ice is a special terrain type in the game, common on coastal maps and in Forlorn Muskeg. After a player walks onto thin ice a red warning appears and a countdown begins; when it ends the ice breaks and the player is judged to have fallen in, then forcibly reset to the area outside the thin ice with effects such as the temperature bar being emptied, 10% of condition deducted and clothing 100% wet. Falling in on the coast makes all your clothing wet, while falling in in the marsh only makes your trousers, shoes and socks wet. Also, falling in in the marsh cracks the ice, and walking to the crack again skips the countdown and immediately counts as falling in. In informal testing the thin ice countdown usually lasts about 5 seconds, extended to about 6 seconds with crampons, but there are still areas that skip the countdown and immediately count as falling in (such as a spot below Jackrabbit Island), so be careful. Also, thin ice detection isn’t limited to the ice surface — it still applies at some height above the ground, so anyone who wants to slope-climb over thin ice should get themselves as high as possible.
Pleasant Valley & Map 3
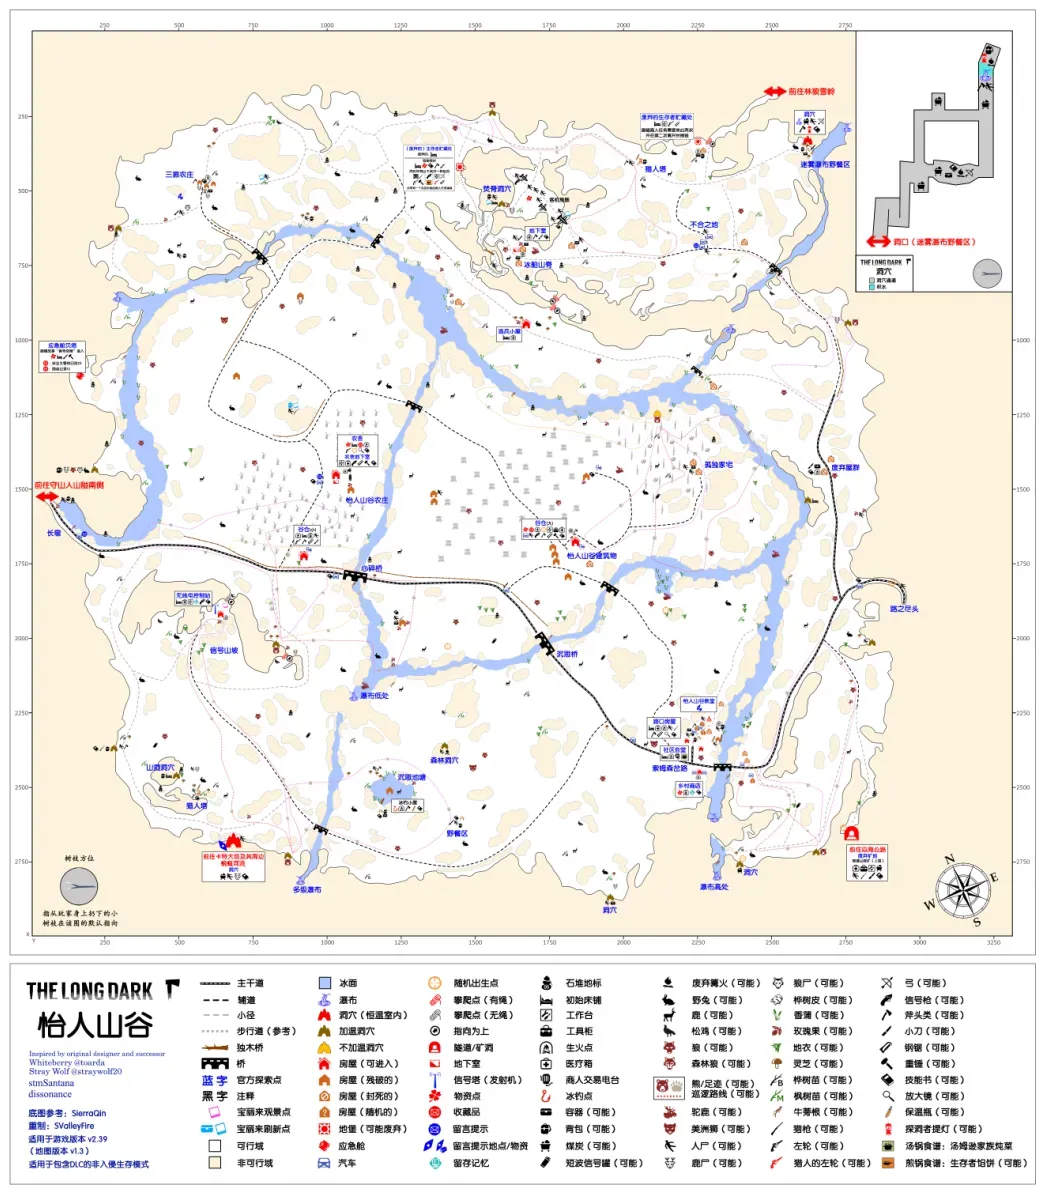 Pleasant Valley, traditional Chinese name 歡樂谷, commonly called Map 3 & Murder Valley. The largest map in the whole game.
Geography: one of the maps officially rotated 90° clockwise. Surrounded by fairly complex mountainous terrain, with a plain encircled by water in the middle, and a highway running through the whole map, crossing the entire plain. Whether it’s pleasant isn’t clear, but it’s certainly a valley.
Climate: officially declared to have “the harshest weather in the entire Great Bear Island region”. In practice it has the highest blizzard probability, average base temperatures about 4° lower than Mystery Lake, and wind chill a bit higher than elsewhere. In short, the nickname Murder Valley isn’t for nothing.
Important resources: on non-Interloper difficulty this map spawns a Survivor Cache (commonly called a bunker) at one of nine random spots. Every bunker contains a bed and various supplies, divided into six types — weapons, tools, medical supplies, clothing, firewood and food — which vary depending on the spawn location.
A hunting rifle is guaranteed to spawn, randomly among five mutually exclusive points: inside the car at Long Curve, Three Strikes Farmstead, Burned Ridge Cave, the Misty Falls picnic area, and the broken shed northwest of the farmstead. There are also two independent spawn points: Pleasant Valley Farmstead and the cave at the Misty Falls picnic area. If the spawned bunker type is weapons, you can find two extra hunting rifles inside the bunker.
Two revolvers are guaranteed. One at the radio control hut on Signal Hill; the other spawns among four mutually exclusive points: the unnamed pond, the basement at Ice Boat Ridge, the abandoned Survivor Cache, and the cave at the Misty Falls picnic area. There is also an independent spawn at the Barn (small). If the spawned bunker type is tools, you can find an extra revolver inside the bunker.
A bow is guaranteed: inside the constant-temperature cave at the Misty Falls picnic area, and arrows may spawn at the two hunting towers and the archery target near the Barn (large).
The airliner wreck has lots of scattered suitcases that yield plenty of clothing. On non-Interloper difficulty the abandoned Survivor Cache is guaranteed to have a hacksaw; those planning to saw open containers on Timberwolf Mountain can grab it on the way.
Pleasant Valley has seven bear caves, the most of any map, six of which are warm caves — the one in the birch forest is the exception. Three bears spawn at random (four on Interloper). There are two mutually exclusive moose spawn areas, at Pensive Pond and around the birch forest northeast of the Barn (large). The map’s only ice fishing hut is at Pensive Pond and catches two kinds of freshwater fish. Lots of cattails can be gathered along the river, though they’re fairly scattered.
Aside from the Cinder Hills Coal Mine, the main coal area, the Misty Falls picnic area cave also spawns a little coal. There are quite a few sticks, but most are in the mountains and they’re scarce near the main buildings.
There are a fair number of houses; breaking down furniture including curtains and sofas yields plenty of cloth. Signal Hill, the abandoned bunker, the two basements and the barn all have plenty of metal shelving, so the scrap metal supply is larger than you’d expect.
On Interloper, both the farmstead basement and the country store have a guaranteed box of matches, the barn has a guaranteed stim, and the farmstead basement has a guaranteed advanced toolkit.
Other: the map has two barns, so the suffixes “large” and “small” were added to distinguish them. Both barns are constant-temperature, but without the Cold Fusion badge the base temperature is -8°, so keep an eye on the temperature bar during early exploration.
Two bears may wander near the farmstead, called the farmstead bears, but they actually come from elsewhere. One may come from the bear cave near Long Curve, the other from the bear cave below Signal Hill. The bear wandering around the radio control hut on Signal Hill comes from the bear cave near the multi-level waterfall.
The blizzard probability is very high — on Interloper, by feel, basically every other day. Without blizzard navigation skills, exploring this map is quite tough; newbies starting on this map should shorten their map-transition times as much as possible to avoid getting stranded.
Most of the houses at Thompson’s Crossing are fixed, but one is random, and its layout varies with its random position. When using sticks to orient yourself on this map, you’ll get the illusion that they point to the top right of the map; the main reason is that the map itself is crooked, giving players that illusion.
There is a fixed building called the “abandoned Survivor Cache” near the entrance to Timberwolf Mountain, commonly called the abandoned bunker, which is actually not the same thing as the “Survivor Cache” bunker that newbies so badly want to find. People often say Pleasant Valley spawns two bunkers, but in fact there is still only one random supply bunker; this counts as a misconception alongside “Interloper also spawns guns (though only flare guns)”.
Two bears may wander near the farmstead, called the farmstead bears, but they actually come from elsewhere. One may come from the bear cave near Long Curve, the other from the bear cave below Signal Hill. The bear wandering around the radio control hut on Signal Hill comes from the bear cave near the multi-level waterfall.
The blizzard probability is very high — on Interloper, by feel, basically every other day. Without blizzard navigation skills, exploring this map is quite tough; newbies starting on this map should shorten their map-transition times as much as possible to avoid getting stranded.
Most of the houses at Thompson’s Crossing are fixed, but one is random, and its layout varies with its random position.
When using sticks to orient yourself on this map, you’ll get the illusion that they point to the top right of the map; the main reason is that the map itself is crooked, giving players that illusion.
Base recommendations: Pleasant Valley Farmstead Rating 4/5
Pros: a large three-storey house with huge space and plenty of containers. Built-in workbench and six-burner stove, plus a corridor that counts as constant-temperature indoor space but inherits outdoor lighting (meaning at night, when it’s not blizzard or fog, you can do light-requiring tasks in the corridor). The area outside the door is a bear patrol zone, there are deer and rabbits nearby, and there’s a car for simply clearing cabin fever. It isn’t close to the ice fishing hut, but relatively speaking it’s the closest on this map.
Cons: poor natural light — even at 100% brightness the interior is dark during the day. Fuel spawns are a bit far, making fuel collection slightly inconvenient. Pleasant Valley has bad weather.
In some ways an almost perfect base, except that it grew in Pleasant Valley.
Community Hall Rating 3.5/5
Pros: fairly spacious, with the largest container capacity on the map — one cabinet even inherits the 200kg capacity setting from the story. Built-in six-burner stove. Bear spawn nearby, rabbits and deer not far. Plenty of fuel, no shortage of sticks around, and close to the Cinder Hills Coal Mine.
Cons: no workbench; the nearest is at the Cinder Hills Coal Mine or the barn, and Pleasant Valley has bad weather.
If the bear cave at the upper waterfall spawns a bear, this becomes a truly excellent base. Being very close to the Cinder Hills Coal Mine, it’s very suitable as an expansion base for Coastal Highway. When living out your retirement on Coastal Highway late game, you can take out the bear here while collecting coal, which rounds to controlling the resources of four bears with a single map.
Abandoned Survivor Cache Rating 2.5/5
Pros: at the Timberwolf Mountain entrance, with plenty of containers. Built-in workbench, and a two-burner stove in the broken shack outside. Close to the Misty Falls picnic area cave, so you can pick up some coal.
Cons: cramped and poorly lit. Because a fire in the outdoor stove doesn’t keep wolves away and it’s very close to a wolf patrol route, be especially careful when cooking at the door. There’s a bear cave not too far, but not close either. Pleasant Valley has bad weather
Not really suitable for a permanent base, but if you want to move resources out of Timberwolf Mountain and Ash Canyon, this is an indispensable transit stop.
Notes Note 9: The Cold Fusion badge’s bonus is essentially neither ambient temperature nor feels-like temperature but a heat source. You can think of it as always having a +2° campfire over your head, except this campfire can do nothing but warm you.
Desolation Point & Map 4
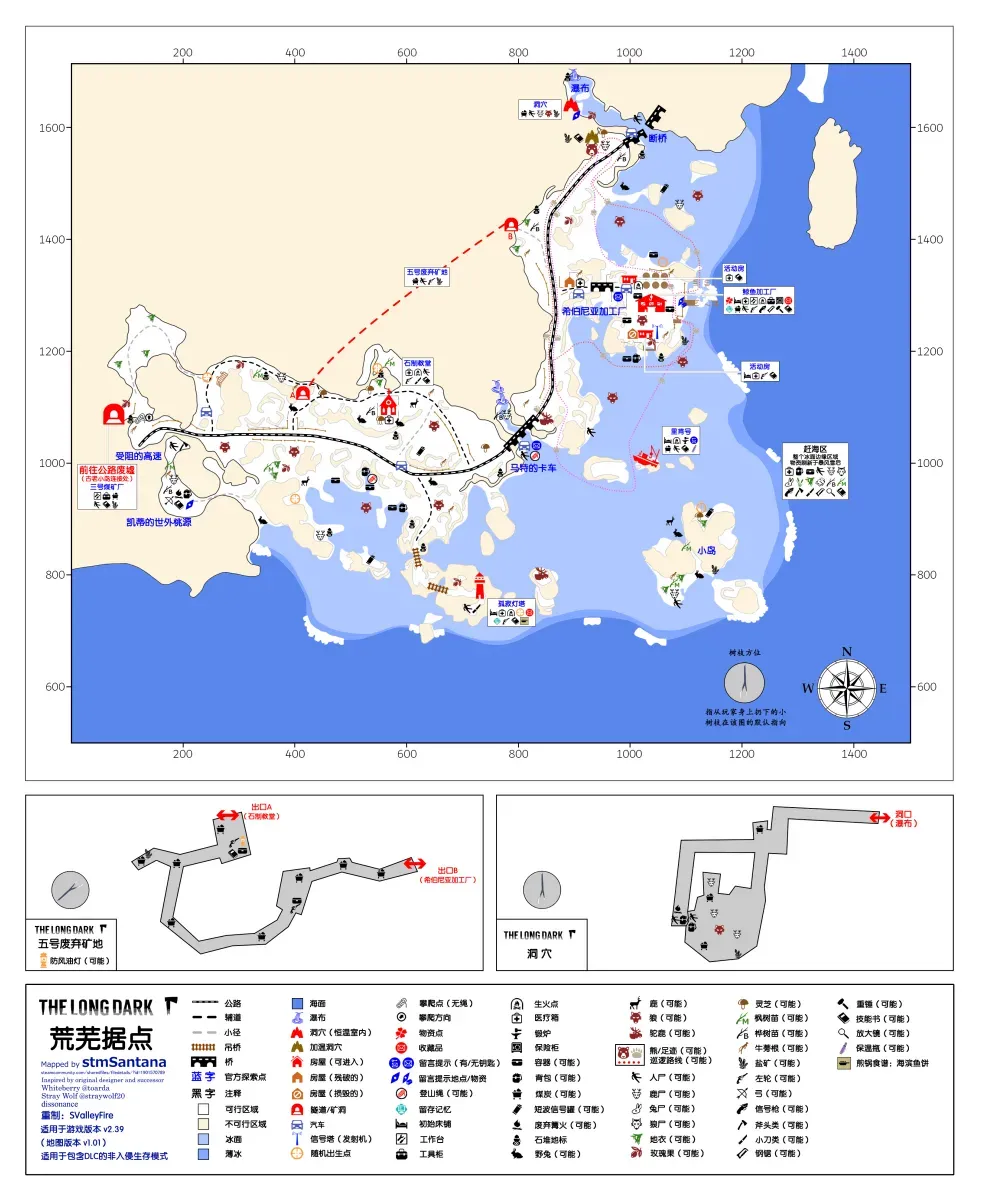
Desolation Point, traditional Chinese name 蒼涼角, commonly called the Point & Map 4. The smallest map on the big map.
Geography: on the coast at the far southwest corner of Great Bear Island, with a land-ice structure similar to Coastal Highway, currently connected only to Crumbling Highway.
Climate: neither good nor bad. Base temperatures slightly lower than Mystery Lake, blizzard and wind probability slightly higher, but overall acceptable.
Important resources: a hunting rifle is guaranteed, inside the constant-temperature cave near the broken bridge.
A revolver is guaranteed, spawning randomly among four mutually exclusive points: Lonely Lighthouse, the stone church, Abandoned Mine No. 5 and the trailer. The safe in the Hibernia Processing plant also has an independent chance.
Inside Hibernia Processing a gun is guaranteed (the safe doesn’t count), type uncertain — either a revolver or a rifle. One rifle spawn can only be seen after breaking a crate.
A bow is guaranteed at Katie’s Secluded Corner, with arrows beside it.
On non-Interloper difficulty the processing plant is guaranteed to have a heavy hammer and a hacksaw.
There is only one bear cave, a warm cave, with a guaranteed bear. There is one moose point near the bridge above Carter’s wagon; it has no moose sign and seems unable to respawn, but this can’t be confirmed.
Abandoned Mine No. 5 has many coal spawn points, and there is flotsam near the thin ice by the sea.
The repair shop together with the trailer beside it, plus the mine and the lighthouse, can be broken down for plenty of scrap metal and a little cloth.
On Interloper, Hibernia Processing is guaranteed to have a box of matches and a prybar, and the Lonely Lighthouse a stim.
Other: the constant-temperature cave near the waterfall is commonly called the wolf cave and may spawn a wolf. Although an indoor wolf ignores bait, it can still be frozen in place by a torch or flare, so be prepared when entering.
Hibernia Processing is constant-temperature inside, but only -5°, so watch the temperature bar during early searches. Its interior is quite cluttered and some supplies are hidden in rather sadistic spots; a thorough sweep takes patience. This building also has a very strange bug: when this building is the first interior loaded after you open the game, its constant temperature becomes -1° and this affects all saves; the bug disappears after you enter another building once.
The Riken has a built-in forge and is one of only three forging points in the game. Since it’s indoors, watch out for cabin fever risk during long forging sessions.
Although this is a coastal map, it’s the only coastal map without an ice fishing hut, probably because they were afraid the lighthouse staff would slack off at work.
Base recommendations: Hibernia Processing Rating 3.5/5
Pros: large space, with a built-in workbench and a burn barrel (two-burner stove). Relatively close to the bear cave and the moose point, and the coal mine is right across the road. There’s a car at the door for simply clearing cabin fever.
Cons: few containers, fairly dim lighting, a chance of running into a wolf right outside, and relatively far from rabbit spawns.
Fairly ordinary. Staying a while isn’t impossible, but the map is too small and overall resources are poor, so it isn’t a long-term plan.
Lonely Lighthouse Rating 1/5
Pros: great scenery, plenty of atmosphere, good for role-playing. Built-in fireplace (two-burner stove) and the top floor comes with an observation deck.
Cons: everything except the above
Some people really do like living here, but from a gameplay standpoint I don’t really recommend it.
Notes Note 10: At a forge you can use a heavy hammer and scrap metal to craft an improvised knife/hatchet and arrowheads, which requires a forge temperature above 150°. Fuel normally only raises the forge temperature to 80°, and reaching 150° requires adding coal; one piece of coal raises the forge temperature by 20°.
Timberwolf Mountain & Map 5
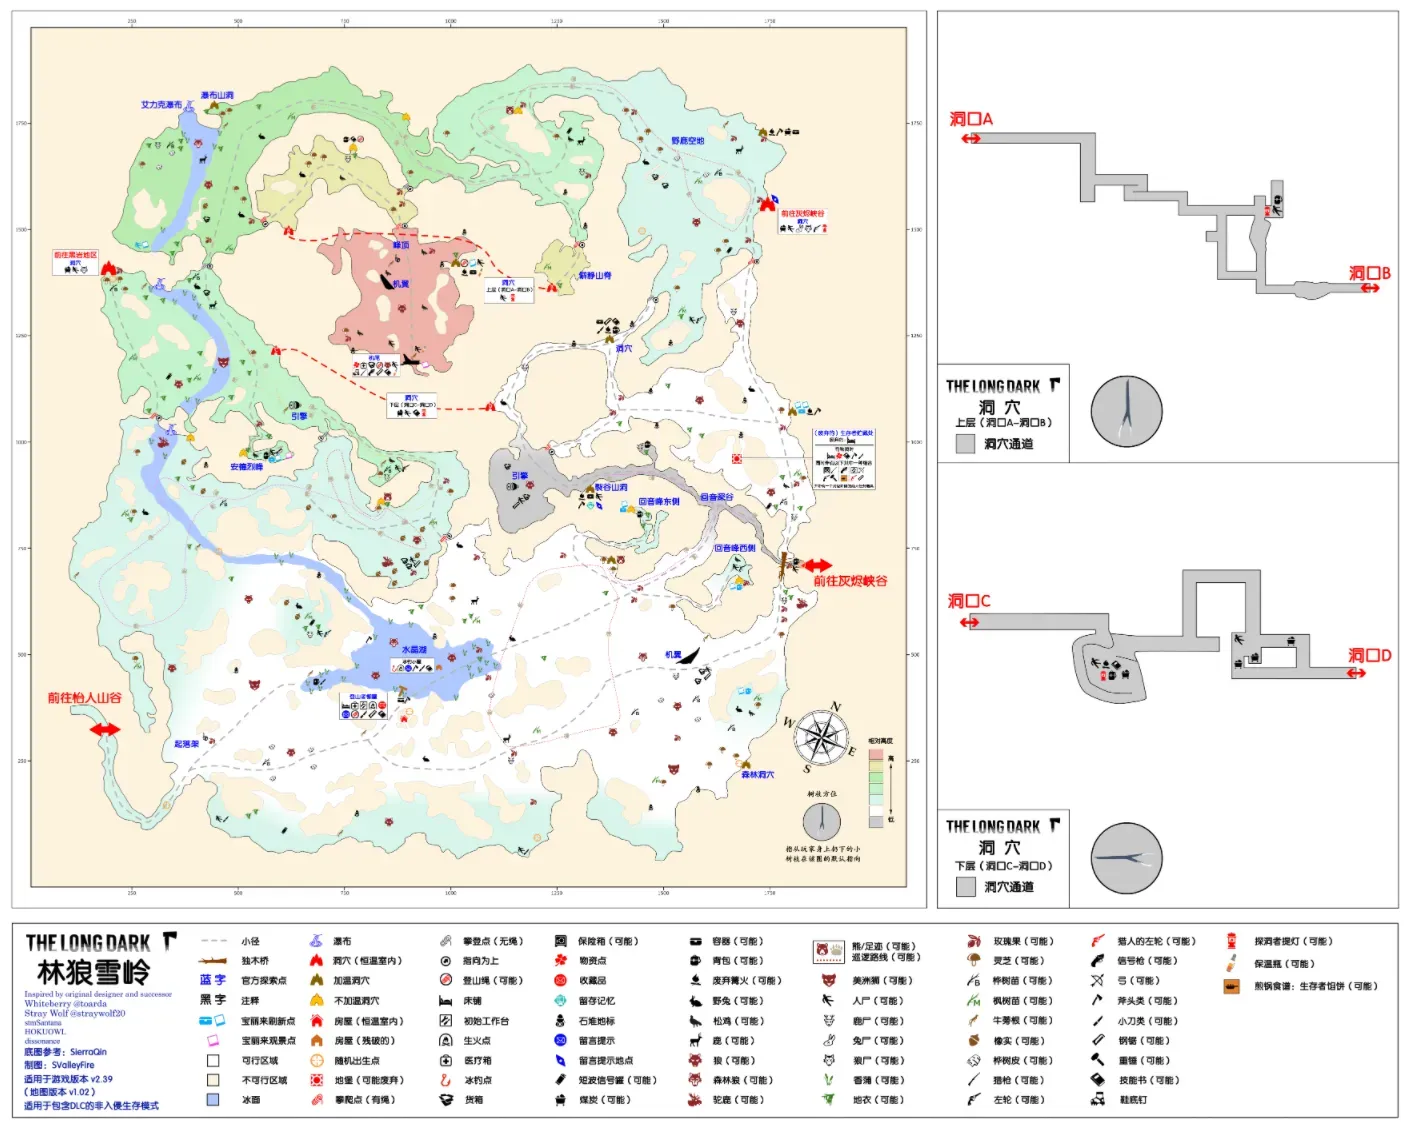 Timberwolf Mountain, traditional Chinese name 灰狼山, commonly called Map 5 & the Mountain, is one of the maps with the richest resources in the game.
Geography: in the mountains of northwestern Great Bear Island. The terrain peaks at the Summit in the center and descends progressively outward, and is fairly complex, with lots of cliffs that require a climbing rope to cross.
Climate: fairly harsh, but still better than Pleasant Valley. Temperature decreases with altitude (non-linearly) [Note 11]: there’s a 2° difference above and below the climbing rope leading to the summit, and the summit is 4° colder than the Crystal Lake area. If we only count the warmest area, Crystal Lake, the temperature is better than you’d think — only about 3° lower than Mystery Lake’s base temperature, better than Pleasant Valley. As for blizzard probability, by feel it’s also considerably better than Pleasant Valley.
Important resources: shipping containers scattered from the plane crash are distributed across the map. Each container has two cargo units, and opening each one consumes 5% of the hacksaw’s durability. The types of supplies inside the containers are fixed but the quantities and durabilities are random. On non-Interloper difficulty 17 containers with 34 openable units in total spawn; on Interloper only 7 containers with 14 openable units spawn in total.
Two hunting rifles are guaranteed. One is guaranteed in the container at the tail section (this rifle is tied to the non-Interloper containers, i.e. if you pick the Interloper template in a custom run and turn on rifle spawning, this rifle still won’t appear; conversely, if you pick the non-Interloper template and turn off rifle spawning, that container will appear but the rifle won’t spawn inside it). The other spawns mutually exclusively among four corpse points at 5, 6, 7 and 8 o’clock in the southern part of the map. The warm cave at the summit is the only independent revolver spawn point. A flare gun is guaranteed at the tail section, with 4-8 rounds on non-Interloper and 8 rounds built in on Interloper. On non-Interloper difficulty both the mountaineer’s hut and the tail section are guaranteed to have a hacksaw.
Timberwolf Mountain has three bear caves; only the one at Echo Peak is a warm cave. Three bears are guaranteed. There are two mutually exclusive moose spawn points, at the landing gear and the wing. There is only one ice fishing hut, at Crystal Lake, which definitely has no door and catches two kinds of freshwater fish; there are lots of cattails around the lake.
Fuel is widely distributed. Cave A-B, Cave C-D and the constant-temperature cave leading to Ash Canyon all have small coal spawn points, but because each yields little and the locations are remote and scattered, practicality is poor.
On Interloper, the mountaineer’s hut and the big cave each have a guaranteed box of matches, and the tail section has two boxes of matches and a stim, but note that if the tail-section matches didn’t spawn at the outside spot, they’re definitely inside a crate.
Other: this map has no locked containers, and neither does Ash Canyon later, so you don’t need to bring a prybar when exploring. The hacksaw’s break threshold is 25%, i.e. when its durability is below 25% there’s a chance it breaks on use. If the hacksaw breaks while sawing a container, that container can never be opened again. So watch the hacksaw’s durability when sawing containers; when it’s low you can repair it with a toolkit + scrap metal or switch to another saw. The image below shows the container at the tail section that has a hacksaw inside on non-Interloper difficulty; sawing this one first is never a loss.
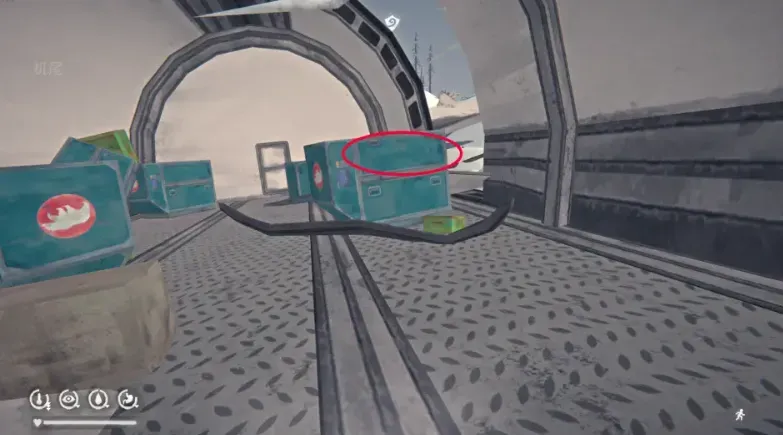
Some crates at the tail section contain supplies. On non-Interloper there’s one crate of peaches, one crate of climbing rope + scrap metal, and one crate of matches and accelerant. On Interloper only the crate of climbing rope + scrap metal remains; the matches and accelerant are only inside the crate when they haven’t spawned outside it.
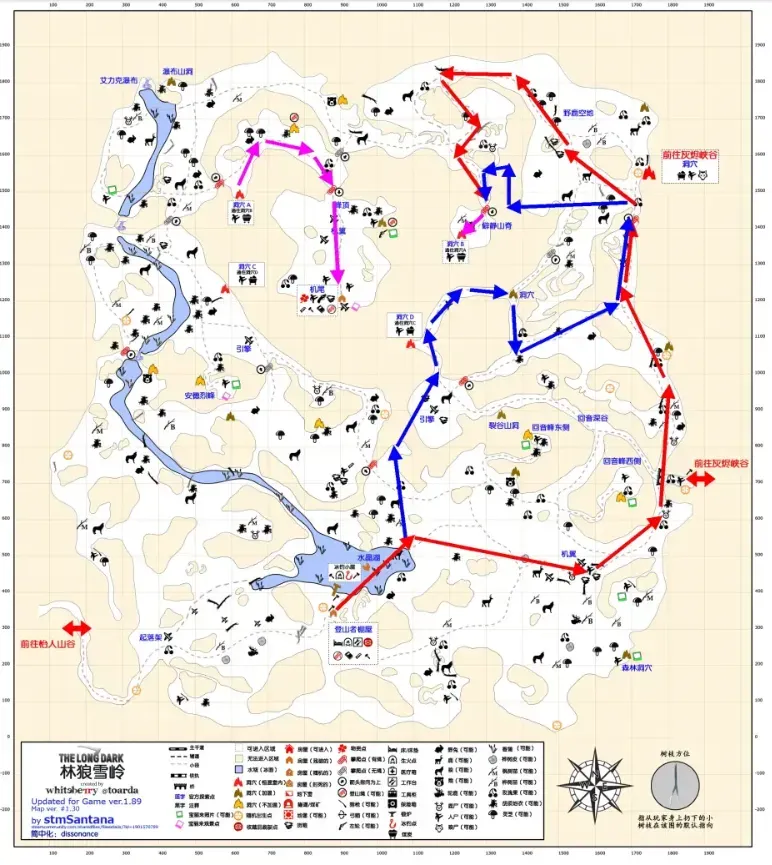
Normally you can only reach the summit of the mountain from the right side; the routes are shown in the image. The red route has no cliff-jumping or slope-climbing sections. It’s a bit of a detour, but the route is simple and you can harvest two containers on the way. The blue route is optimal time-wise, but requires some slope-climbing skill and makes sprains fairly likely. After reaching the secluded ridge there’s only one purple route: cross the cave and then take the climbing rope to the summit. All routes pass three climbing ropes. Of course, there are also cheesy routes that save rope, but they aren’t really practical, so I won’t go into them here. Recommended climbing routes:
Base recommendations:
Mountaineer’s Hut Rating 4/5
Pros: bright and open — at night you can even look up at the stars — with a built-in workbench and fireplace (two-burner stove). Open the door and you see Crystal Lake, where wolves, deer and bears are often out strolling happily together while the rabbits nearby shiver. The map’s only two moose points are not far on either side. Fishing is convenient, there are huge numbers of sticks around, and fuel isn’t lacking. The light and item-decay rate inside the room are judged as outdoors [Note 12].
Cons: not constant-temperature, not constant-temperature, not constant-temperature — important things bear repeating three times. It’s the only non-constant-temperature location on the map that accumulates cabin fever. The hut has a base +10° warming that gradually increases with decay, reaching up to +30° in the late Interloper game; combined with a +5° bed, that’s a total of +35° while sleeping. Even so, if your clothing isn’t good enough there’s still the risk of an early-morning blizzard causing you to lose temperature while sleeping. So the lack of constant temperature is the hut’s biggest flaw; the rest — small space, few containers, inconvenient coal collection, no save on entering/leaving — are just extras. On non-Interloper this flaw isn’t really fatal, but on Interloper, if you want to live here, you’ll have to consider your clothing first.
Notes Note 11: The game’s so-called altitude cooling isn’t strictly linear cooling along the z-axis; it’s zones the developers drew by hand. In extreme cases you can walk one step and lose 5°, then step back and gain 5°.
Note 12: The durability decay rate of all food in the game differs indoors and outdoors. Generally, food left outdoors spoils far slower than food left indoors. Only the three kinds of soda, canned sardines, pork and beans, peaches and the “Go!” energy drink are exceptions.
Forlorn Muskeg & Map 6
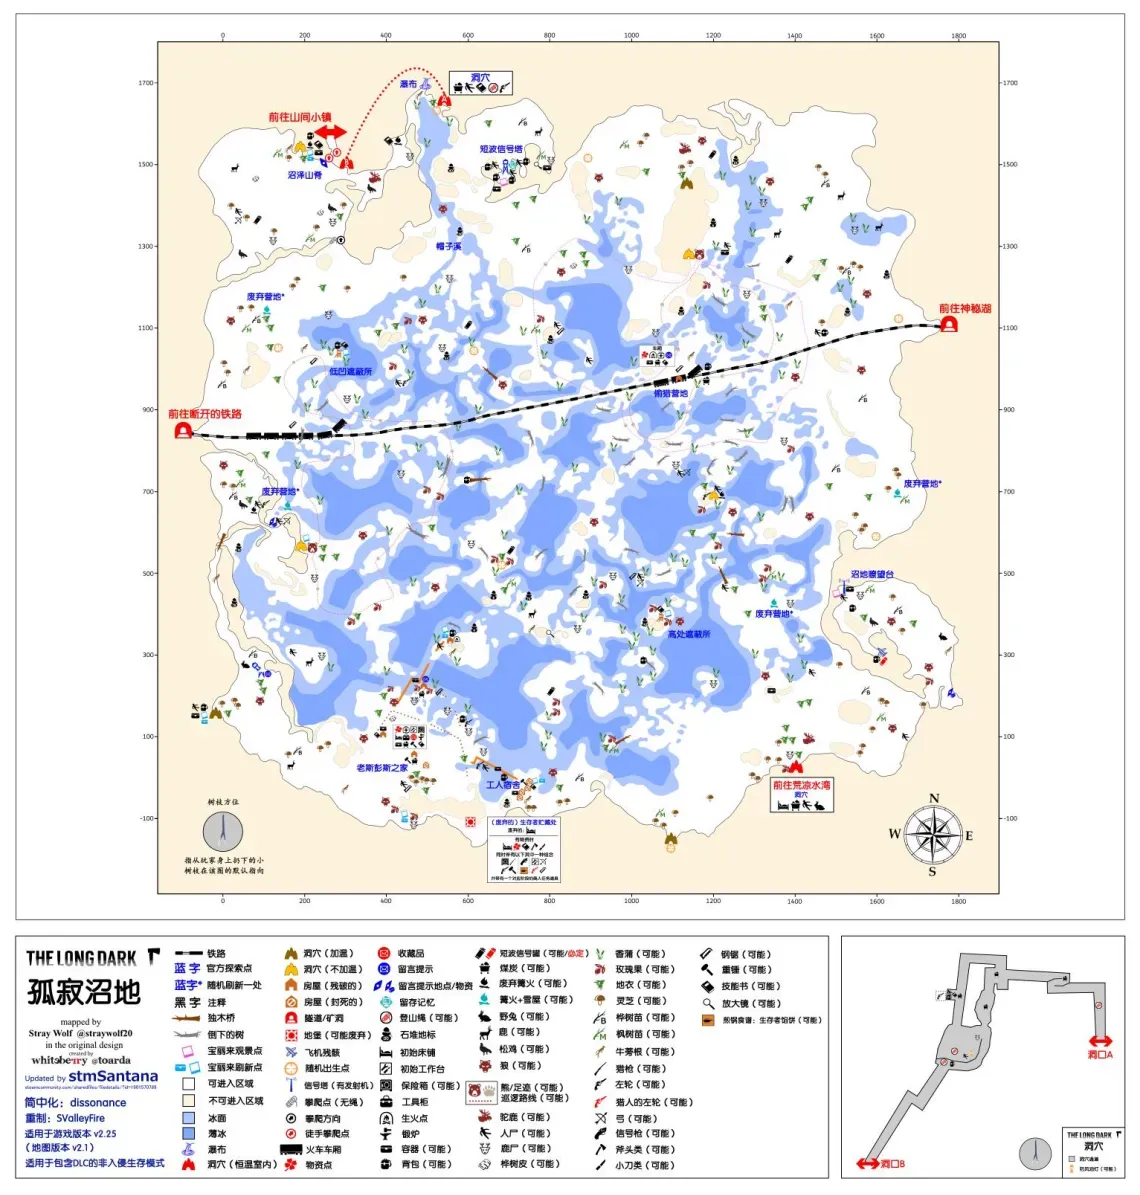 Forlorn Muskeg, traditional Chinese name 伶仃苔沼, commonly called Map 6 & the Muskeg. A Canadian engineering miracle: a railway through a swamp.
Geography: a standard basin — mountains on all sides with marsh in the middle. The marsh has scattered patches of land and a lot of thin ice, and a railway runs across it connecting Mystery Lake and Broken Railroad.
Climate: base temperatures equivalent to Mystery Lake, but fog probability far exceeds every other map. As a basin, that makes sense.
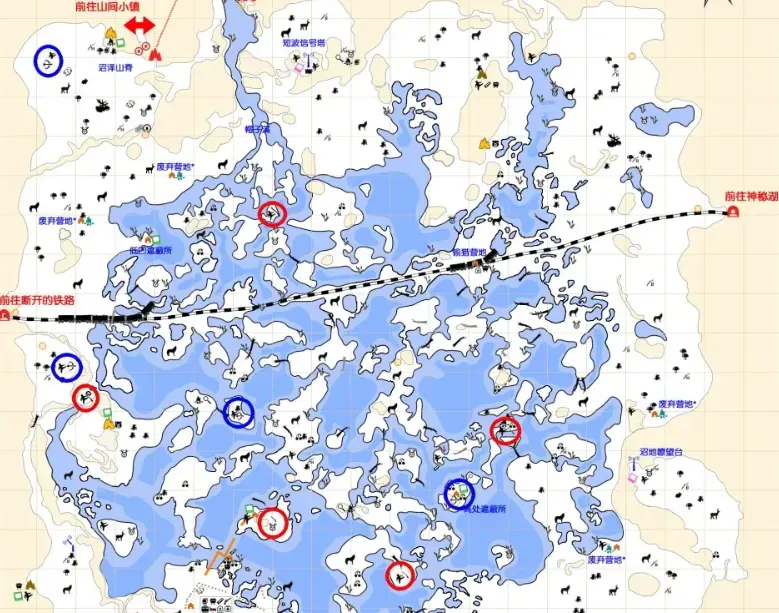
Important resources: a hunting rifle is guaranteed, spawning randomly among five mutually exclusive points. The locations are beyond my ability to describe in words, so see the image (red circles).
There are three independent revolver spawn points: beside the bed on the second floor of Old Spence Family Homestead, inside the safe, and in a backpack in the constant-temperature cave by the waterfall.
A bow is guaranteed, spawning randomly among four mutually exclusive points. The locations are beyond my ability to describe in words, so see the image (blue circles). Rifle & bow locations in the Muskeg:
On non-Interloper a heavy hammer is guaranteed, randomly among three mutually exclusive points at Old Spence Family Homestead and the workers’ quarters.
There are two bear caves, neither a warm cave, with two guaranteed bears. There are three mutually exclusive moose spawn areas at the 3, 5 and 10 o’clock positions on the map. Plant resources are rich, and the number of cattails tops the whole game.
Although it’s a marsh map, fuel isn’t lacking. Poacher’s Camp and the area near Old Spence’s have a certain amount of non-respawning coal, and the waterfall cave and the cave to Bleak Inlet both have small coal spawn points.
On Interloper, Old Spence Family Homestead has a guaranteed box of matches, and Muskeg Ridge a guaranteed stim.
Other: this map has an explorable location, the “abandoned camp”, which spawns randomly in one of four positions, characterized by a snow shelter, a campfire and some supplies. This location counts toward your stats. The central marsh has a lot of thin ice. Generally the ice near land is fine, so when crossing the marsh try to walk close to land. If you absolutely must cross thin ice, reduce your load as much as possible, increase sprint speed and be prepared to fall in.
It has Great Bear Island’s only outdoor forge, which gets the cold bonus while avoiding cabin fever accumulation. Other than not being able to let the fire go out while sleeping, it’s perfect, and it’s a fairly ideal forging spot on Interloper.
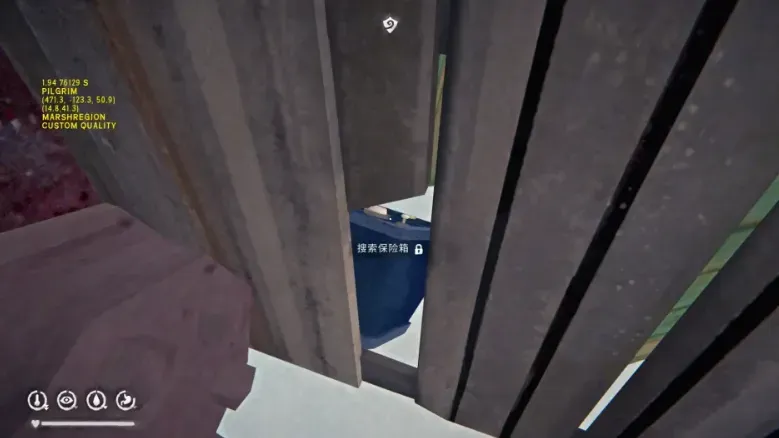
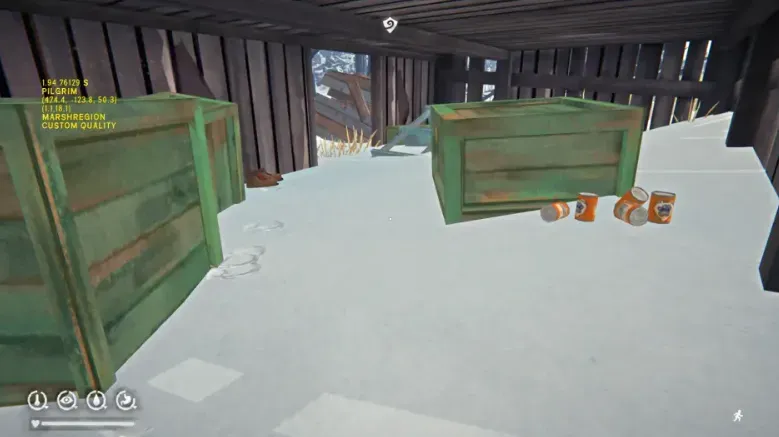
The crate beside the bed at Old Spence Family Homestead contains accelerant, and the hidden safe inside the shed can be opened directly from a gap behind it. Also, the dog food inside the shed doesn’t actually spawn inside the crate but behind it.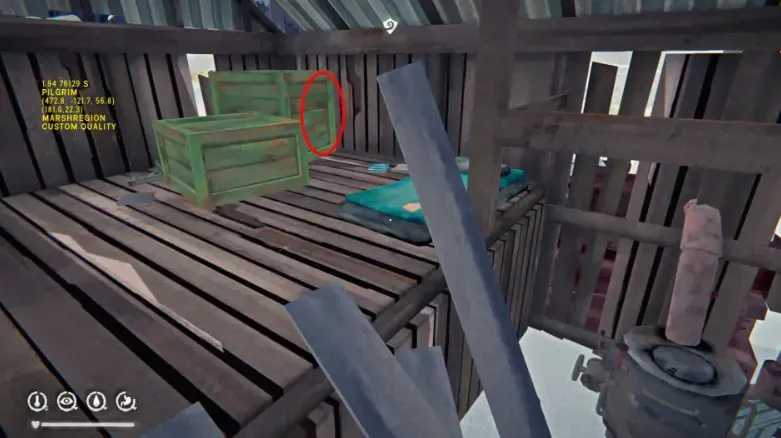
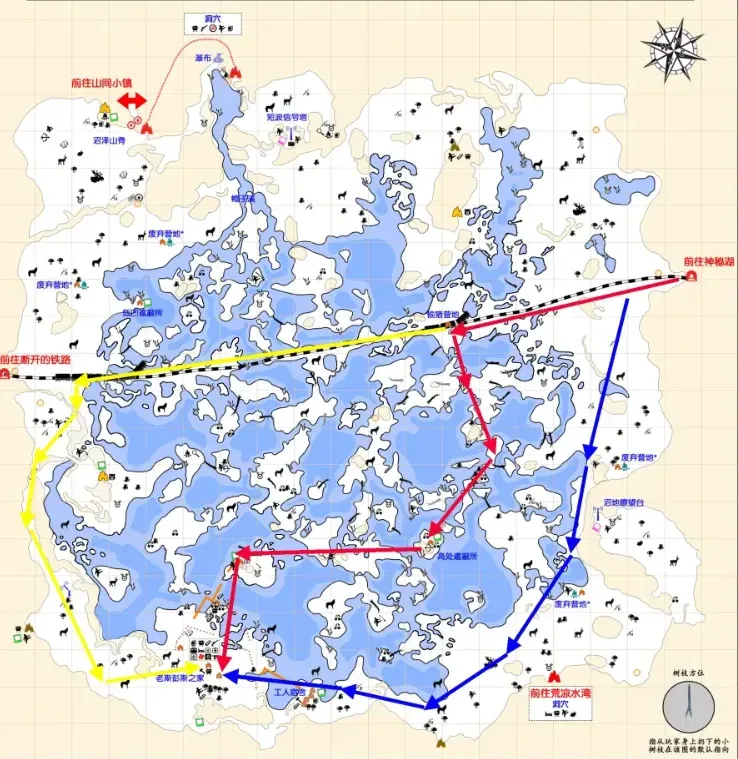
The recommended forging routes are shown in the image. Red is the shortest route with the lowest chance of meeting wolves — apart from Poacher’s Camp and Old Spence’s you almost never meet a wolf — but it crosses the center of the marsh, so it’s easy to get lost when visibility is poor. The blue route is more reliable: it hugs the edge the whole way so getting lost isn’t a concern, and it passes a constant-temperature cave and a warm cave so you don’t have to worry about losing temperature. Its downside is the distance, and the number of wolf spawns along the way. The yellow route is the longest; I don’t recommend taking it if you start from Mystery Lake, but it’s usable when you’re lost, and it’s mostly used for forging trips starting from Muskeg Ridge.
Base recommendations: Cave (near the waterfall) Rating 2/5
Pros: good location, at the junction of Broken Railroad, Milton Basin and the Muskeg, and constant-temperature. Muskeg Ridge has no wolves, plenty of rabbits and a little birch bark. Even if no moose spawns at the door, going to the nearby Milton Basin to get a few deer to roast isn’t a problem.
Cons: never mind a workbench and containers — there isn’t even a bed, and the cave is pitch dark.
Generally I don’t recommend living anywhere without a bed, but the rest of the Muskeg is so poor that this is a very good relay point: whether you come from Milton Basin or Broken Railroad, you can stop here to regroup.
Cave (leading to Bleak Inlet) Rating 2/5
Pros: good location, at the junction of the Muskeg and Bleak Inlet, constant-temperature, with a bed. This cave is the map’s only indoor rabbit spawn; a rabbit may spawn inside, though unfortunately snares don’t work inside the cave. Wolves and deer aren’t far, and there’s a moose point at each end of the cave, so food isn’t scarce. Good as a forward base.
Cons: no workbench or containers, dark inside even during the day, and you see wolves when you step out.
Generally I don’t recommend living in a place like this, but whether you’re hauling resources out of Bleak Inlet or going to the Bleak Inlet cannery to make bullets and maintain tools, this is the only relay point available.
Broken Railroad & Map 7
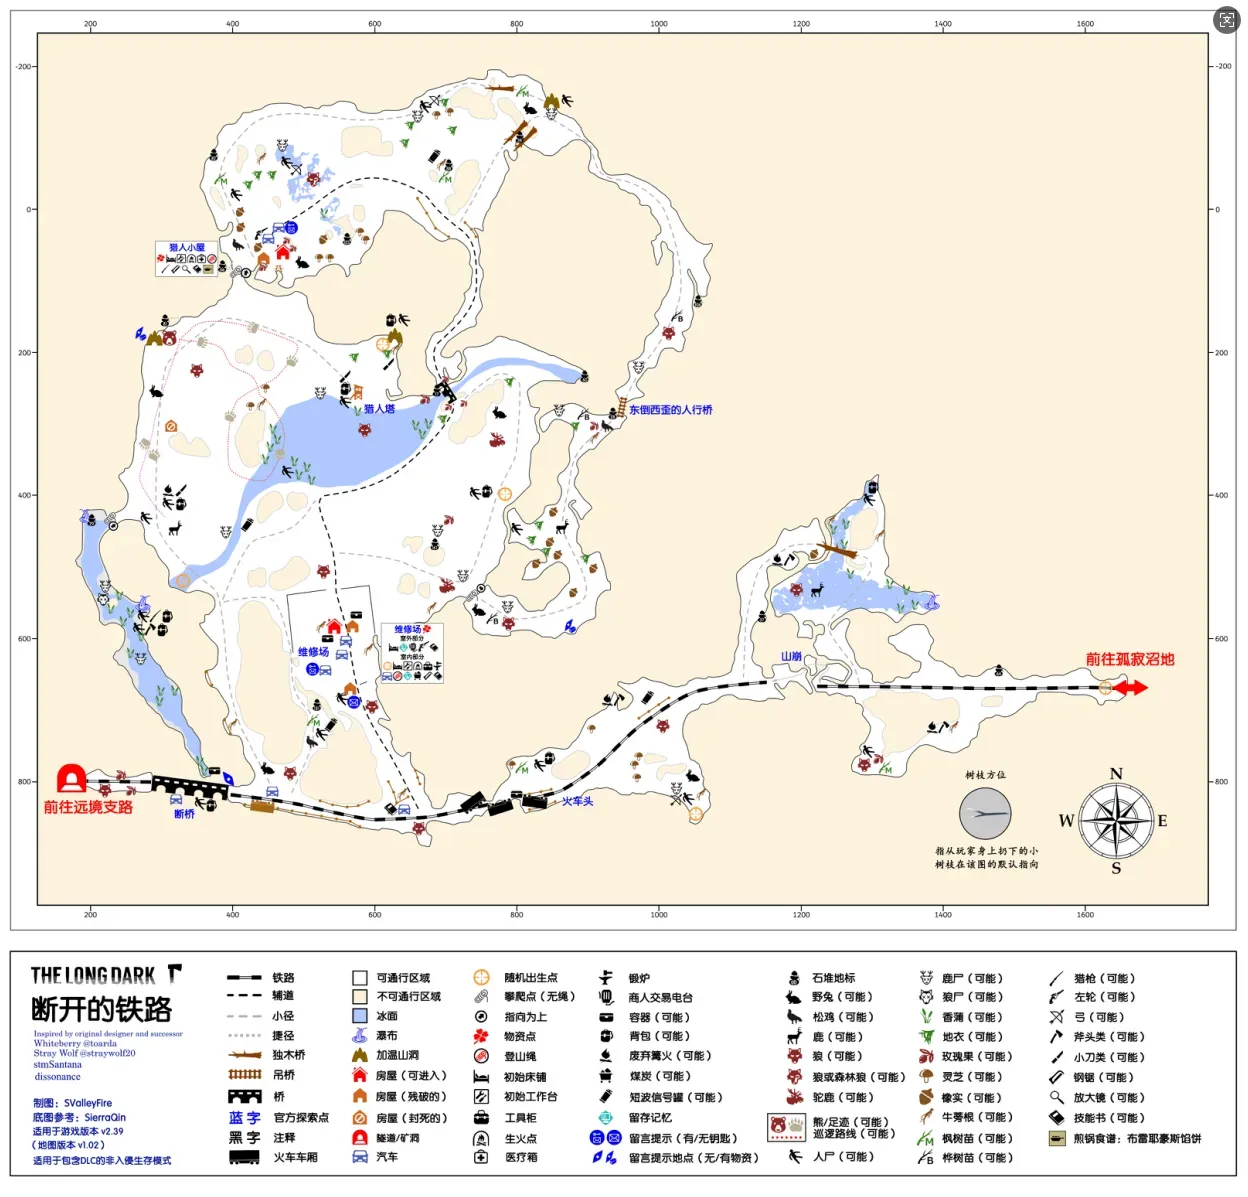
Broken Railroad, traditional Chinese name 鐵路斷線, commonly called Map 7 & the Railroad. This map used to be translated as “Mystery Lake Railway”, which made no sense at all; it was later changed to “Broken Railroad”, which still isn’t as good as the traditional Chinese name.
Geography: the second of the maps the developers rotated 90°. The terrain is simple: a railway cutting across mountains plus a few small water basins. I just don’t know why anyone would build a repair shop in this godforsaken place.
Climate: basically a copy-paste of Mystery Lake, the best tier.
Important resources: there is one independent hunting rifle spawn, in the canyon under the broken bridge. There are two independent revolver spawns: in a flower pot at the Maintenance Yard, and in the car outside Hunter’s Lodge.
Hunter’s Lodge is similar to the processing plant: a gun is guaranteed, type uncertain — either a rifle or a revolver.
A bow is guaranteed, with two mutually exclusive spawn points: the pond in front of Hunter’s Lodge and the corpse near the locomotive.
The Maintenance Yard is guaranteed to have a 4L fuel can and a climbing rope, which is exactly what you need to tie onto the climbing spot nearby that leads to the canyon. Hunter’s Lodge likewise has a guaranteed climbing rope, which fits the climbing spot behind the building.
There is only one bear cave, a warm cave, with one guaranteed bear. There are two mutually exclusive moose points: on the road from the Maintenance Yard to the wooden bridge, and at Hunter’s Lodge’s door. Apart from the pond at Hunter’s Lodge’s door, other waterways come with some cattails to gather.
Fuel isn’t lacking, but the map produces no coal. The Maintenance Yard has the odd one-off piece of coal, but that clearly doesn’t match its status as a forging map.
The Maintenance Yard and Hunter’s Lodge both have a number of metal shelves that yield plenty of scrap metal and some cloth.
In standard Interloper you can’t spawn on Broken Railroad. On Interloper, the Maintenance Yard and Hunter’s Lodge each have a guaranteed box of matches, and the canyon under the broken bridge and Hunter’s Lodge each have a guaranteed stim.
Other: you can slope-climb straight over the landslide without going around.
The Maintenance Yard is one of only three forging points in the game, but the map doesn’t necessarily spawn a heavy hammer, so if you come here to forge remember to bring one (and coal too). I strongly suspect that after the developers added a forge to the Maintenance Yard for the story in 1.44, they didn’t adjust the accompanying spawns. On aurora nights the scattered live wires can damage the player and apply the burn debuff, so be careful. Also, breaking some crates in the Maintenance Yard may yield supplies; the important one is the one on the shelf in the second image, which has a chance to give a stim. The other odds and ends aren’t important.
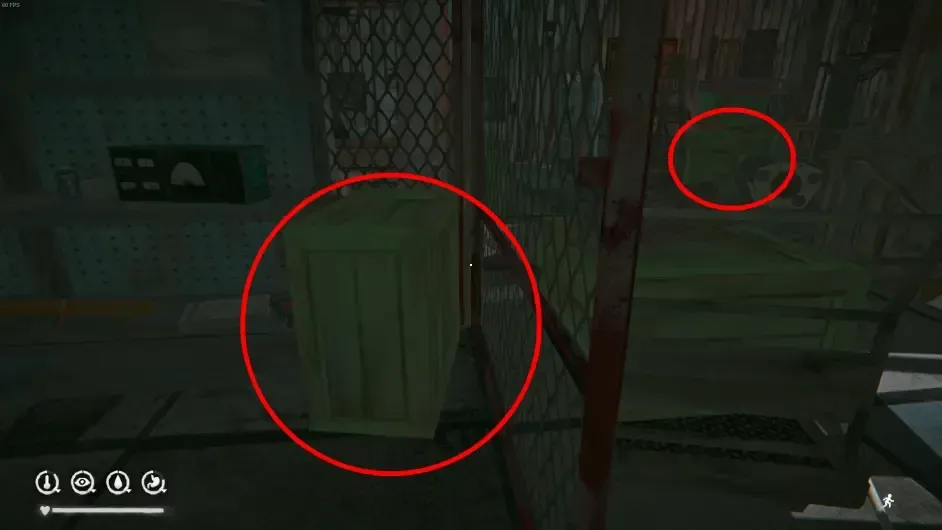
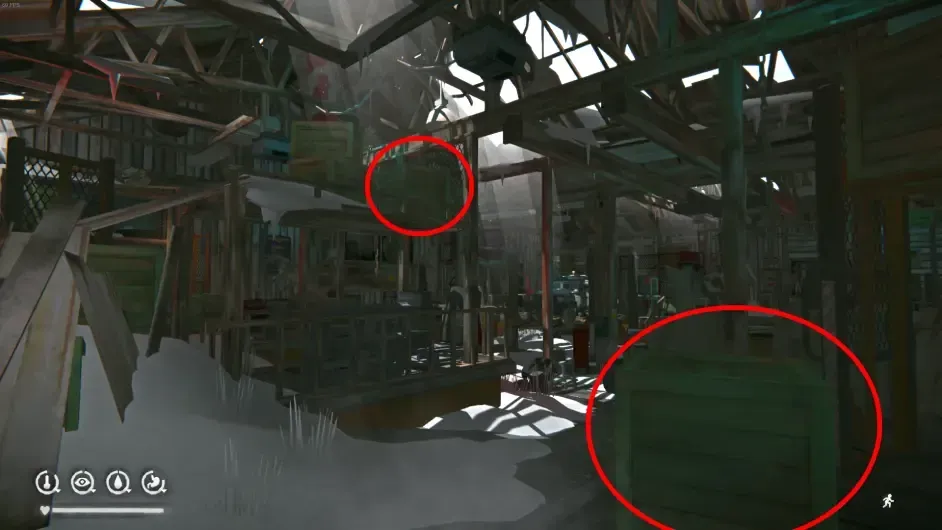
Never go down into the canyon under the broken bridge without tying a rope first — in normal play you can’t get back up without one, which counts as one of the classic ways to die.
Base recommendations: Maintenance Yard Rating 3.5/5 Pros: large space, fairly many containers, built-in forge, workbench and burn barrel (two-burner stove), and you can even light a campfire on the floor. It comes with an outdoor annex: no warming, but no cabin fever accumulation either, and it’s windproof and wolf-proof, with a floor where you can also light fires freely. It’s also fairly close to the bear cave and moose point.
Cons: a notorious wolf den — step outside and there’s a pile of wolves. Relatively far from rabbit spawns, no coal to pick up, and at night you have to watch out for aurora-night live wires.
The only base with a built-in forge (surely nobody lives on the Riken), but it doesn’t even produce coal, and with a small map and few resources there isn’t much to do. Plus there’s a pack of wolves at the door.
Hunter’s Lodge Rating 4/5
Pros: large space over three floors, with a built-in six-burner stove and workbench. Step out and there’s the pond moose point; down the climbing rope behind the building is the bear cave, and the door is a rabbit warren.
Cons: remote. The map itself is already a corner, and this building is in the corner of that corner, so to speak, cut off from the world. There’s a cheesy route straight to the exit, but it’s still really out of the way and inconvenient to get anywhere. Fuel isn’t easy: you either go across the pond or down the climbing rope. Also the building is too empty and always feels eerie, especially at night.
Mountain Town & Map 8
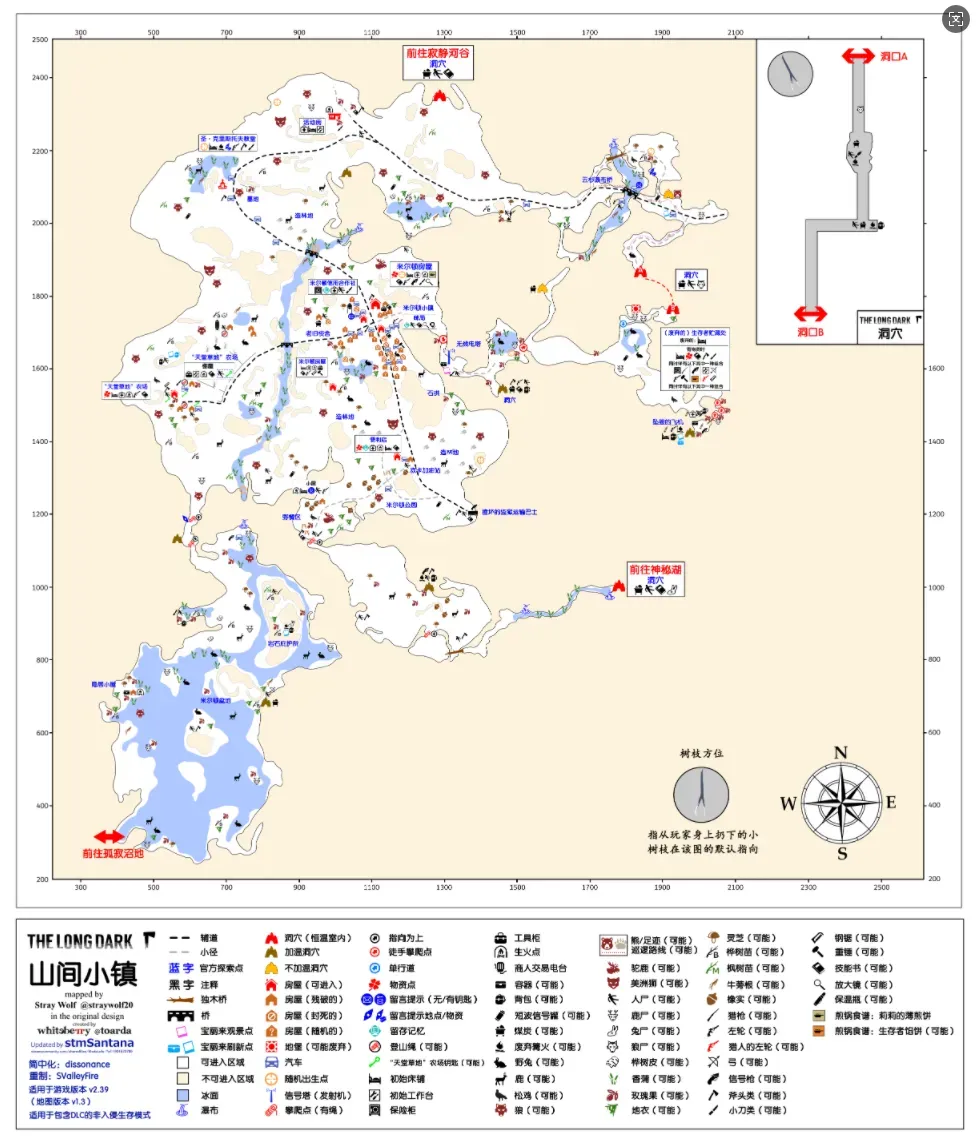 Mountain Town, traditional Chinese name 高山鎮, commonly called Map 8 & Milton. The starting point of the story, and the first map many newbies encounter.
Geography: laid out around the town, with mountains in the northeast and a basin in the southwest. The terrain is fragmented, and getting in and out requires climbing ropes. The map many newbies encounter first.
Climate: as the story’s starting map, it gets the same treatment as Mystery Lake — high base temperatures, balanced weather, moderate blizzard probability.
Important supplies: two hunting rifles are guaranteed. One spawns randomly among four mutually exclusive points: the church, the Milton house (Grey Mother’s house), the Milton house (the standalone one on the small hill), and Paradise Meadows Farm. The other spawns randomly among seven mutually exclusive points; describing them is beyond my ability, so see the image for details.
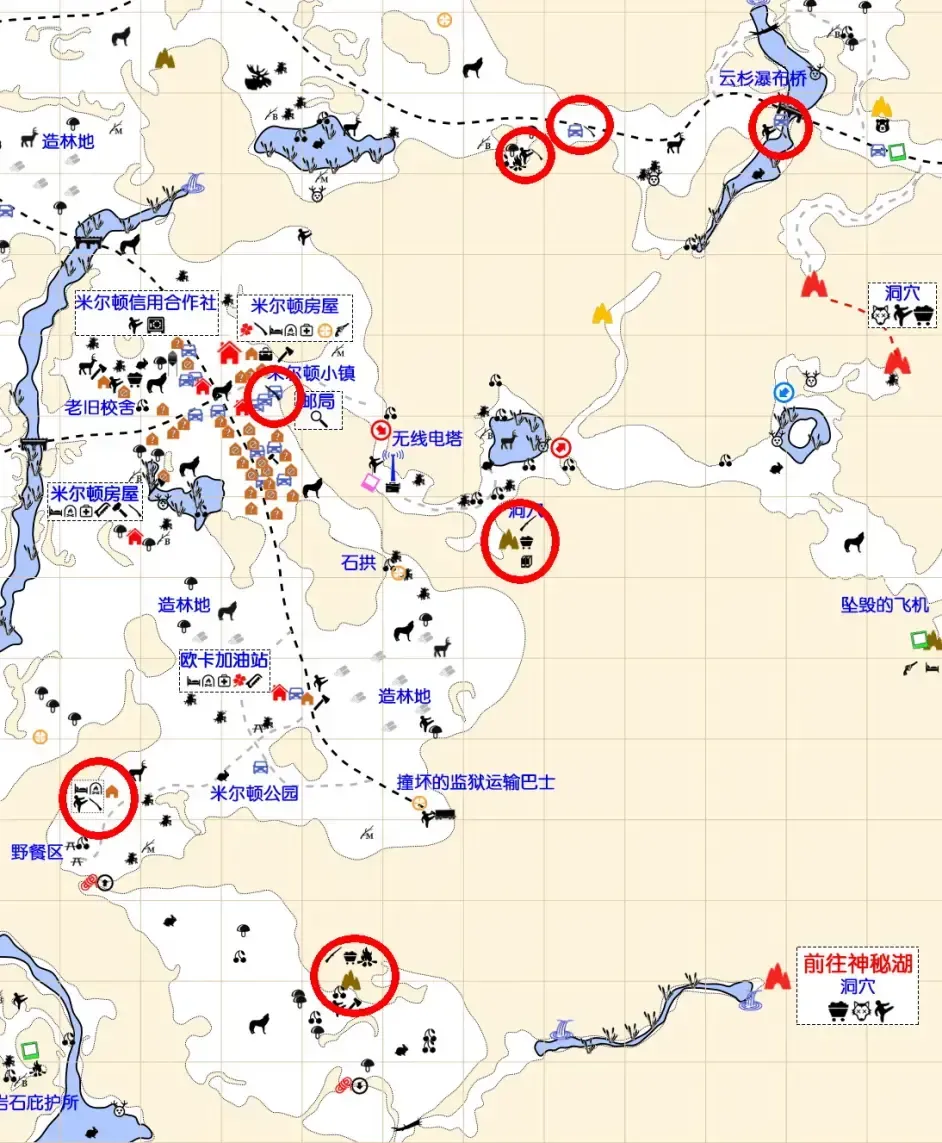
There are two independent revolver spawns: the Milton house (Grey Mother’s house) and the crashed plane (in a backpack in the cave).
There is only one bear cave, not a warm cave, near the Spruce Falls Bridge, with one guaranteed bear. There are two mutually exclusive moose points: the small pond between the trailer and the Spruce Falls Bridge, and Milton Basin. Cattails grow near all the waterways on the map, and their total number is quite considerable.
As for fuel, there are many houses and no shortage of furniture, so there’s no problem in the short term, but sticks are generally far from the settlements, which is a bit inconvenient long term. Coal spawns are scattered and sparse — only the two caves connecting to Mystery Lake and Hushed River Valley, and the constant-temperature cave from the Spruce Falls Bridge to the crashed plane, will spawn it.
There are lots of houses; breaking down furniture including curtains and sofas yields plenty of cloth and some scrap metal.
In standard Interloper you can’t spawn in Mountain Town. On Interloper, the Milton house (Grey Mother’s house) and the backpack in the warm cave below the picnic area each have a guaranteed box of matches; the crashed plane has a guaranteed stim and a 4L fuel can.
Other: two buildings have entry restrictions. The Euro Truck gas station needs a prybar to get in, and Paradise Meadows Farm unlocks automatically with the main story in story mode but needs a key in Survival mode. The key spawns randomly among four points: the cab of the pickup in the shed, the tractor cab, on the corpse inside the broken house, and on the corpse behind the house.
The collapsed houses in the town are random, but not every house has an independent probability; like Coastal Highway, it’s random among several patterns while keeping the total the same.
There are three points on the map called “plantation” ( 造林地 ); each counts toward your stats, so don’t miss any.
One of the crates at the crashed plane can spawn pants, and on Interloper even combat pants.
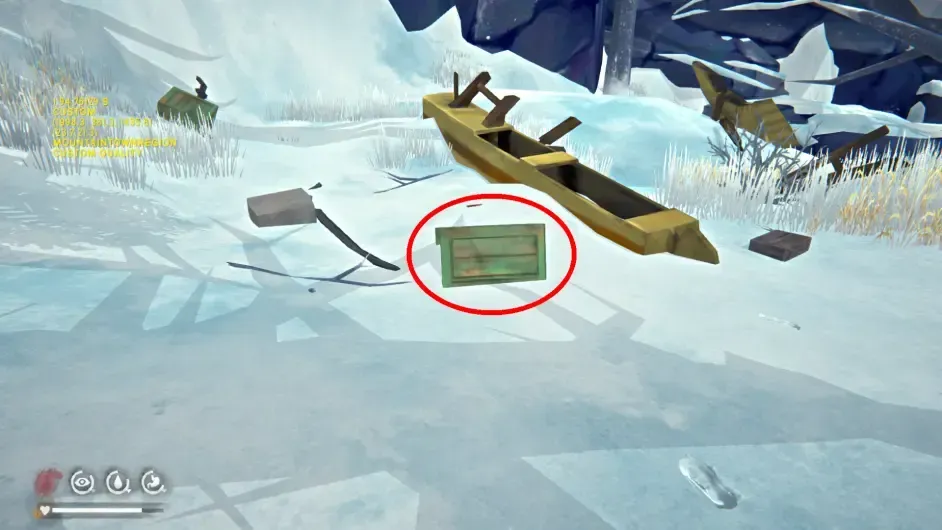
The town has the longest and tightest invisible walls of any map — the whole stretch from the crashed plane to the Mystery Lake entrance is exceptionally strict. Apart from exploits, no route from Mountain Town to Mystery Lake without climbing a rope has been found.
There is an unfinished area on the map: opposite the tunnel with the wrecked prison transport bus, in the area between the crashed plane and the cave to Mystery Lake. It’s presumed to be the road leading to Long Curve in Pleasant Valley; in the chapter 3 opening cutscene, Molly also picks up the female lead Astrid in this area. The cliff near the cave below the crashed plane has a kill zone, so smuggling yourself through here is impossible. There’s a route near the crashed plane that goes around the kill zone and down into this area, where you’ll find that apart from the terrain it’s basically blank, with nothing to explore or collect.
Base recommendations: Milton House (Grey Mother’s House) Rating 3.5/5
Pros: the best house in town — two storeys, large space, plenty of containers, built-in six-burner stove. Rabbit spawns are right across the street, there are many houses around, breaking down furniture alone gives plenty of firewood, and there’s a car at the door for simply clearing cabin fever.
Cons: no built-in workbench; the nearest is at Paradise Meadows Farm or the trailer. The town is a wolf den — step outside and there are wolves. After the climbing rope behind the house was removed, the distance to the moose point and bear spawn effectively increased. Once the surrounding furniture has been chopped up, fuel collection takes more time.
Setting aside nostalgia and the nuclear fireplace, this base actually isn’t that practical, but even so it’s the best house in town. If you’re moving supplies to Mystery Lake, Grey Mother’s house is an unavoidable stop.
Paradise Meadows Farm Rating 3.5/5
Pros: decent space, built-in six-burner stove, an outdoor workbench, and a burn barrel (two-burner stove) beside it. Rabbit spawns are right outside, and there’s a car at the door for simply clearing cabin fever.
Cons: a wolf den at the door, a very dangerous workbench, and very far from large animal spawns. Although the basin’s moose point looks close on the map, there are two ropes in between, so living at the farm you can’t actually use the basin’s resources.
A base that looks lovely but isn’t actually great. Because the interior is fairly compact and on the warm side, some people find it cozy.
Trailer Rating 4/5
Pros: built-in workbench, a burn barrel at the door, and a bed that heals slightly above normal (36% per 10 hours on Interloper). Close to the small pond moose point and the bear cave, and rabbit spawns aren’t far either. Sticks aren’t lacking around it, and both coal caves are within a normal patrol range, giving a certain coal supply. It’s very close to a warm cave, so cabin fever can be cleared without pressure.
Cons: cramped, with basically no containers. Although there are no wolves when you open the door, wolf spawns aren’t far, and cooking at the door easily attracts wolves.
Located not far from the valley exit, it can be a forward base for exploring the valley or a transit station for hauling valley resources out. Long-term residence isn’t actually impossible.
Hushed River Valley & Map 9
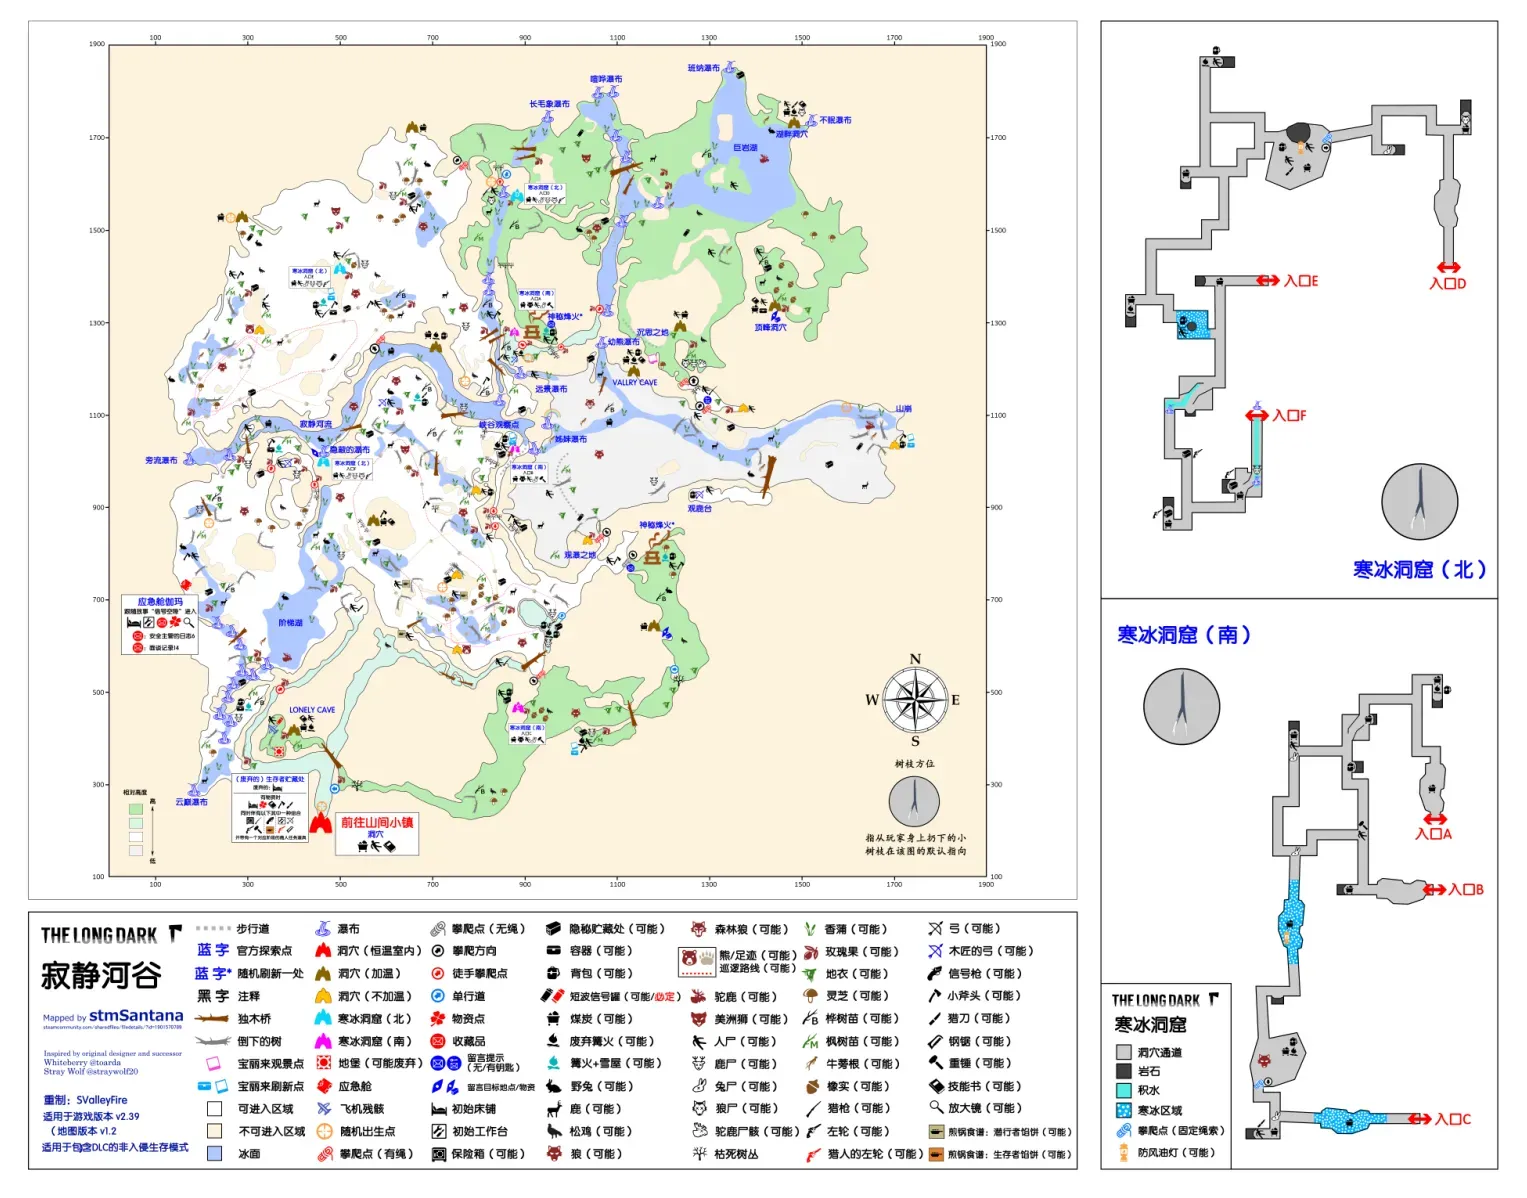 Hushed River Valley, with the same name in traditional Chinese, one of only two maps with identical simplified and traditional names, commonly called Map 9 & the Valley. The most complex terrain of any map, probably without exception.
Geography: at the far northwest corner of Great Bear Island. The whole map is split by a river valley. Overall the terrain is higher in the east and lower in the west, but the valley itself is higher in the west and lower in the east, so the terrain is extremely messy and hard to cross, connected mainly by two groups of six ice cave entrances.
Climate: between Mystery Lake and Pleasant Valley — neither good nor bad. The whole map has uniform temperature, without altitude layering like the mountain.
Important resources: a hunting rifle is guaranteed, spawning randomly among five mutually exclusive points: Bear Cub Falls, beside the tree trunk in the middle stretch of the Hushed River, the warm cave near the stepped lake, near entrance E of the ice cave (north), and near entrance D of the ice cave (north).
A revolver is guaranteed, spawning randomly among four mutually exclusive points: the lakeside cave, the mysterious signal fire, beside the campfire in the ice cave (south), and the platform south of the waterfall viewpoint. There are also two independent revolver spawn points, the ice cave (north) and the canyon observation point; currently the one at the canyon observation point can’t be obtained due to a terrain texture error (v1.94).
A survival bow is guaranteed, spawning randomly among three mutually exclusive points: the deer viewing platform, the entrance of the warm cave at 12 o’clock on the map, and beside the tree trunk south of the canyon observation point. There is also one independent spawn point, the ice cave (north), usually with 2 or more arrows beside it.
A flare gun is guaranteed (not on Interloper), spawning mutually exclusively among three warm caves: the summit cave, Lonely Cave and Valley Cave, with a number of rounds on the corpse nearby.
The valley has two bear caves, neither a warm cave, with two guaranteed bears. There are two mutually exclusive moose points, below the deer viewing platform and at the giant rock lake. Also, the place of contemplation may spawn a ready-made moose carcass; this point randomly rolls among four outcomes: deer carcass, wolf carcass, moose carcass, or nothing.
Fuel is plentiful and sticks are widely distributed. Both groups of ice caves have a number of coal spawn points, and the summit cave and the warm cave in the middle stretch of the Hushed River also spawn one-off coal. Cattails can be gathered near most waterways, and the total is considerable.
It has the landmark resource point the “mysterious signal fire”, which spawns at one of two locations at random; by habit I call them the south & north signal fires based on direction. The signal fire comes with a snow shelter, a piece of moose meat, a backpack (containing a Mackinaw jacket) and a whetstone, plus a corpse nearby (containing a sewing kit). On non-Interloper, the signal fire also comes with a ready-made moose backpack, and the Mackinaw backpack additionally contains a stim and a magnifying lens. On Interloper, the signal fire only adds a heavy hammer.
There are four random campsite points, two of which spawn (one on Interloper), each with a fixed snow shelter, a campfire, a pot and some other supplies; on Interloper it comes with a hacksaw.
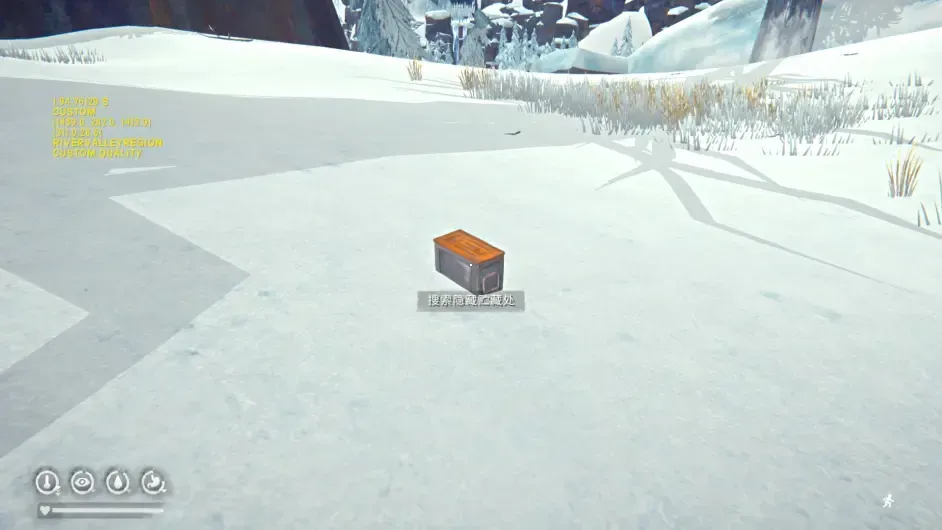
There is a resource point with its own mechanic, the “hidden cache”, which looks like the image and spawns in various corners of the valley. Boxes at different locations give different supplies, from food to clothing to ammunition. But because they’re so well hidden, neither the full set of spawn points nor the spawn rules can be verified, so those with no interest in researching it can just make do by poking around the points on the map, and those who are interested can try to work out the pattern.
On Interloper the valley has three guaranteed boxes of matches: inside the warm cave in the middle stretch of the Hushed River, the warm cave at 12 o’clock on the map, and beside the campfire in the south ice cave.
Other: the mysterious signal fire doesn’t last forever. For a period after you first enter the map (roughly 3-5 days) it keeps smoking; after a while, when the map reloads, the fire tower collapses and stops smoking. So after entering the map you should prioritize determining the signal fire’s location. Also, although the fire tower looks like it’s burning, it provides no temperature bonus at all. The valley has no locked containers, so you don’t need to carry a prybar when exploring. On the other hand there are lots of dead bushes blocking the way, which can only be opened with a hatchet & improvised hatchet, so it’s recommended to bring one when exploring; some areas can only be reached by clearing the way with an axe.
Most of this map is linked by the two groups of ice caves, which are also the only two indoor caves in the game with three exits. Entrances A, B and C form the south ice cave, while entrances D, E and F form the north ice cave. If you need to reach the two exits leading to the north and south platforms (C & D), you have to climb a short stretch of climbing rope inside the cave; compared with the long ropes outside, that cost is basically negligible. The south ice cave may spawn a campfire at one of three points. This campfire comes with a box of matches, a bedroll and various other supplies, and on Interloper also a hacksaw. Also, the south ice cave may spawn a wolf, so be prepared when entering; once killed it won’t respawn (can’t be disproven).
There are two untranslated place names, Lonely Cave and Valley Cave; given the developers’ habits, these two caves would probably be translated as “lonely cave” and “canyon cave”.
Base recommendations: There isn’t even a single roof tile on the whole map, so it’s not recommended as a base. Generally you explore this map using the ice caves as shelter, and once you’re done you head straight back to Mountain Town.
Bleak Inlet & Map 10
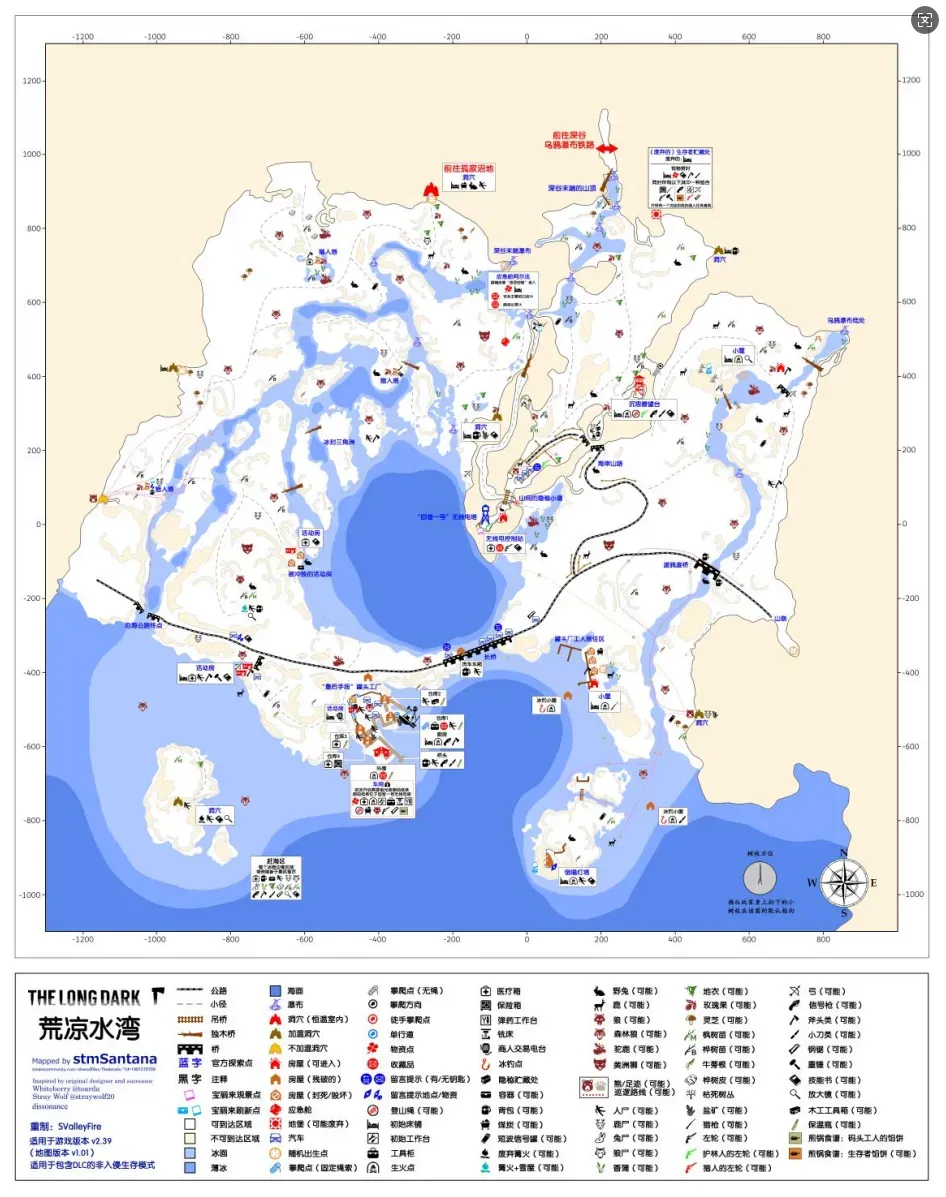 Bleak Inlet, traditional Chinese name 淒涼入口, commonly called Map 10 & the Inlet. Currently the hardest map (one of them, since there’s still something like Sundered Pass where you lose temperature at high noon), oozing the developers’ malice everywhere.
Geography: on the southwestern coast of Great Bear Island. Overall it has two levels: the upper level is a mountain extension coming from the Ravine, and the lower level is a delta area. In normal play the two levels only connect via a climbing rope.
Climate: base temperatures low enough to rival Pleasant Valley, wind chill unmatched by any map, the highest frequency of high winds, and the highest aurora frequency at night. Only the blizzard frequency is slightly lower than Pleasant Valley; everything else is as bad or worse.
Important resources: there are three independent hunting rifle spawns: at the end of the hidden mountain path, the cannery workers’ dormitory, and the ice fishing hut beside the dormitory.
A revolver is guaranteed inside the cannery workshop (there are four points, all hidden in pretty hellish spots). There are two independent spawn points: inside the easternmost ice fishing hut and in the safe inside the cannery.
There is one bow spawn, at the door of the trailer near the end of Coastal Highway, but it currently can’t be obtained due to a terrain bug. The top of the collapsed lighthouse has a guaranteed flare gun (not on Interloper). On non-Interloper the Contemplation Lookout may spawn a bear-skin bedroll, and there’s a climbing rope on the hook to the right after opening the lookout’s door. Breaking some crates at the cannery yields canned sardines.
There is only one bear cave, a warm cave, with one guaranteed bear. There are two moose spawn points, in the open ground behind the washed-out trailer and around the birch forest in the northwest corner of the map. Neither has moose sign, so both may be independent, but this can’t currently be disproven. There are two ice fishing huts, neither with a door, catching two kinds of saltwater fish. There are many waterways, but cattails are mostly concentrated near the freshwater extending from the Ravine, and the total is small.
Fuel is generally scarce; near the cannery, where fuel is needed most, you can only survive by breaking crates, and only the cave leading to the Muskeg has small coal spawn points. Believe it or not, this map even has very few stones.
Other: the climbing spot connecting the Inlet’s upper and lower levels has no rope by default, so if you first enter Bleak Inlet on the lower level, you can’t explore the upper level in normal play. When exploring Bleak Inlet I recommend entering from the Ravine; after tying a climbing rope at the climbing spot at Contemplation Lookout, the upper and lower levels become connected.
The route from the Bleak Inlet cannery to the workshop is fairly hidden: you need to climb a climbing rope in cannery building 1 and then take quite a long detour to get there, and along the way you’ll trigger a wave of timberwolf spawns. If you don’t want to make that loop, you can try using the rock cache and a campfire to build a makeshift bridge. The cannery workshop has an entry restriction: there’s an electronic lock on the only path, and unlocking it requires the “communication report” in the radio control hut below Echo One Radio Tower. Once you have the report, interacting with the lock on an aurora night unlocks the door, and after that you don’t need an aurora night to enter. A normal wolf may spawn inside the workshop, so be prepared before entering; once killed it won’t respawn. On aurora nights the scattered live wires inside the workshop can also damage the player, so be careful. The cannery workshop has the map’s only ammunition workbench, which can melt scrap lead into bullet heads (requires fire), combine stump remover + sulfur powder + charcoal into gunpowder, and combine gunpowder + bullet head + the matching casing into a bullet.
Bleak Inlet has the only milling machine in the game, in the cannery workshop. On aurora nights it can repair the hunting rifle, revolver, hacksaw, hunting knife, improvised knife, hatchet and improvised hatchet, consuming only one piece of scrap metal each time. For the hacksaw and knives/axes, the repair success rate and restored amount are tied to the repair skill [Note 13], while the rifle and revolver’s repair success rate and restored amount are fixed at 50% and 40%, which looks like a bug. When the repair skill is 100, repairing the hacksaw and knives/axes can reach an astonishing 100% success rate and 99% restored amount (tools at 0% cannot be repaired).
Bleak Inlet is one of only two maps in Survival mode with timberwolves, currently the most threatening aggressive animal to players. However, this wolf’s behavior and how to handle it are outside the scope of this article.
Base recommendations: Cabin (cannery workers’ residential area) Rating 2/5
Pros: built-in fireplace, backed onto a bear cave, with an ice fishing hut outside. Near the sea so you can beachcomb, and the collapsed lighthouse not far away has the map’s only outdoor six-burner stove.
Cons: small space, few containers, you have to run to the cannery workshop for a workbench, and fuel is a constant headache. Bleak Inlet has bad weather and timberwolves are extremely dangerous.
Generally, just on the weather and the wolves alone, Bleak Inlet can be written off your long-term residence list; if you absolutely must find a place, it’s this. Timberwolves respawn slowly, so after clearing them you can survive here for a while, but the weather is just too miserable.
Cave (leading to Forlorn Muskeg) Rating 2/5
Same as the Muskeg chapter.
Notes Note 12: The game has three hidden skills: sharpening, gun cleaning and repair. Sharpening levels up by sharpening knives and axes with a whetstone and improves sharpening speed and the restored durability; gun cleaning levels up by cleaning rifles and revolvers with a rifle cleaning kit and improves cleaning speed and restored durability; repair levels up by repairing tools with a simple toolkit, advanced toolkit or the milling machine, and improves the repair success rate and the durability restored when using the milling machine.
Ash Canyon & Map 11
 []O`OLO_7.png]Ash Canyon, whose traditional Chinese name is identical, one of only two maps with the same simplified and traditional names, commonly called Map 11 & the Canyon, Ash Valley.
Geography: at the far northeast corner of Great Bear Island. The terrain is divided into multiple layers by altitude; the lowest layer is a river valley formed by waterways with lots of burnt trees, and it gradually becomes normal going up. Crossing layers requires climbing ropes, and the upper layers are connected by wooden suspension bridges, making the routes on this map very three-dimensional.
Climate: base temperatures slightly lower than Crystal Lake on Timberwolf Mountain, blizzard probability slightly higher. You can think of it as a degraded version of the mountain.
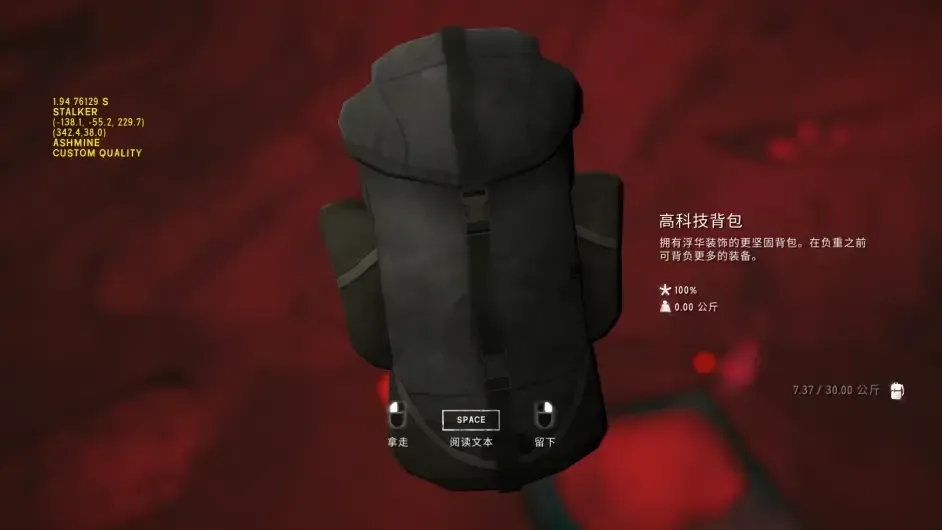
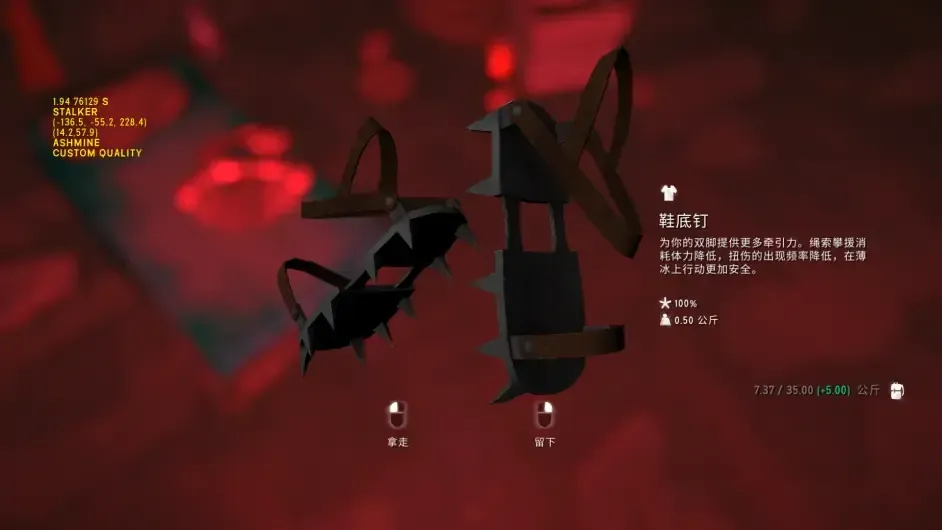
Important supplies: the canyon has the game’s only technical backpack and crampons, fixed to spawn in the Gold Mine at the far northwest corner of the map. The technical backpack permanently increases max and min carry weight by 5kg and changes the backpack icon and sound. The crampons reduce stamina consumption when climbing ropes, lower the sprain chance when walking on slopes, and extend the time you can move on thin ice (by about 1 second). Currently the crampons still can’t be repaired and are an unrecoverable consumable (v1.94). Although durability drops very slowly (0.02% per day when stored, 0.2% per day when worn as an outer layer), they lose some durability when you take fall damage, struggle, get burned or get bitten by timberwolves while wearing them, so it’s best to put them on only when needed. (Note: the crampons can now be repaired)
Two hunting rifles are guaranteed. One between High Meadow and Angler’s Den, on a log on a small platform; the other inside the Gold Mine. There are also two independent spawn points: Foreman’s Retreat and Angler’s Den.
A revolver is guaranteed at Homesteader’s Respite. There is one more independent spawn point: on the hand of the corpse by the waterfall west of the mining camp.
There are two independent bow spawn points: beside the campfire on the road from Long Falls Cave to Wolfjaw Overlook, and beside the campfire below the second of the three ropes behind the Gold Mine.
A flare gun may spawn beside the campfire on the small hill north of Pillar’s Footrest, but with no ammunition.
There is one bear cave, at Miner’s Folly. Although it’s just a stone corridor, it actually counts as a warm cave, with one guaranteed bear. There are two moose points, at Bitter Marsh and below the three ropes behind the Gold Mine. Neither has moose sign, so both may be independent, but this can’t currently be disproven. There is one ice fishing hut, at Bitter Marsh, catching two kinds of freshwater fish. Plant resources are rich, with possibly the most birch sapling spawns in the game, and cattails can be gathered near most waterways.
Fuel isn’t lacking: Long Falls Cave, the Gold Mine and the cave leading to Timberwolf Mountain all have a number of coal spawn points. On the west side of the map, from the three ropes to Pillar’s Footrest, there are lots of birch bark spawns.
On Interloper, Ash Canyon is guaranteed to have three boxes of matches, at Angler’s Den, Homesteader’s Respite and the Gold Mine. A stim is guaranteed beside the road from Wolfjaw Overlook to the Gold Mine.
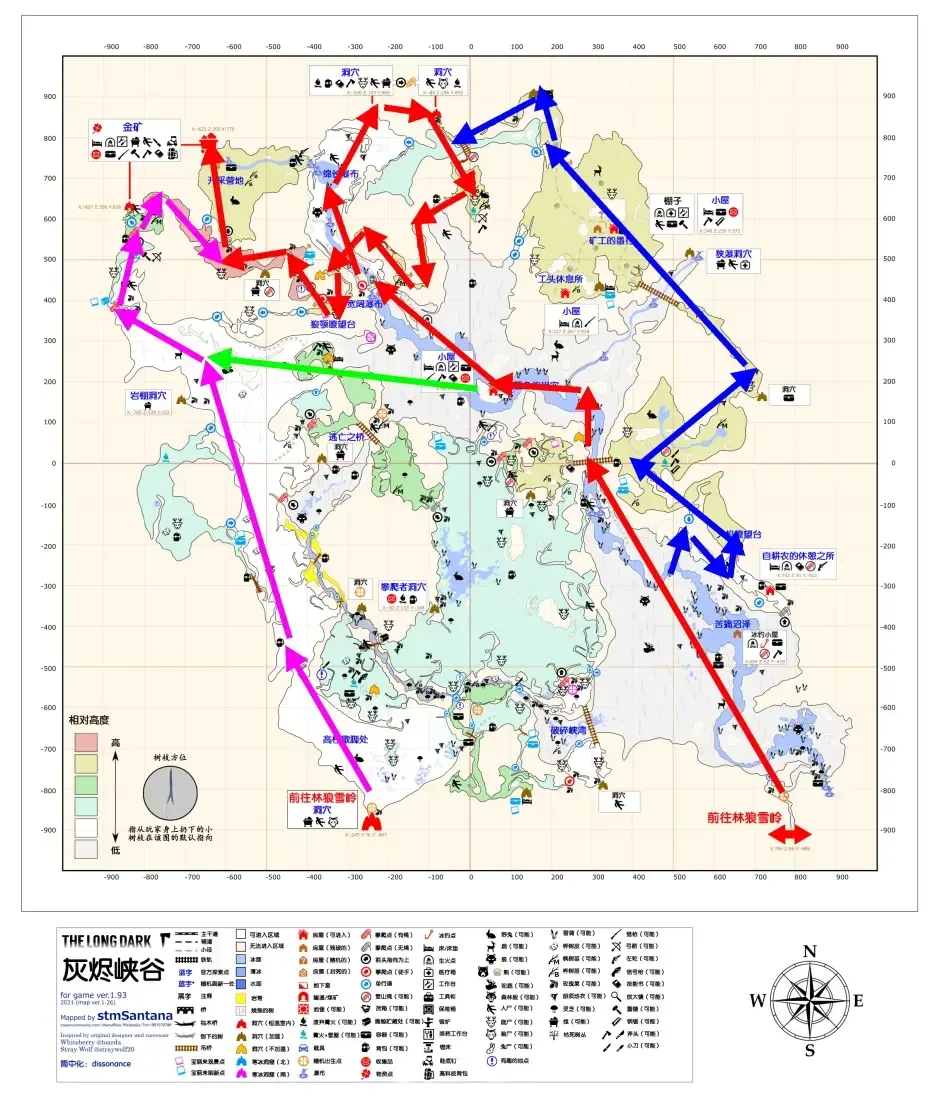
Other: there are many routes to the backpack, each with its own merits. The red route is the plainest: a bit longer and with more wolves on the way, but at least you won’t get lost. It has only one short climbing rope inside Long Falls Cave, costing just a little stamina. The blue route requires slope-climbing up to the homesteader’s place and guarantees a pile of sprains. But after climbing up to the Flame Lookout it’s basically smooth going — apart from watching out when passing the bear cave, the rest of the time is absolutely safe. The purple route goes into the canyon from the cave at Deer Clearing; cost-wise it inherently uses one more climbing rope’s worth of stamina than entering from Echo Canyon, but you won’t meet any wolves on the route — though watch the moose point below the three ropes. There are many ways to climb the three ropes; if you don’t want to spend time resting midway, I recommend bringing at least two energy drinks or a stim to handle the stamina cost of three climbing ropes. The green route switches between the red and purple routes; the second half of these two can be swapped, so pick whichever you prefer.
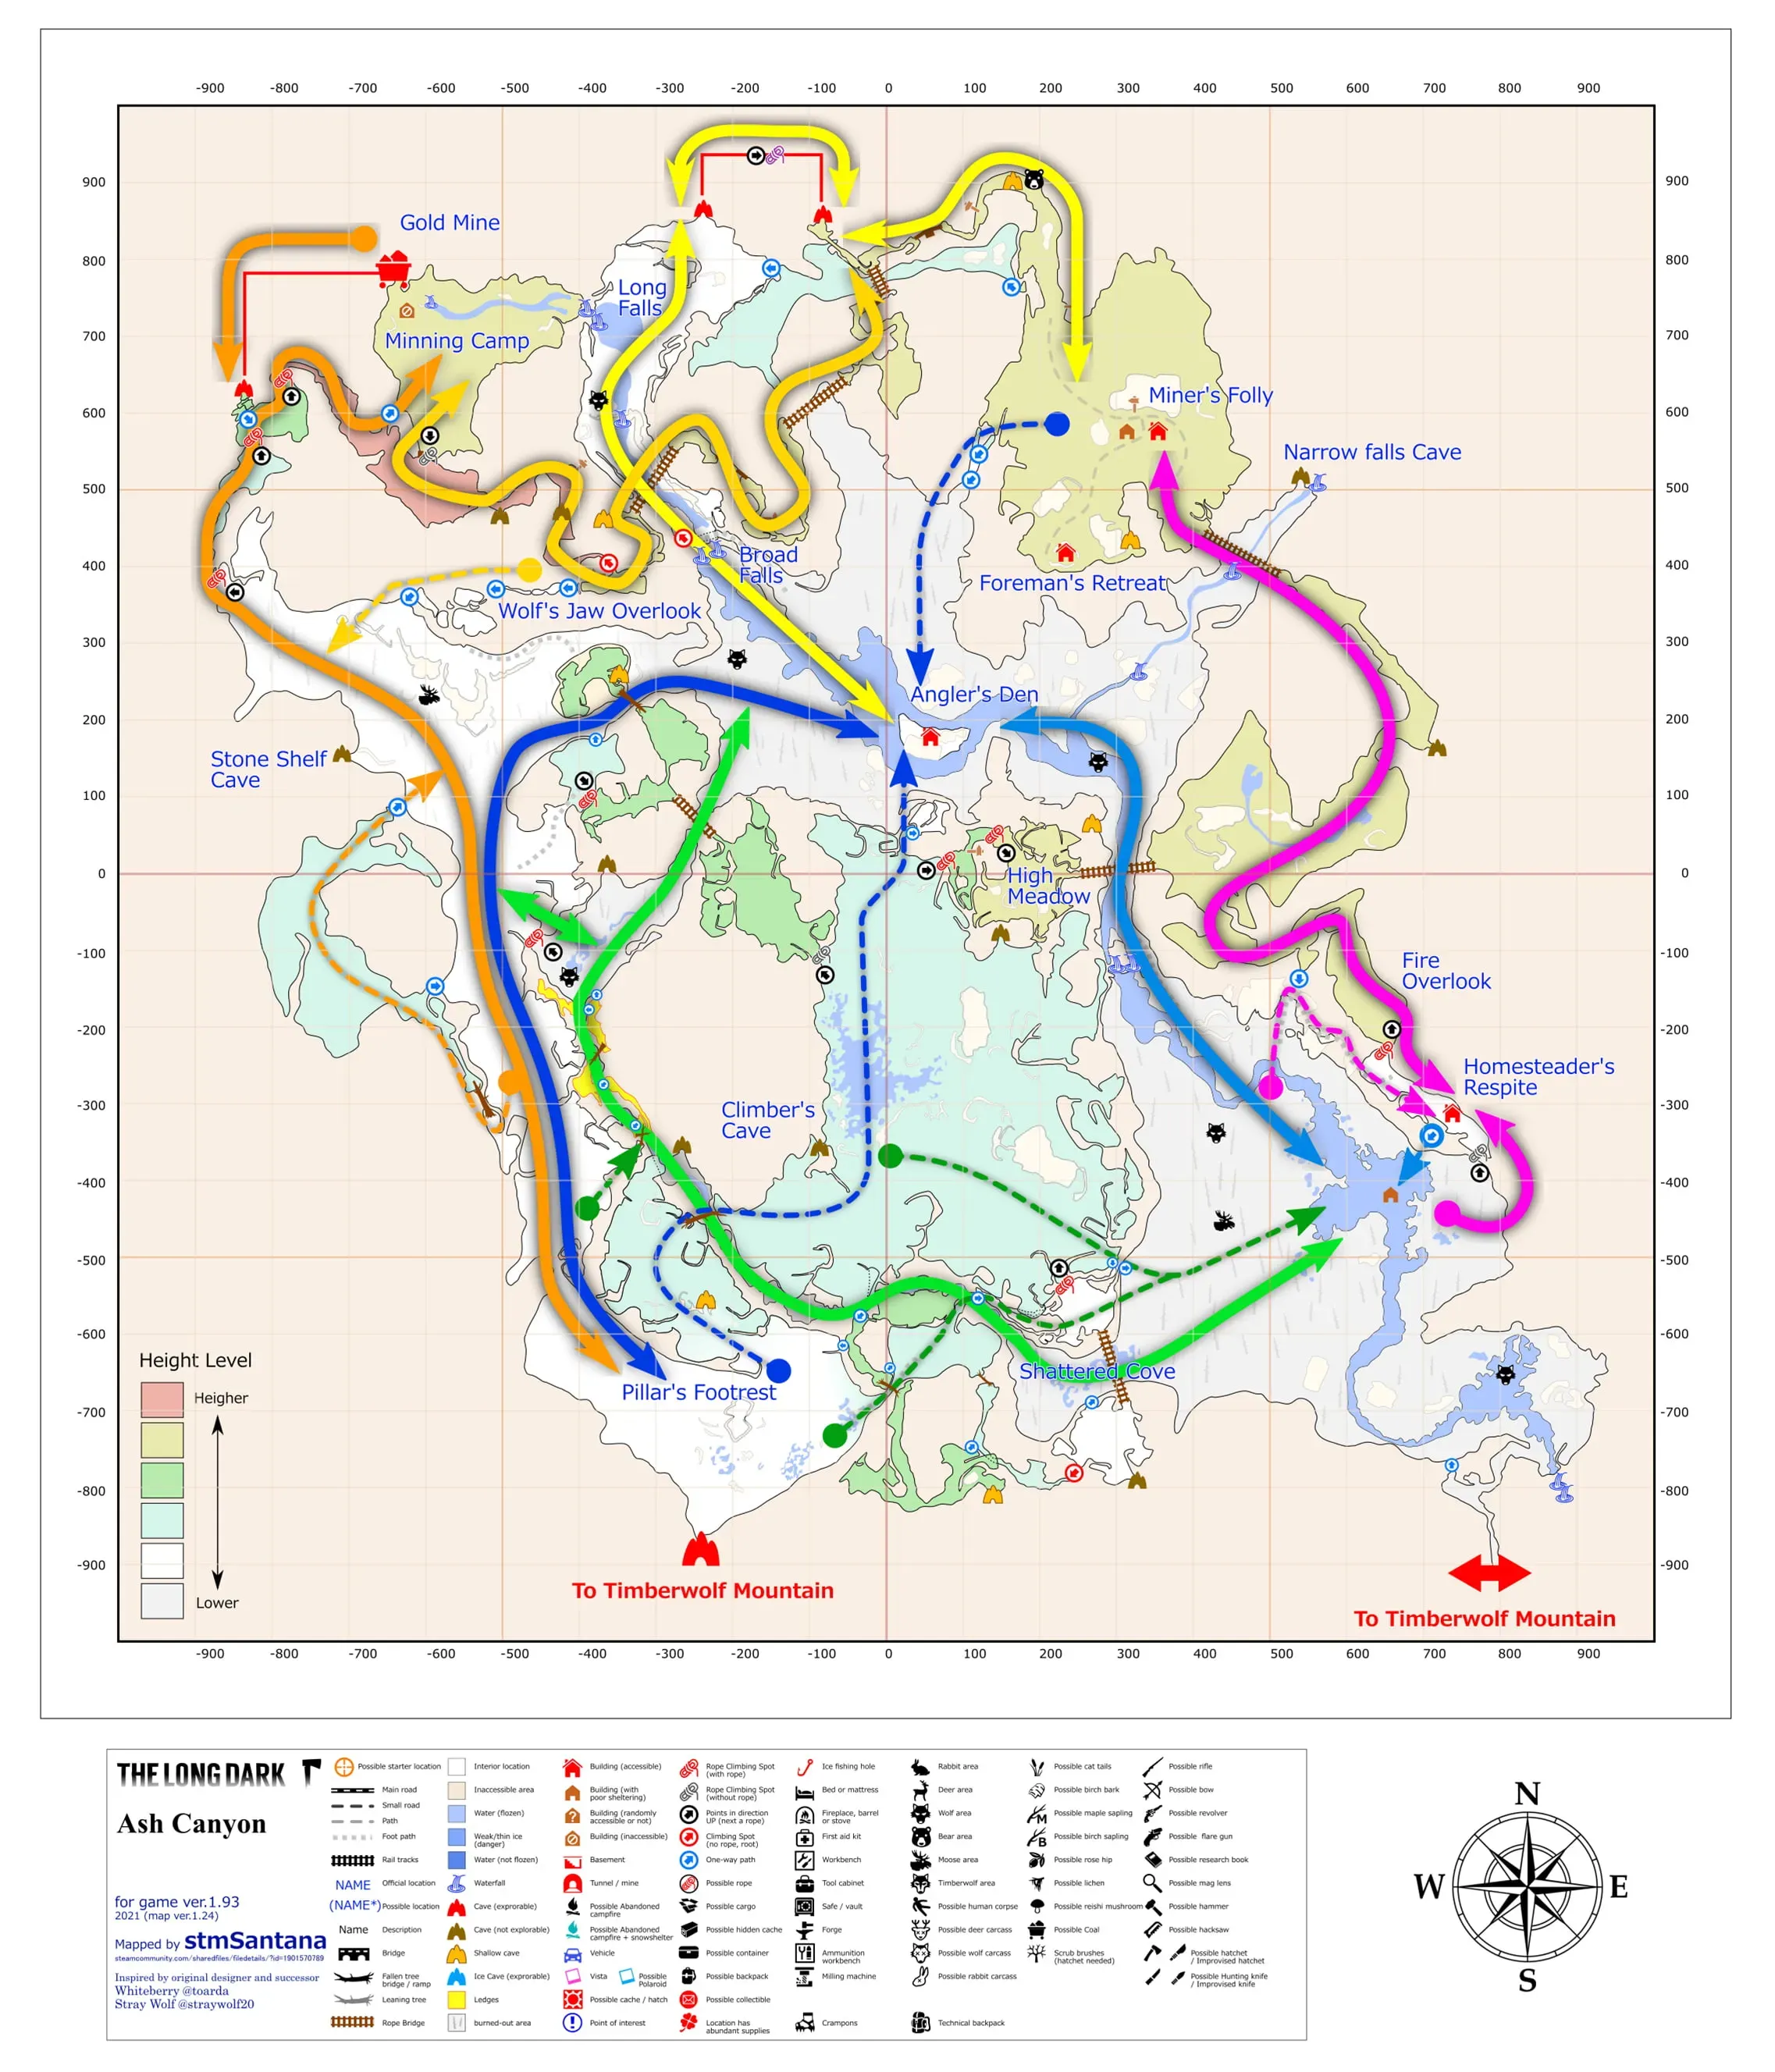 Wolf distribution on this map is very concentrated, existing only in the low-altitude areas around Bitter Marsh, Shattered Fjord, Long Falls and Angler’s Den. Once you’ve climbed any of the climbing ropes, you’ll never be bothered by wolves again.
The bottom of the canyon has large swathes of charred tree trunks, permanently surrounded by a special filter that makes it look hazy gray, not even clearing on sunny days.
The canyon has many wooden suspension bridges swaying in the wind. They look scary, but they only sway themselves and don’t move the character’s coordinates. The safe way to cross a bridge is to walk straight along the center line; unless you walk out through a gap in the rope yourself, falling off is very hard. Also, dropping items on a bridge is disabled, but you can still throw meat out using the decoy hotkey.
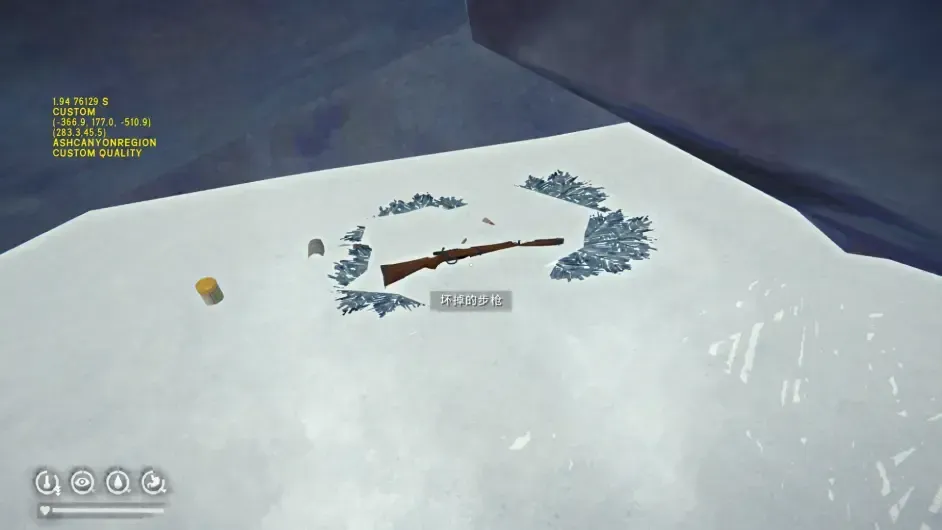
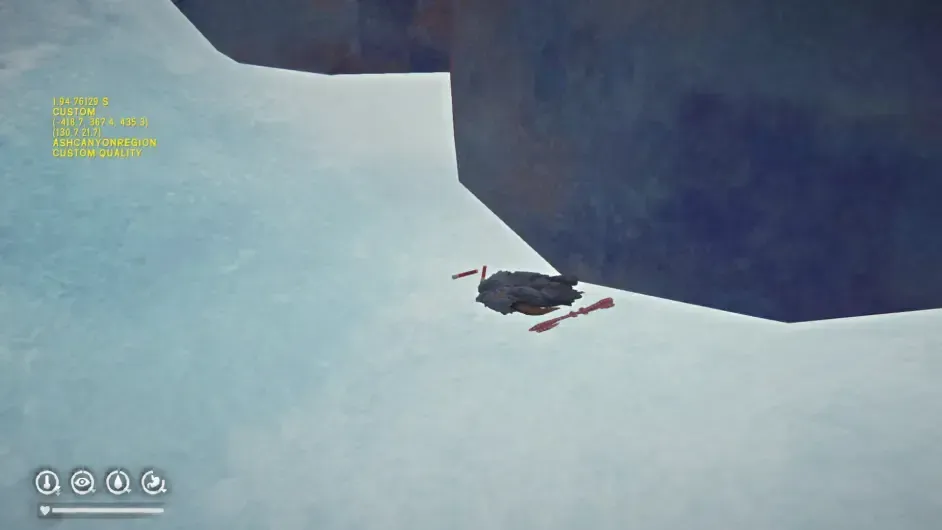
Some items that may be cut story content or easter eggs are marked as “point of interest” on the map. The two most representative ones are the “broken rifle” and the bearskin coat, which has a chance to spawn even on Interloper. The broken rifle is just a name with an item label and can’t be interacted with when clicked, while the bearskin coat can actually be picked up and worn.
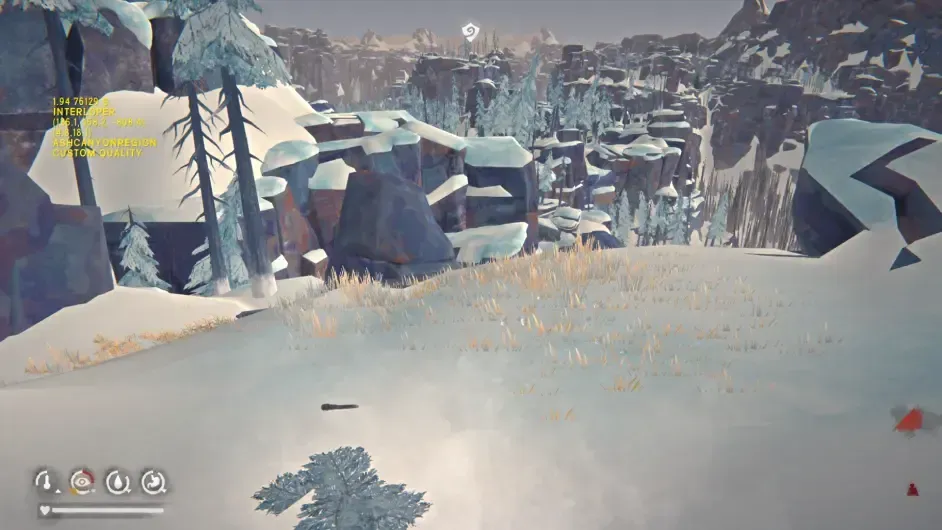
The canyon has some very strange warm spots. Although they look like they couldn’t possibly be warm, they really do get temperature bonuses that scale with decay. The most representative is the inner layer of the shed at Miner’s Folly, which directly makes it the map’s only warmed workbench: crafting here means you don’t have to worry about temperature and can also clear cabin fever risk.
The absurd warm spots:
The warmed workbench: (the only one on all of Great Bear Island)
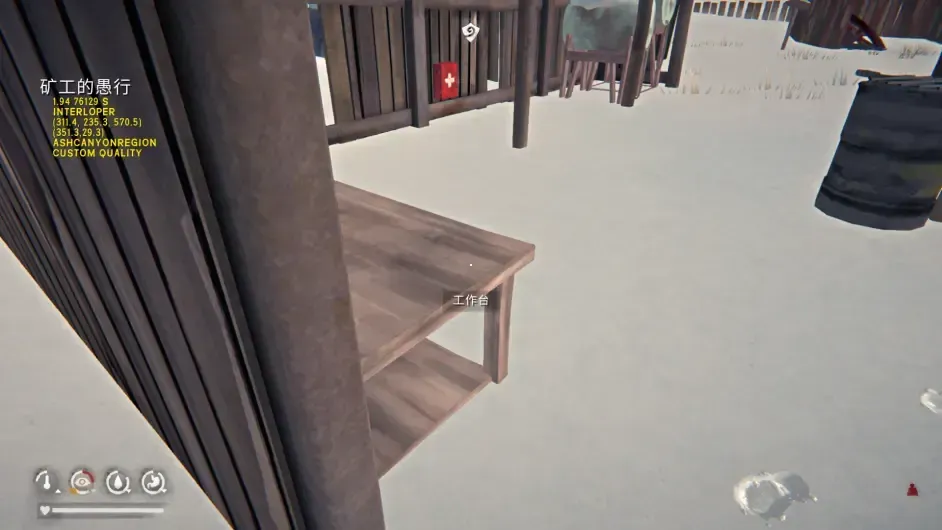
This map has one clearly inappropriate translation: the English original is Angler’s Den, the simplified Chinese is “anglerfish nest”, and the traditional Chinese is “the angler’s nest”, which is a bit more reliable than the simplified one.
Although Ash Canyon connects to Timberwolf Mountain, if you take the direct passage at Echo Canyon as the reference, the map just doesn’t line up however you place it. So either the canyon rotates 90° clockwise or the mountain rotates 90° counterclockwise — someone has to get wrecked.
Base recommendations: Miner’s Folly Rating 4/5
Pros: two very close buildings that add up to decent space, with a built-in fireplace and a burn barrel outside, plus the unique warmed workbench. Whether you’re making clothes, replenishing arrows and snares, or clearing cabin fever, it’s all convenient. Close to the bear cave so killing the bear is easy, rabbit and deer spawns are nearby, and the whole activity area has no wolf spawns.
Cons: fairly remote and isolated. If you live here long term, hauling cloth and scrap metal over takes a lot of effort, not to mention needing to regularly go to Bleak Inlet to repair knives or forge new ones. It’s a bit far from fishing spots and there isn’t enough food to eat your fill all day; firewood isn’t exactly scarce but isn’t plentiful either, and stockpiling more requires crossing the bridges to gather. The weather isn’t ideal either.
A warmed workbench + no wolves + next to a bear cave makes for a very excellent base, but unfortunately the map is too remote, which lowers its ceiling.
Angler’s Den Rating 2/5
Pros: central location, built-in workbench and single-burner stove, a burn barrel not far from the door, and it’s not far from either of the two moose points.
Cons: small, few containers, no windows so at night you can’t even find the bed. Surrounded by wolves, and although it’s central, nowhere is actually close, which combined with the canyon’s lousy weather is pretty miserable.
It’s the kind of temporary base with a locational advantage: you can gather the upper-layer supplies here and then try to haul them out of the canyon. Not recommended for long stays.
Blackrock & Map 12
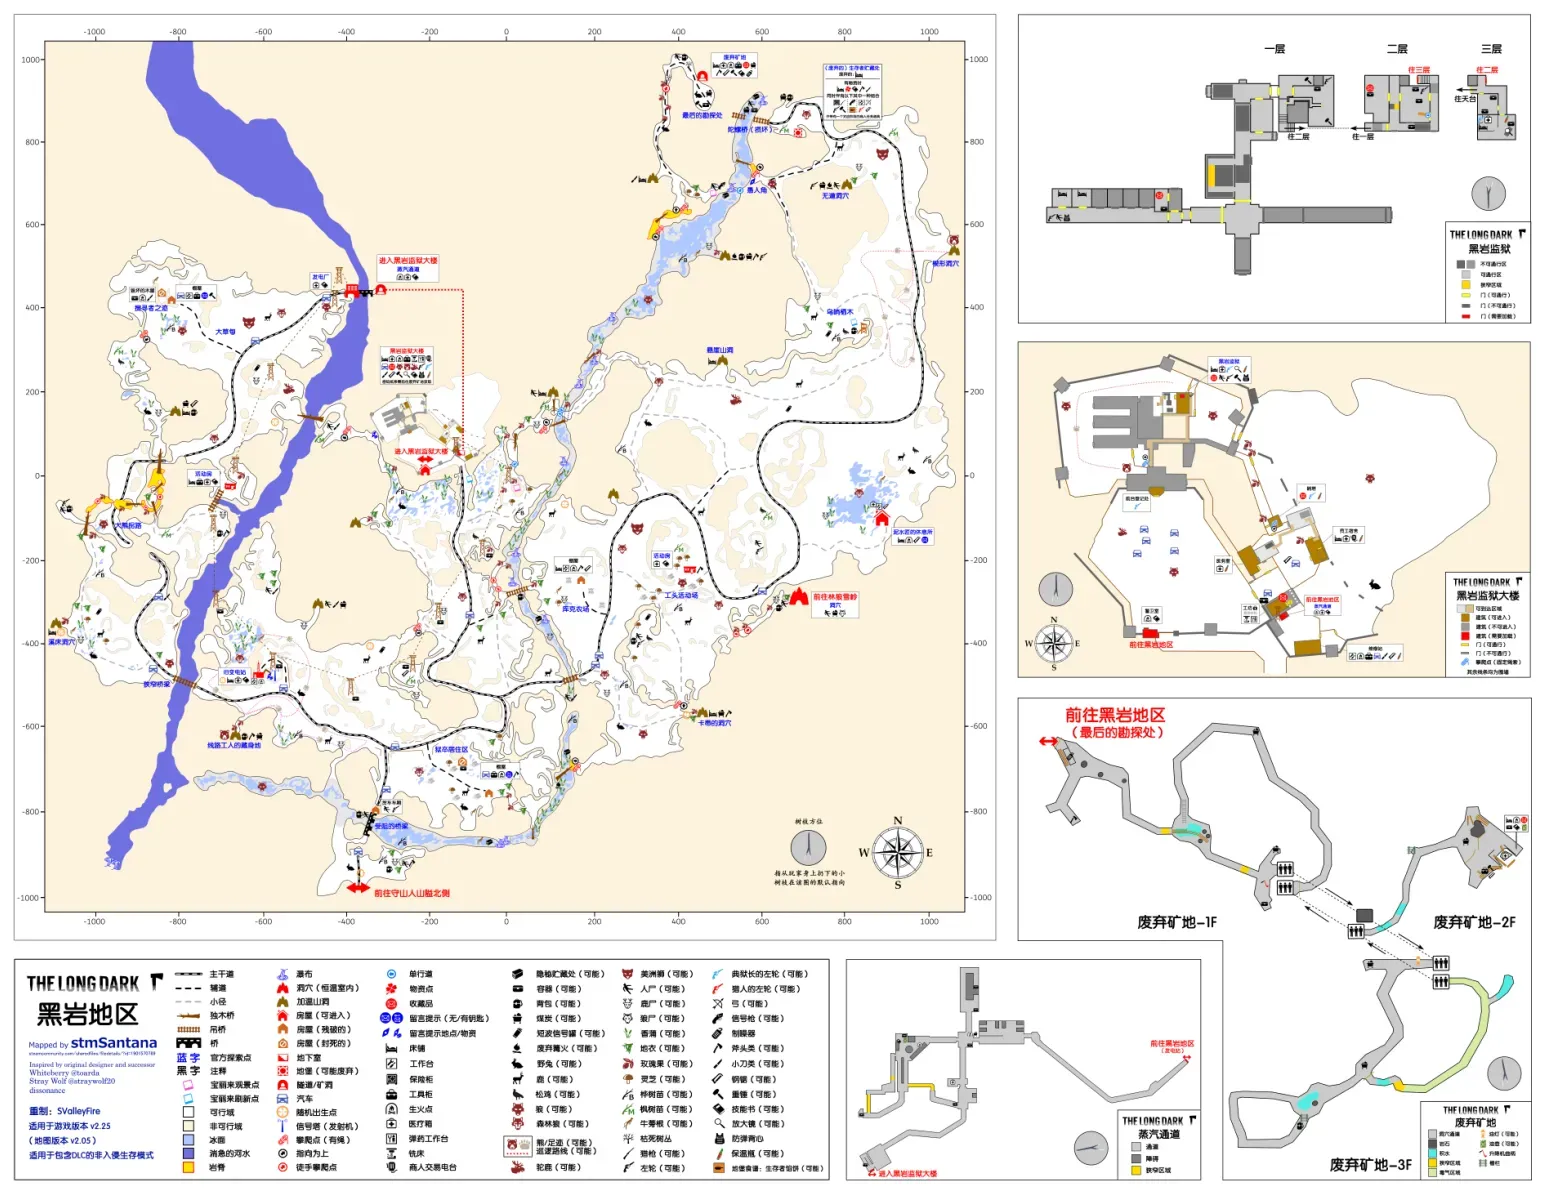
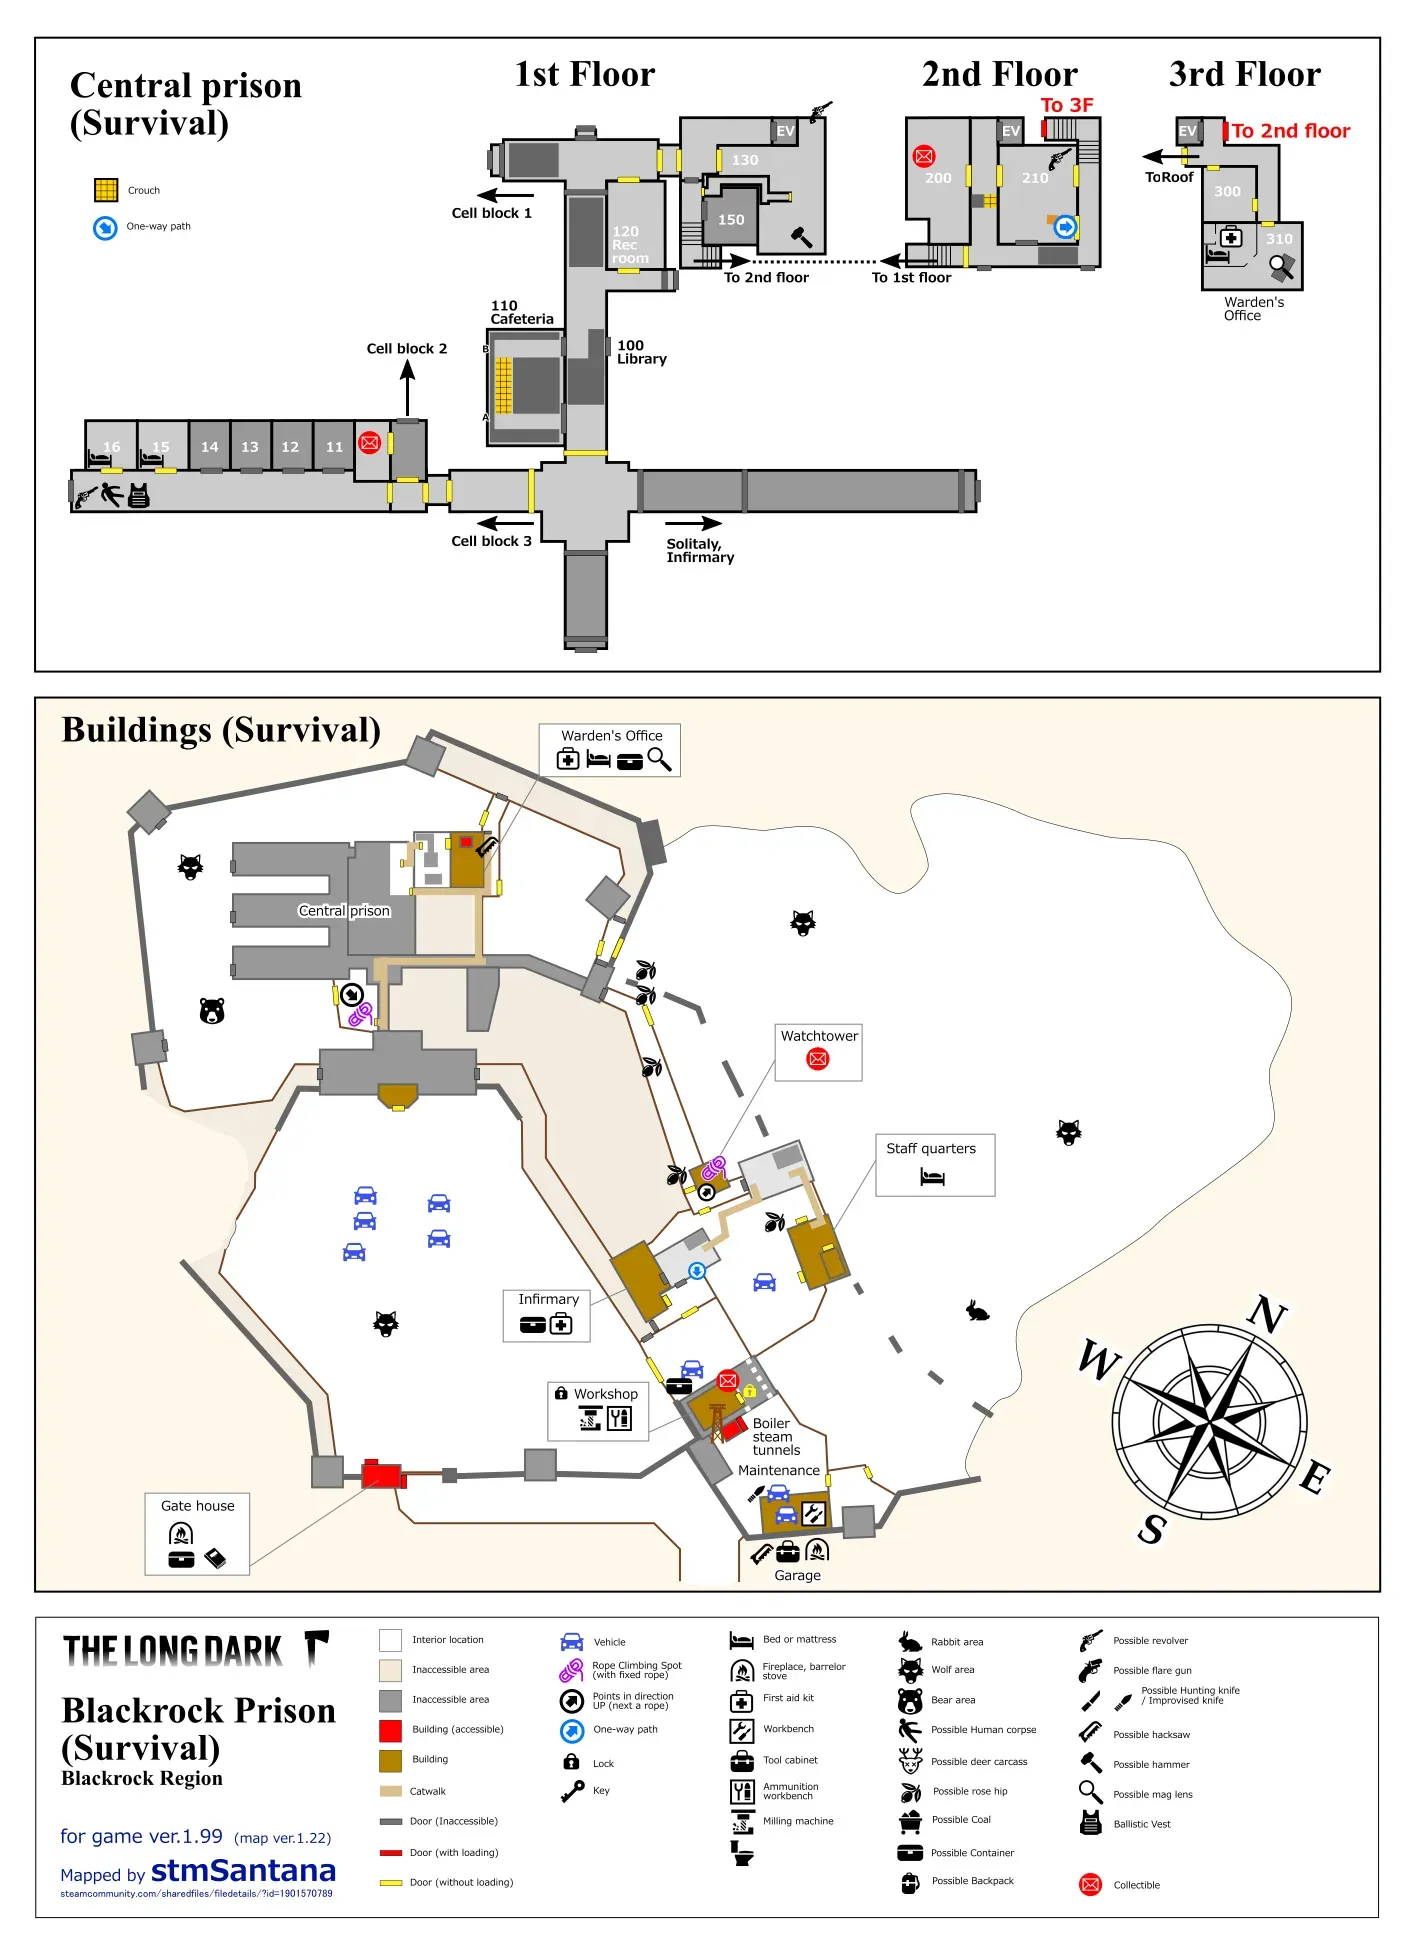 Interior map of the prison
Blackrock Prison is generally north of Great Bear Island, encircled by Mountain Town, Pleasant Valley and Timberwolf Mountain, and can currently be reached via Pleasant Valley and Timberwolf Mountain. The Timberwolf Mountain connection is an indoor cave northwest of Andre’s Peak, leading directly to below the bricklayer’s retreat. The Pleasant Valley connection is Long Curve; after passing through two long connector maps, the southern and northern sides of the Keeper’s Pass, you reach the other side of the blocked road in the southern part of the Blackrock map.
Transfer Pass & DLC map
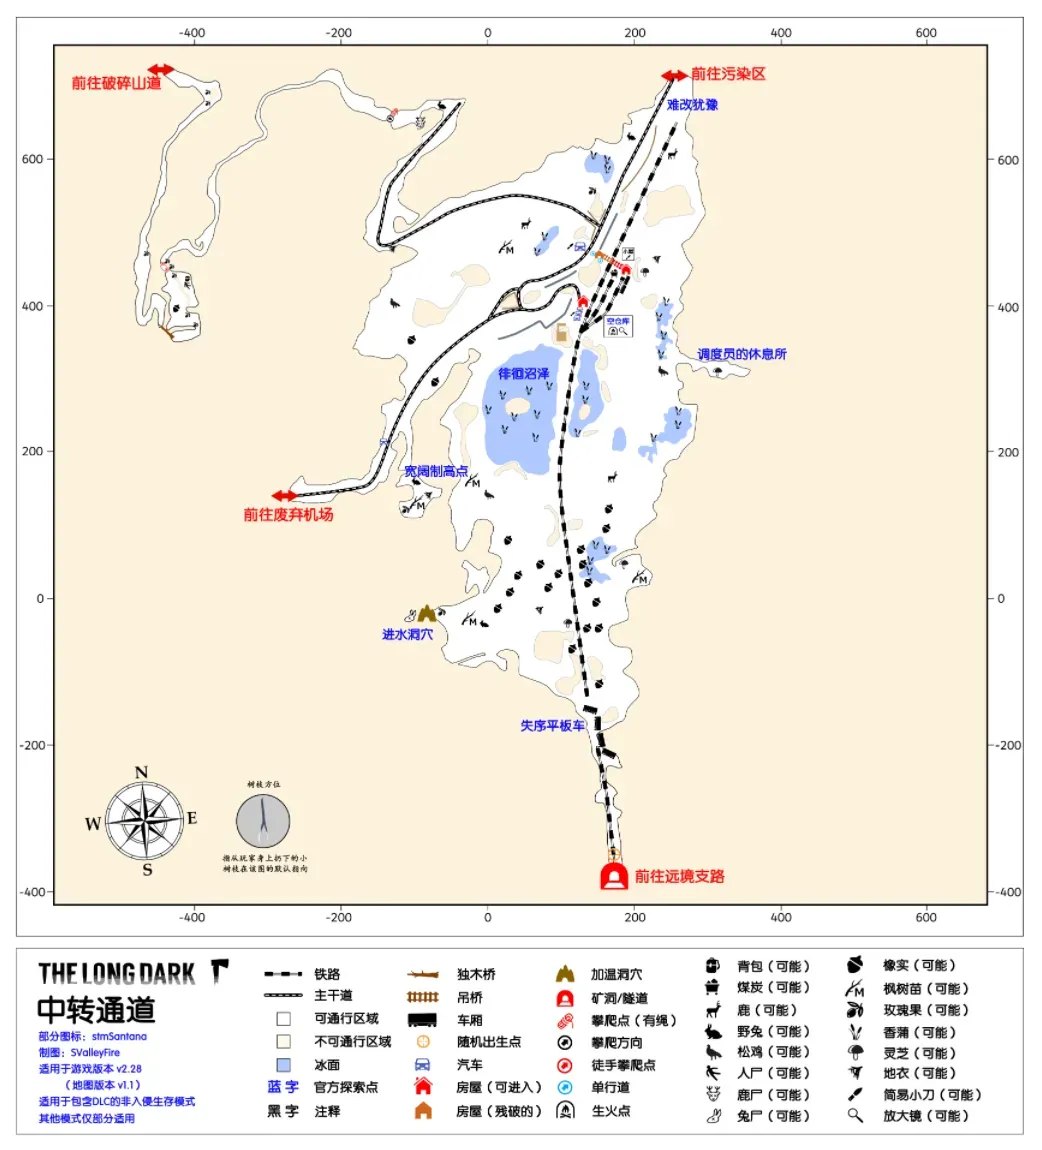
Forsaken Airfield & DLC map
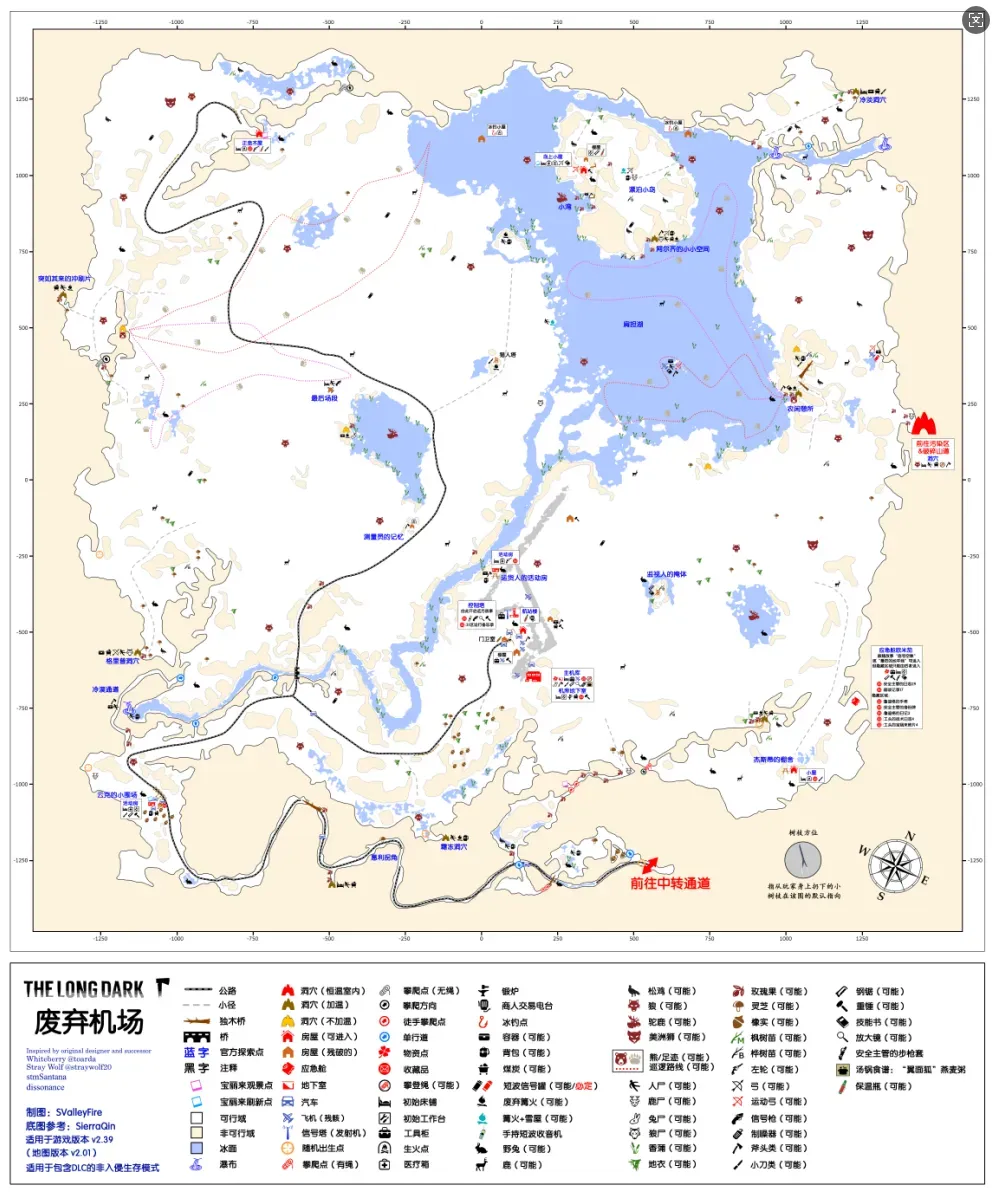
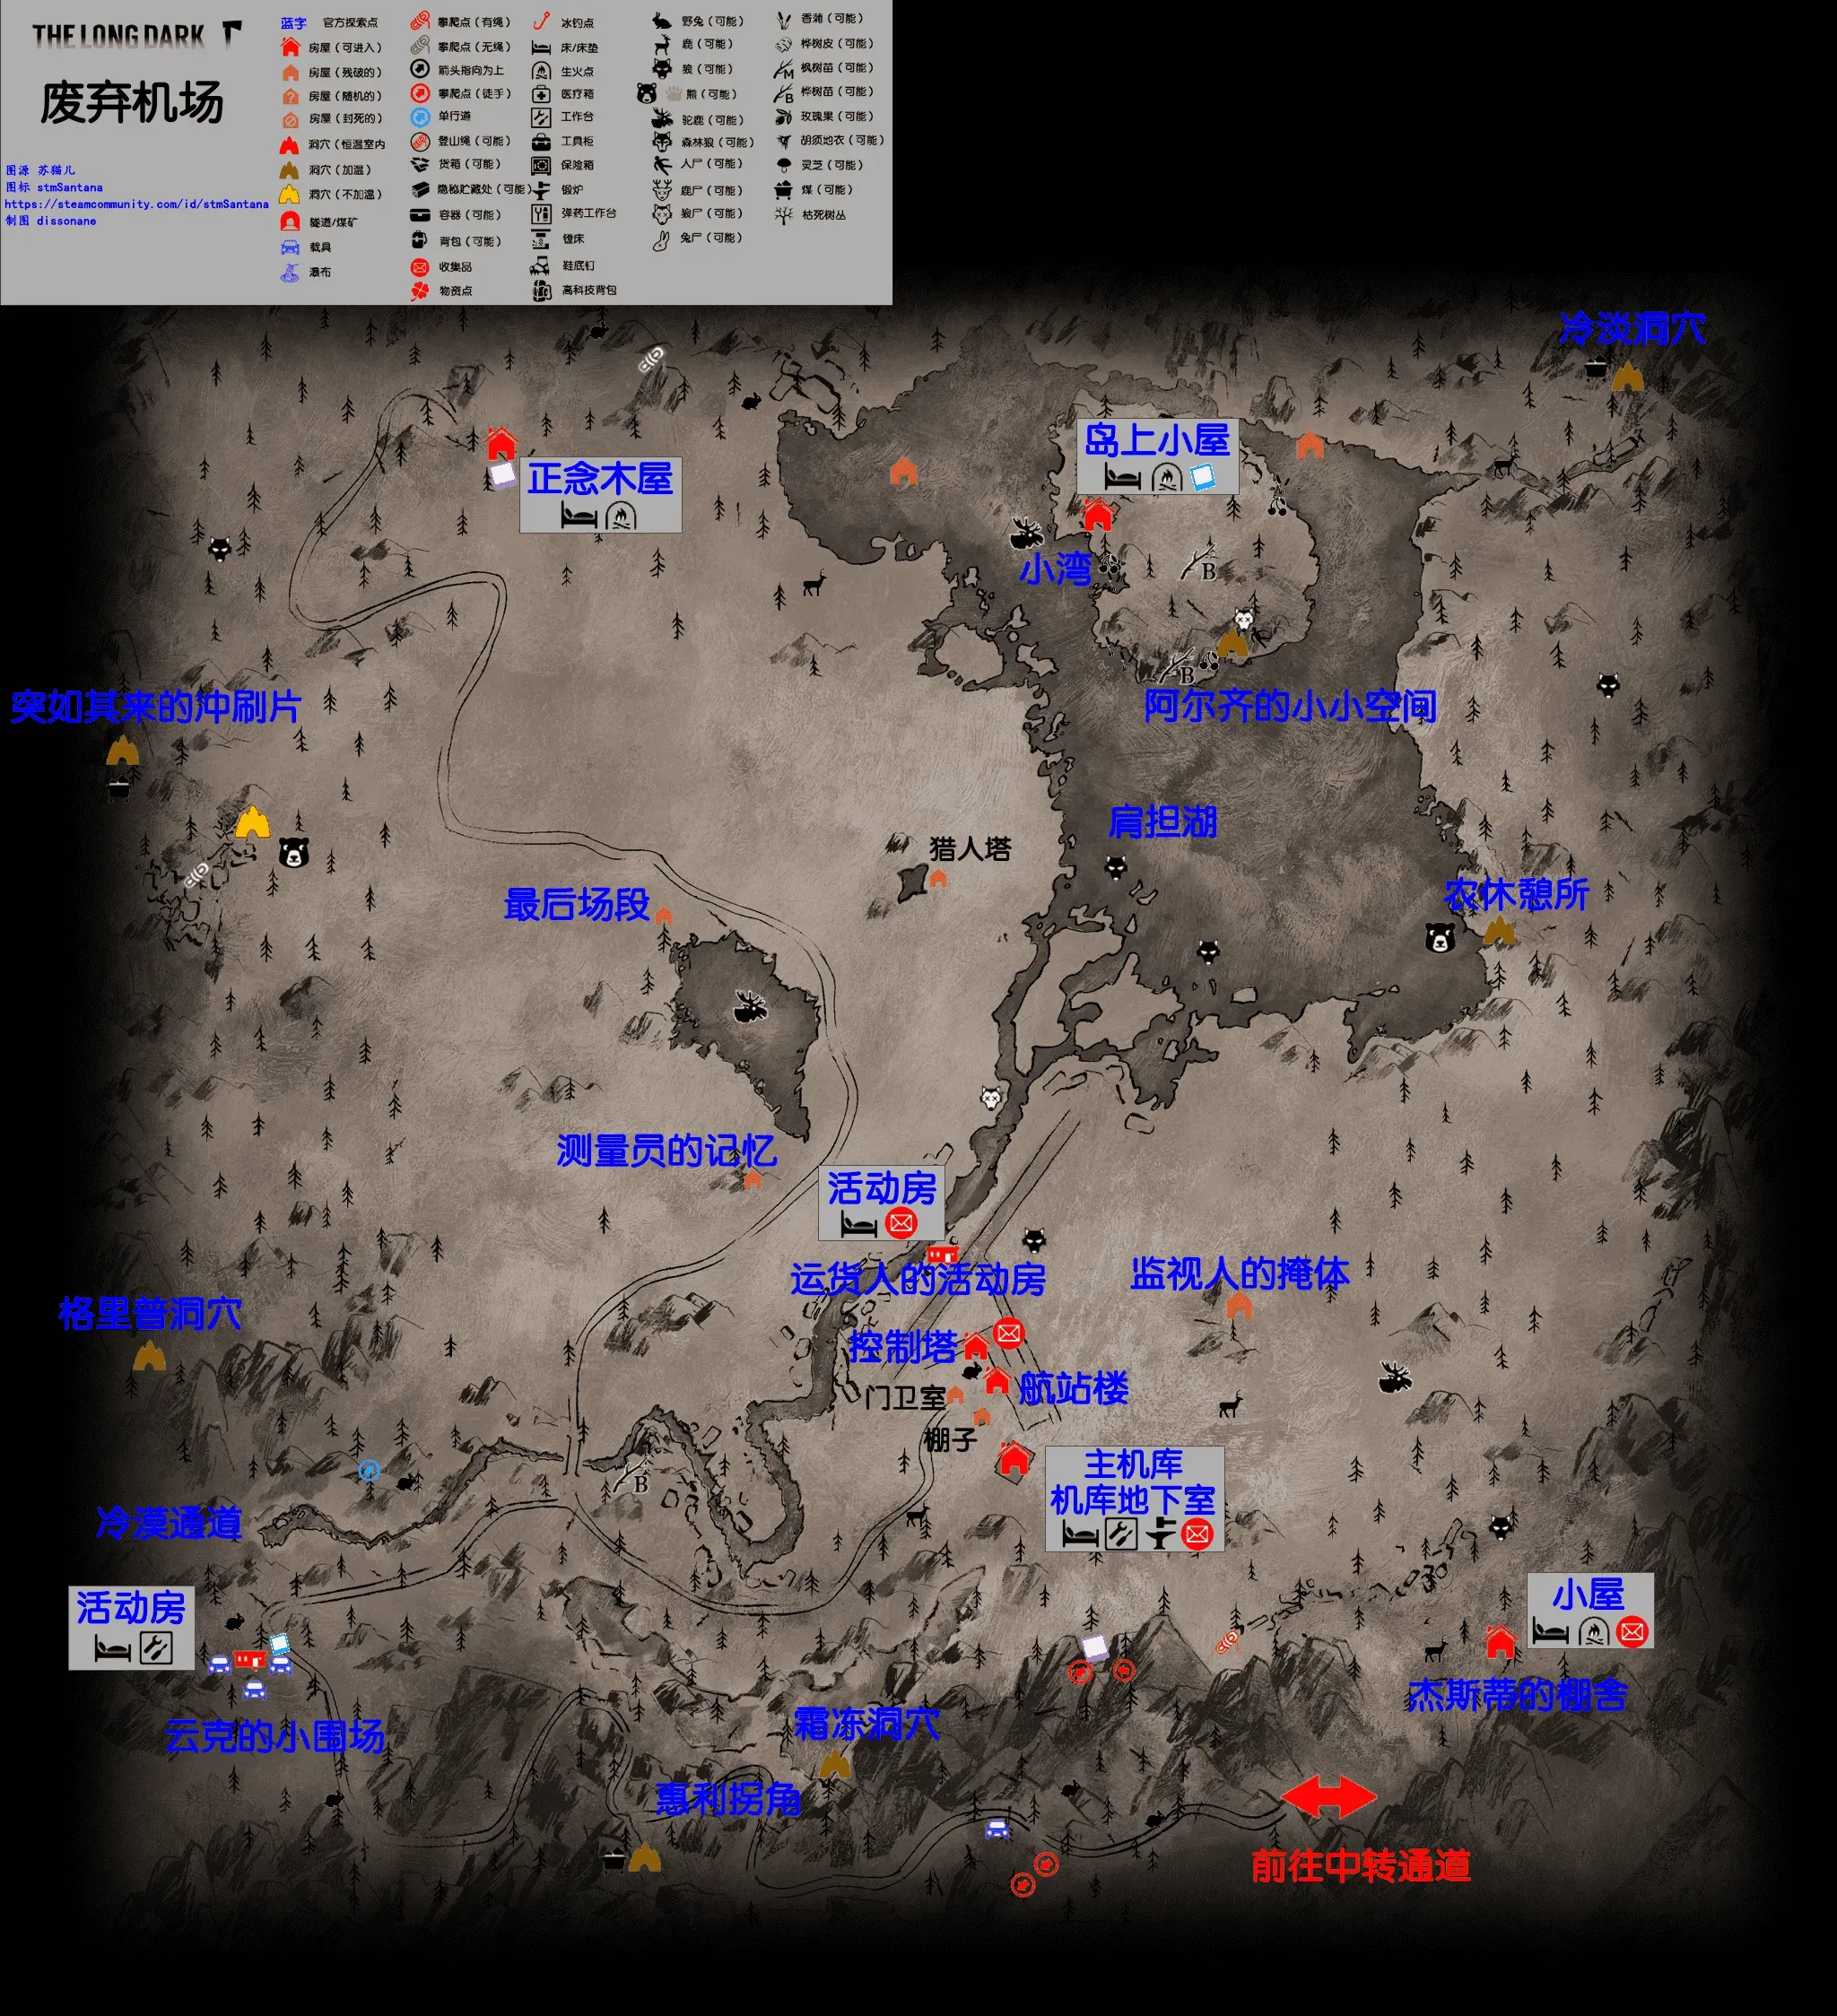
Zone of Contamination & DLC map
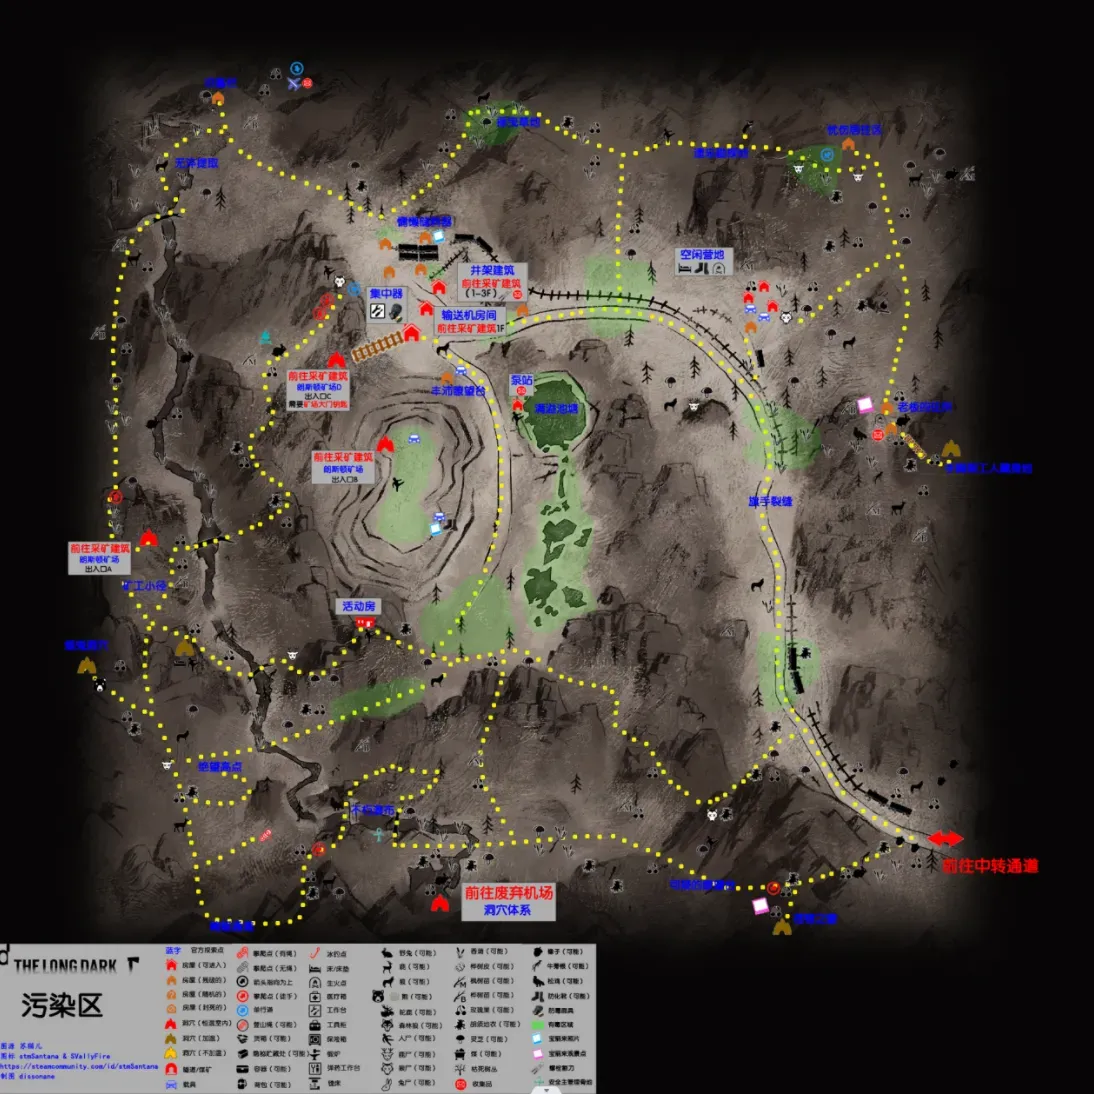
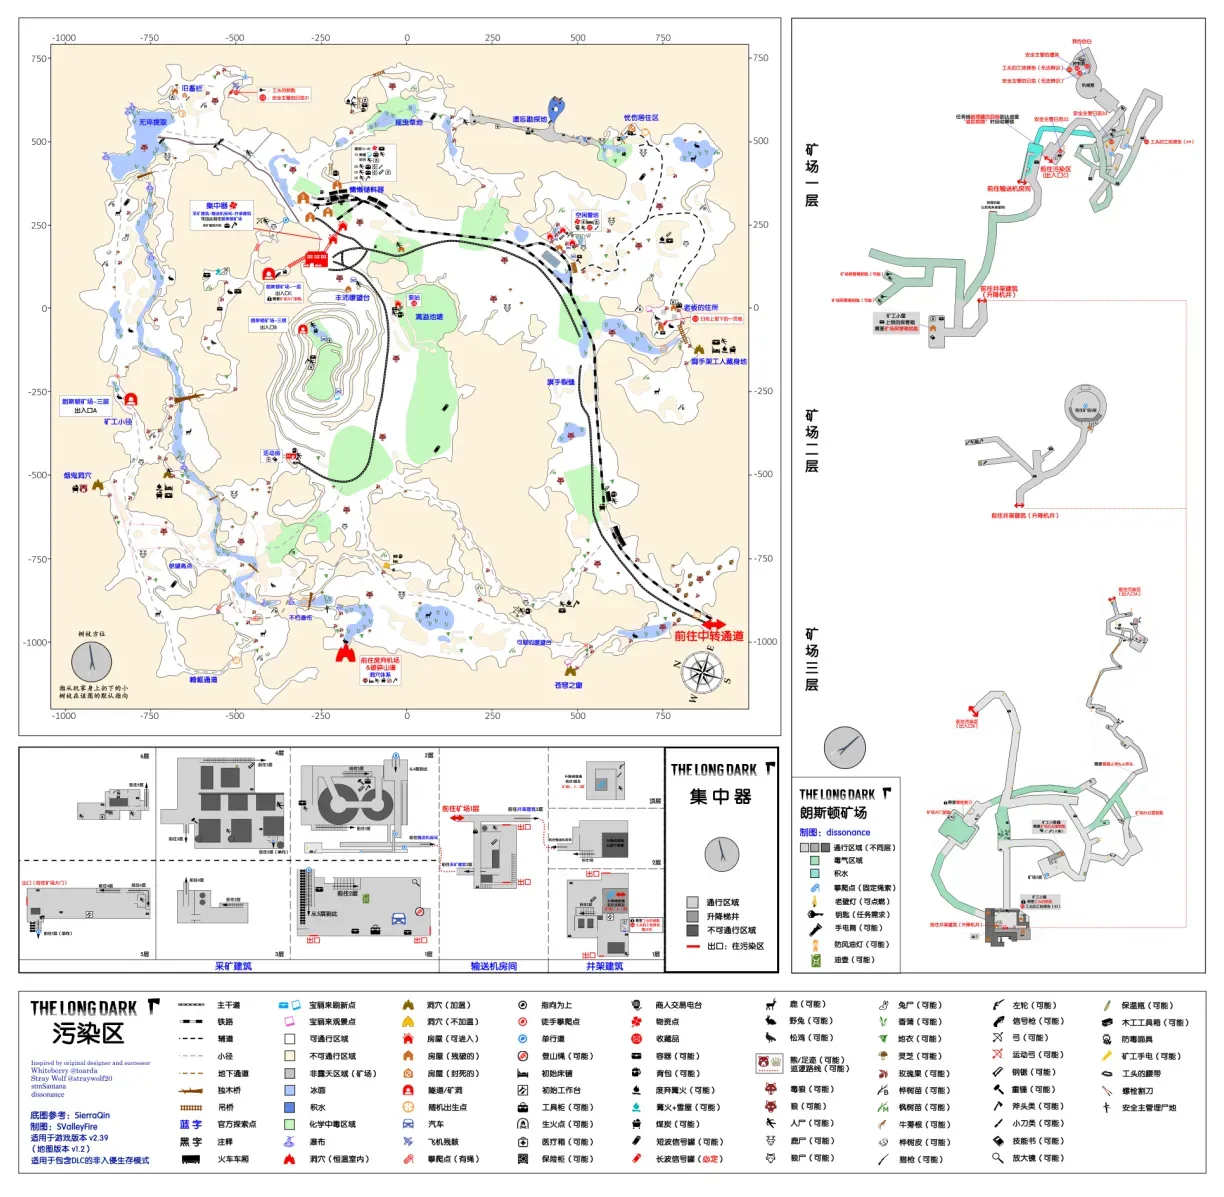
Sundered Pass & DLC map
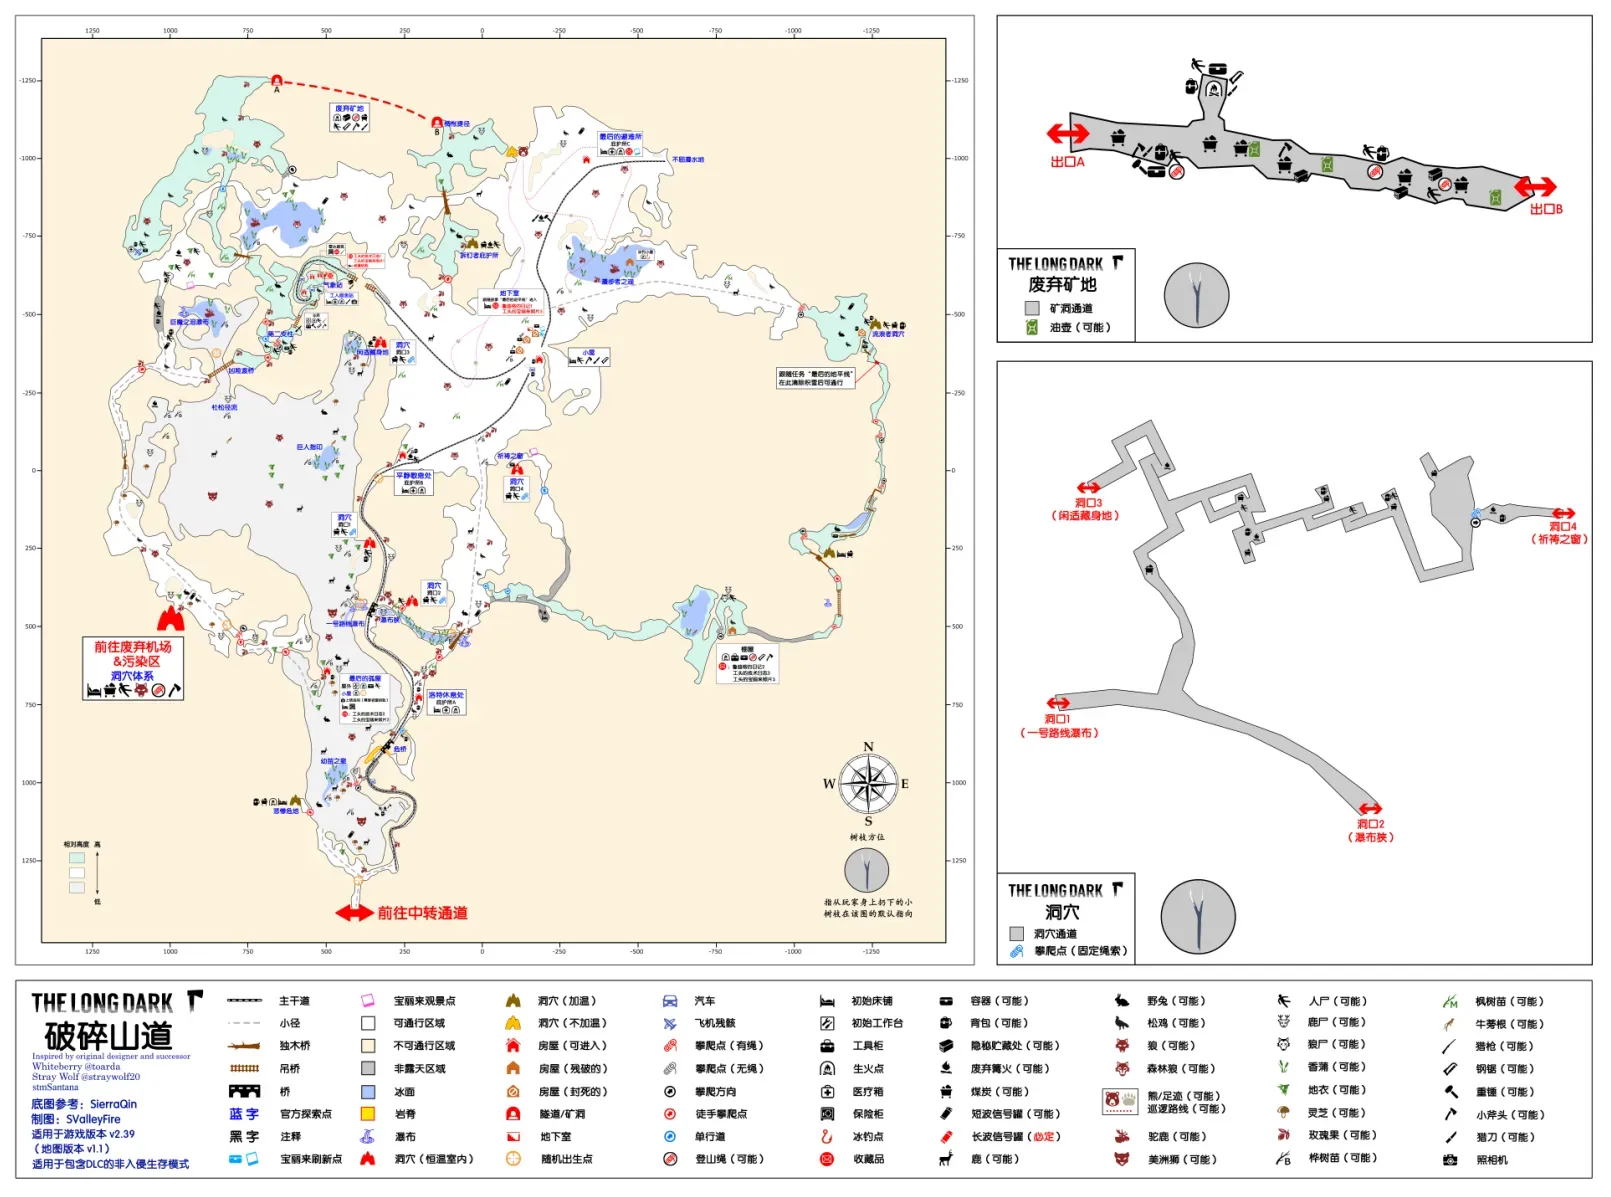
Carter Hydro Dam & Environs / Winding River (connector map)
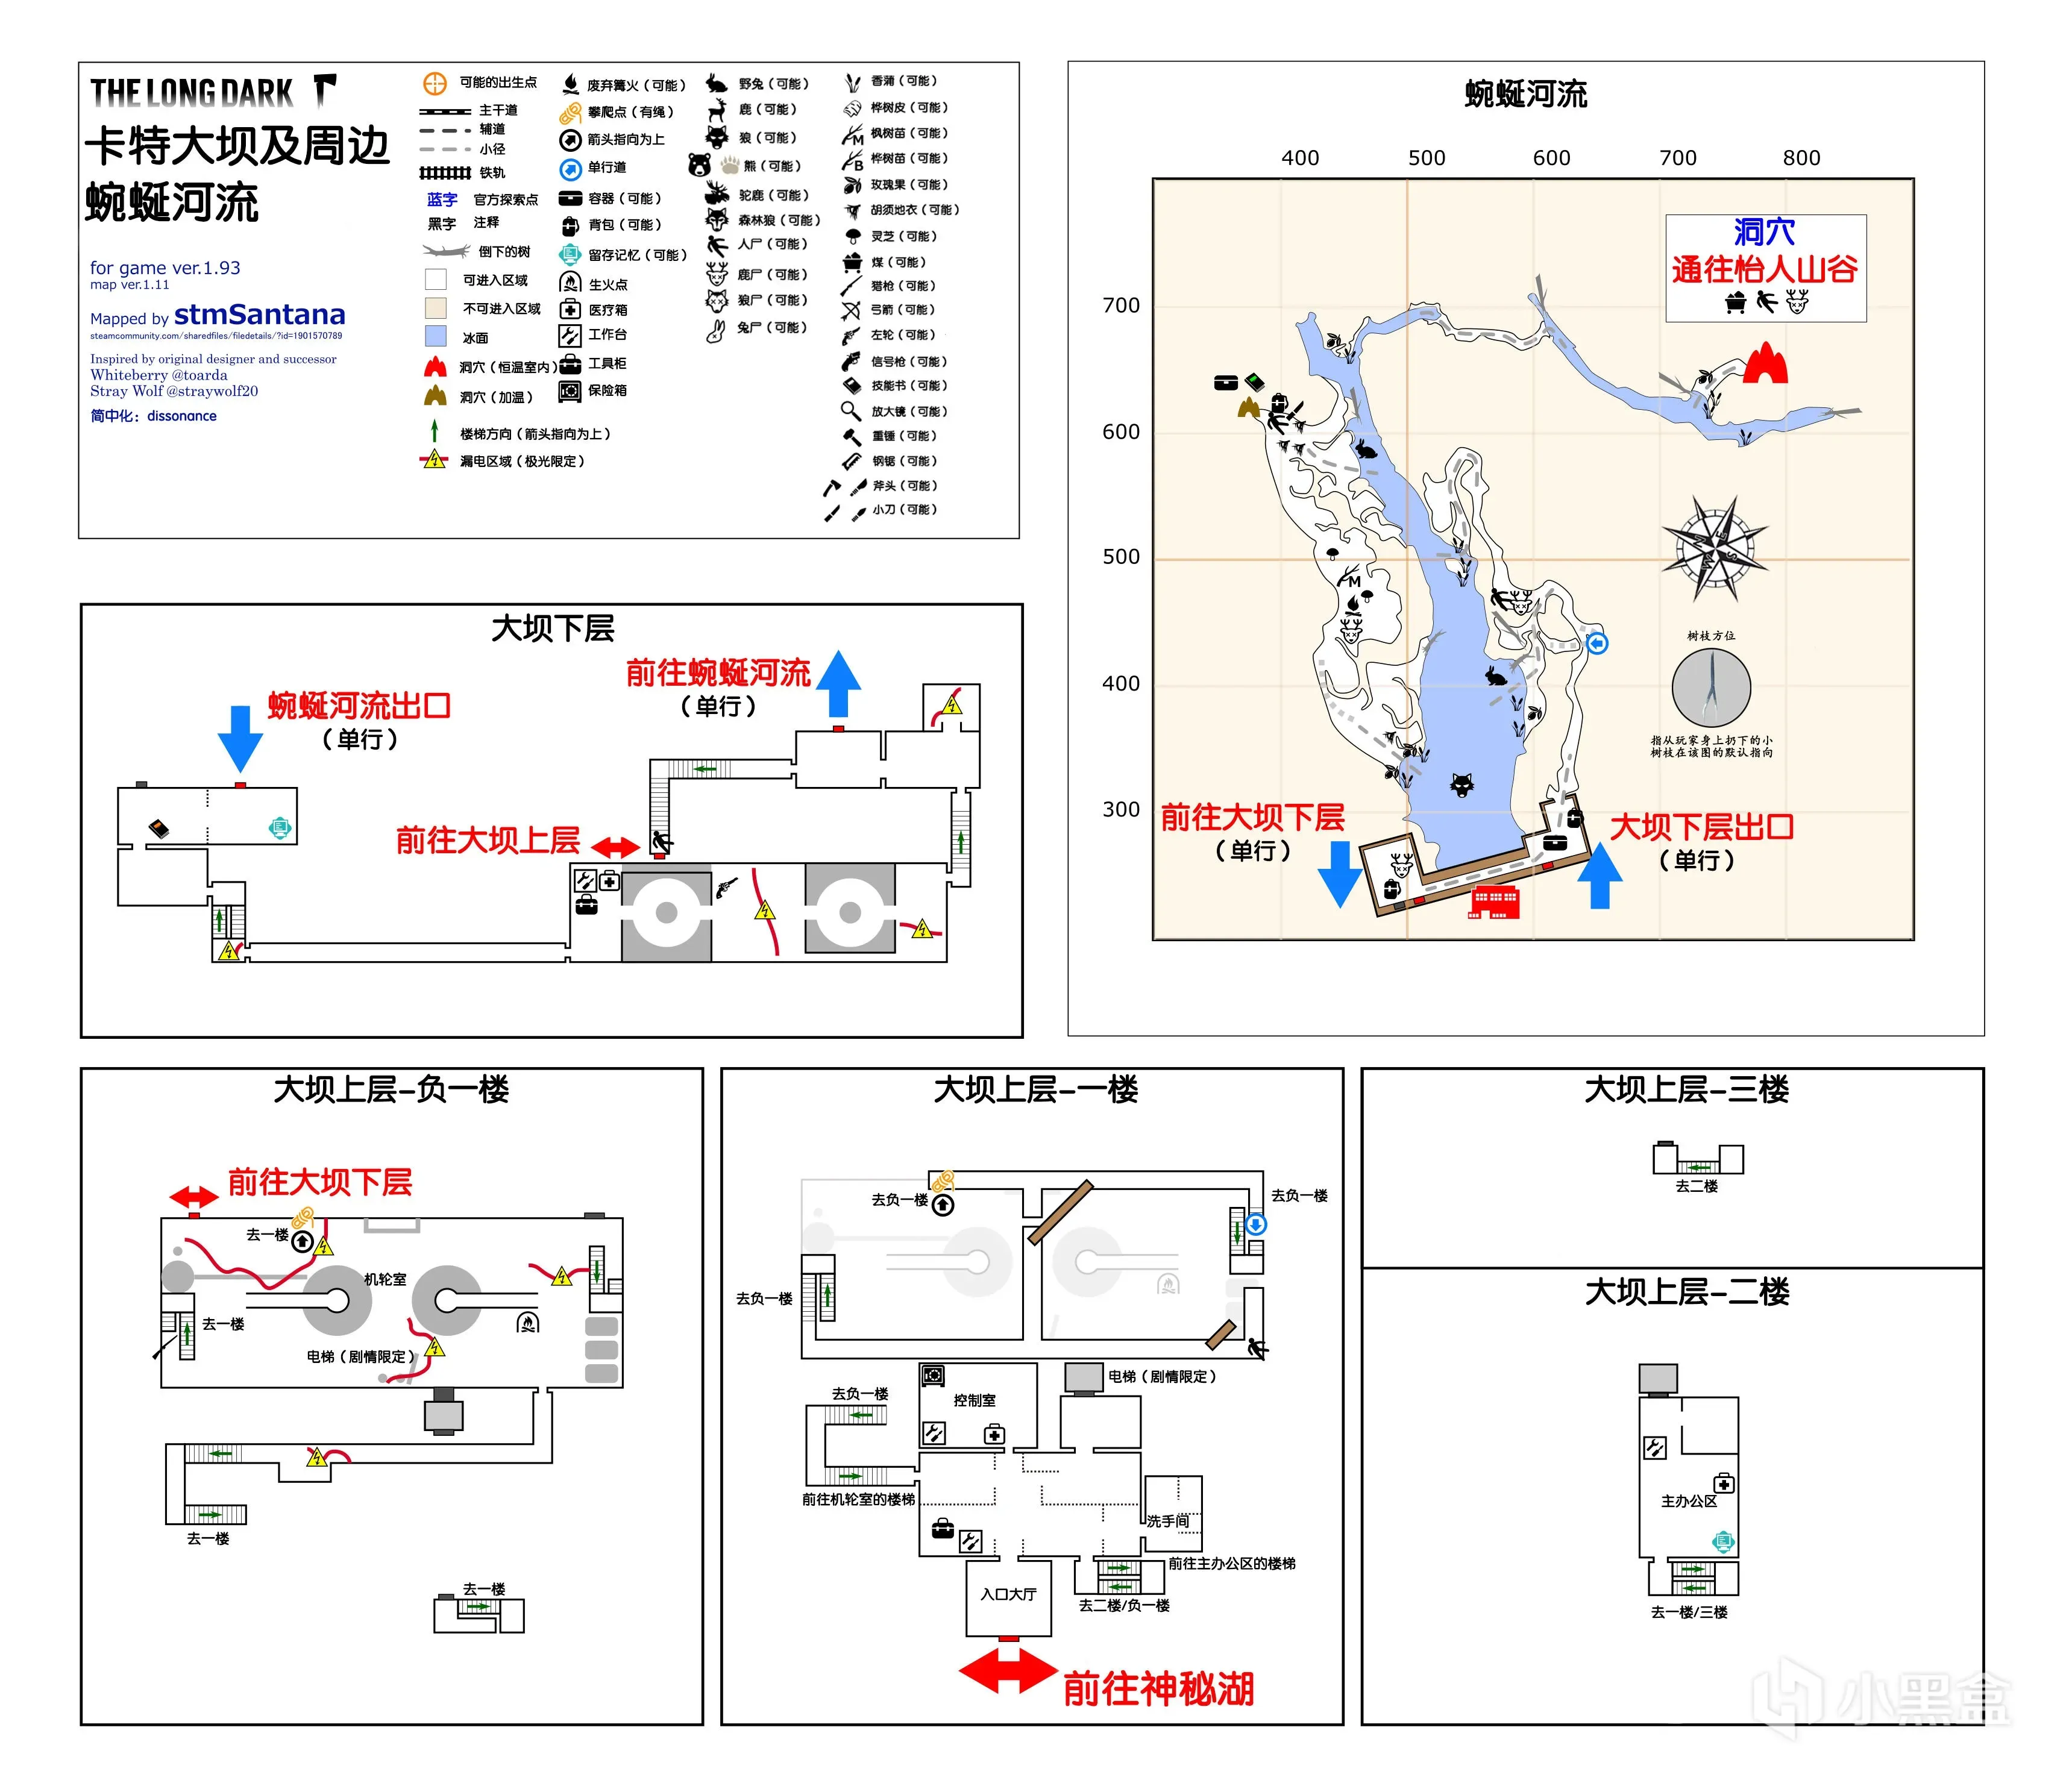
Carter Hydro Dam & Environs, a connector map, traditional Chinese name 卡特水壩及附近區域. This map generally isn’t treated as a whole: the dam part is often mistaken for a Mystery Lake building and is commonly called the dam; the rest is commonly called the Winding River.
Geography: as a connector map it lies between Mystery Lake and Pleasant Valley. It consists of three parts: the dam, the Winding River, and the connecting cave to Pleasant Valley.
Climate: as a connector map, passing through generally inherits the weather of Mystery Lake or Pleasant Valley.
Important resources: the safe on the upper level’s first floor may contain a revolver; on the upper level’s basement floor, opposite the stairs leading to the dam’s lower level, a revolver or rifle may spawn; on the desk in the turbine room on the lower level a revolver may spawn. All are independent spawn points. Arrows are nailed into the door leading from the dam’s lower level up to the upper level.
Carter Hydro Dam is the biggest scrap metal source in the game: breaking down all the breakable objects inside the dam, such as chairs and metal shelving, yields about 720 scrap metal and about 80 cloth, but you also have to watch out for aurora wires suddenly becoming live and for cabin fever risk accumulating.
Other: the entrance and exit between the dam and the Winding River are both one-way — the exit is a safe door, and the entrance is a broken window on the other side.
Aurora nights restore power [Note 6], and live scattered wires damage the player and apply the burn debuff. In story mode you can get through some electrified areas by using the elevator and shutting off the breakers, but in Survival mode neither works. The only way through the dam on an aurora night in Survival mode is to sprint and force your way through the electrified areas; even at your lightest load, forcing your way through the three mandatory electrified stretches costs over 80% of your condition, so it’s best to stay away from the dam during auroras — it brings misfortune.
Although the dam is constant-temperature throughout, there are still some temperature differences between areas. For example, it’s a constant -5 at the Mystery Lake entrance on the upper level, and a constant -8 by the turbine room, so watch the temperature bar when searching in the early game.
Base recommendations: usually discussed together with the trailer at the door; see the Mystery Lake chapter.
Notes Note 6: The aurora is a weather type in the game that can only trigger at night, with strange lights flashing in the sky accompanied by eerie background music. The aurora has two main effects. One is restoring electrical devices to working order, seen as lights flickering crazily, some computers letting you read records, music channels on the radio, and live scattered wires damaging the player and applying the burn debuff. The second affects animals: rabbits, deer and moose stop spawning, and bears and wolves get a green buff. Aurora bears and wolves have 50% more health plus an extra 25% damage reduction, and all their attributes including sight range and charge distance are boosted; they’re no longer afraid of the usual counters like campfires, flares and the flare gun. But aurora creatures have one weakness: they fear light. An aurora creature illuminated by a streetlight, car headlight or a flashlight in high-beam mode is frozen in place, and prolonged exposure can even scare off an aurora wolf. Aurora bears won’t be scared off, but precisely because of this they’ll stand there stupidly taking hits.
Aurora night
Aurora bear
Raven Falls Railway Line / Ravine (connector map)
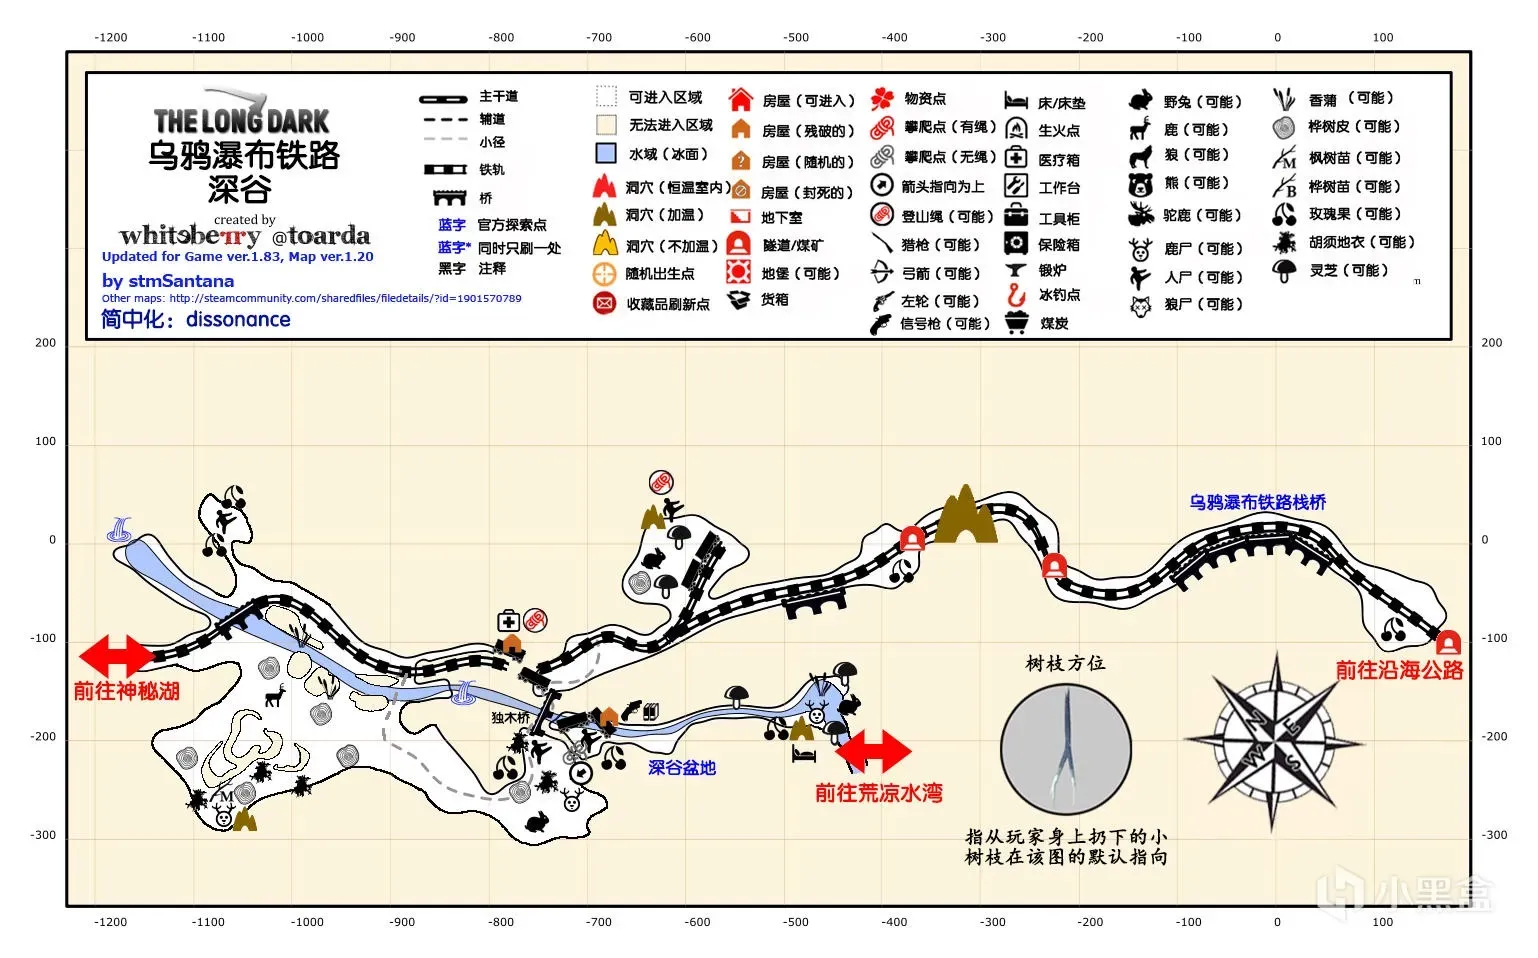
Raven Falls Railway Line, also known as the Ravine, a connector map, traditional Chinese name 渡鴉瀑布鐵路線 & 溪谷, generally called the Ravine. A classic two-part connector map name; both names count as official.
Geography: between Mystery Lake, Coastal Highway and Bleak Inlet. The train flew off the tracks and crashed into the Ravine basin, cutting the whole railway; to pass normally you have to detour over a log bridge beside it.
Climate: as a connector map, passing through generally inherits the weather of Mystery Lake or Pleasant Valley.
Important resources: the train car in the Ravine basin has a flare gun case with a flare gun and some rounds (on Interloper the gun is guaranteed with 4 rounds; on other difficulties it’s said there’s a chance no gun spawns, which can’t currently be disproven). The upper car that didn’t fall has a fixed 4L fuel can. There are two climbing rope spawn points on the map, but a rope doesn’t always spawn. There are also large, concentrated birch bark spawns.
Other: the only map in the whole game without wolves. As long as you don’t go slope-climbing all over the place, it’s very safe.
The middle section of the Raven Falls trestle is damaged. Dying from a fall here counts as one of the classic deaths in this game, so slow down and cross carefully.
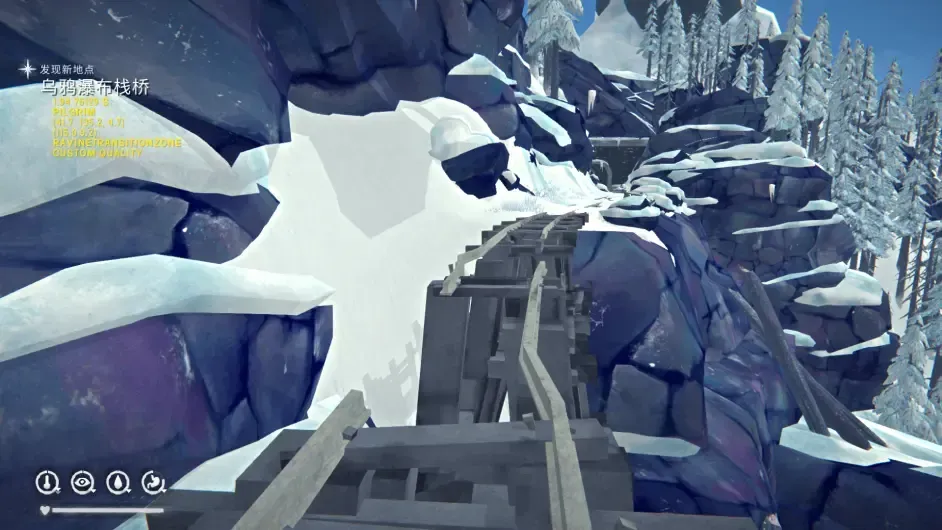
The climbing spot leading down to the Ravine basin has no rope by default, and there’s an invisible kill zone ring around the Ravine basin: a player who crosses it is given a very high fall damage and basically always dies. Those who want to slope-climb down into the Ravine without a rope should back up their save first or copy a video guide’s route exactly [Note 7].
The rope into the Ravine basin is usually the first long rope a player encounters. A rope of this height is very hard to climb in one go when you’re not at full condition. I recommend using the ledges midway to recover stamina, or simply using a stim’s stamina-lock effect to force your way up.
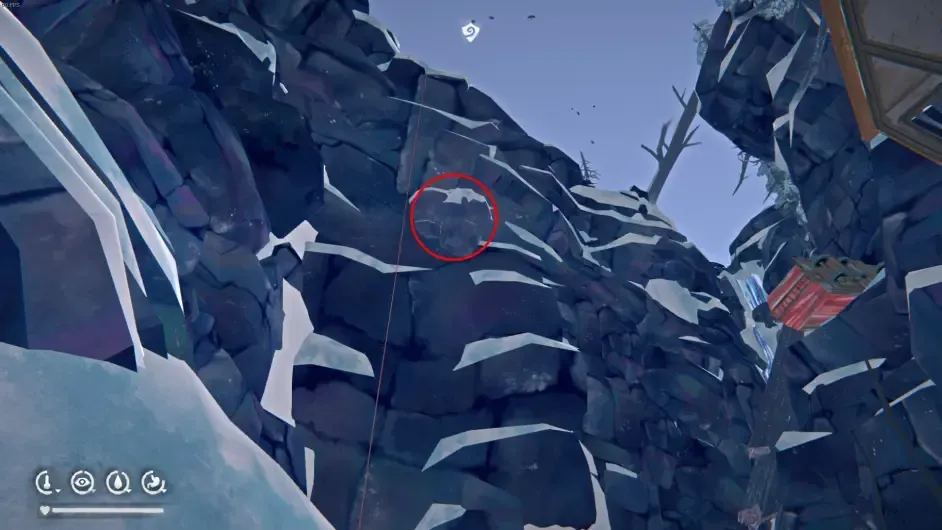
Base recommendations: usually discussed together with the trailer outside the dam. Some people do like to live here alone because there are no wolves, but I don’t think a place without even an indoor bed deserves to be called a base.
Notes Note 7: The game’s save location is C:\Users\你的用户名\AppData\Local\Hinterland\TheLongDark. This is valid for Windows 10 on Steam; other operating systems and platforms are untested.
Old Island Connector / Crumbling Highway (connector map)
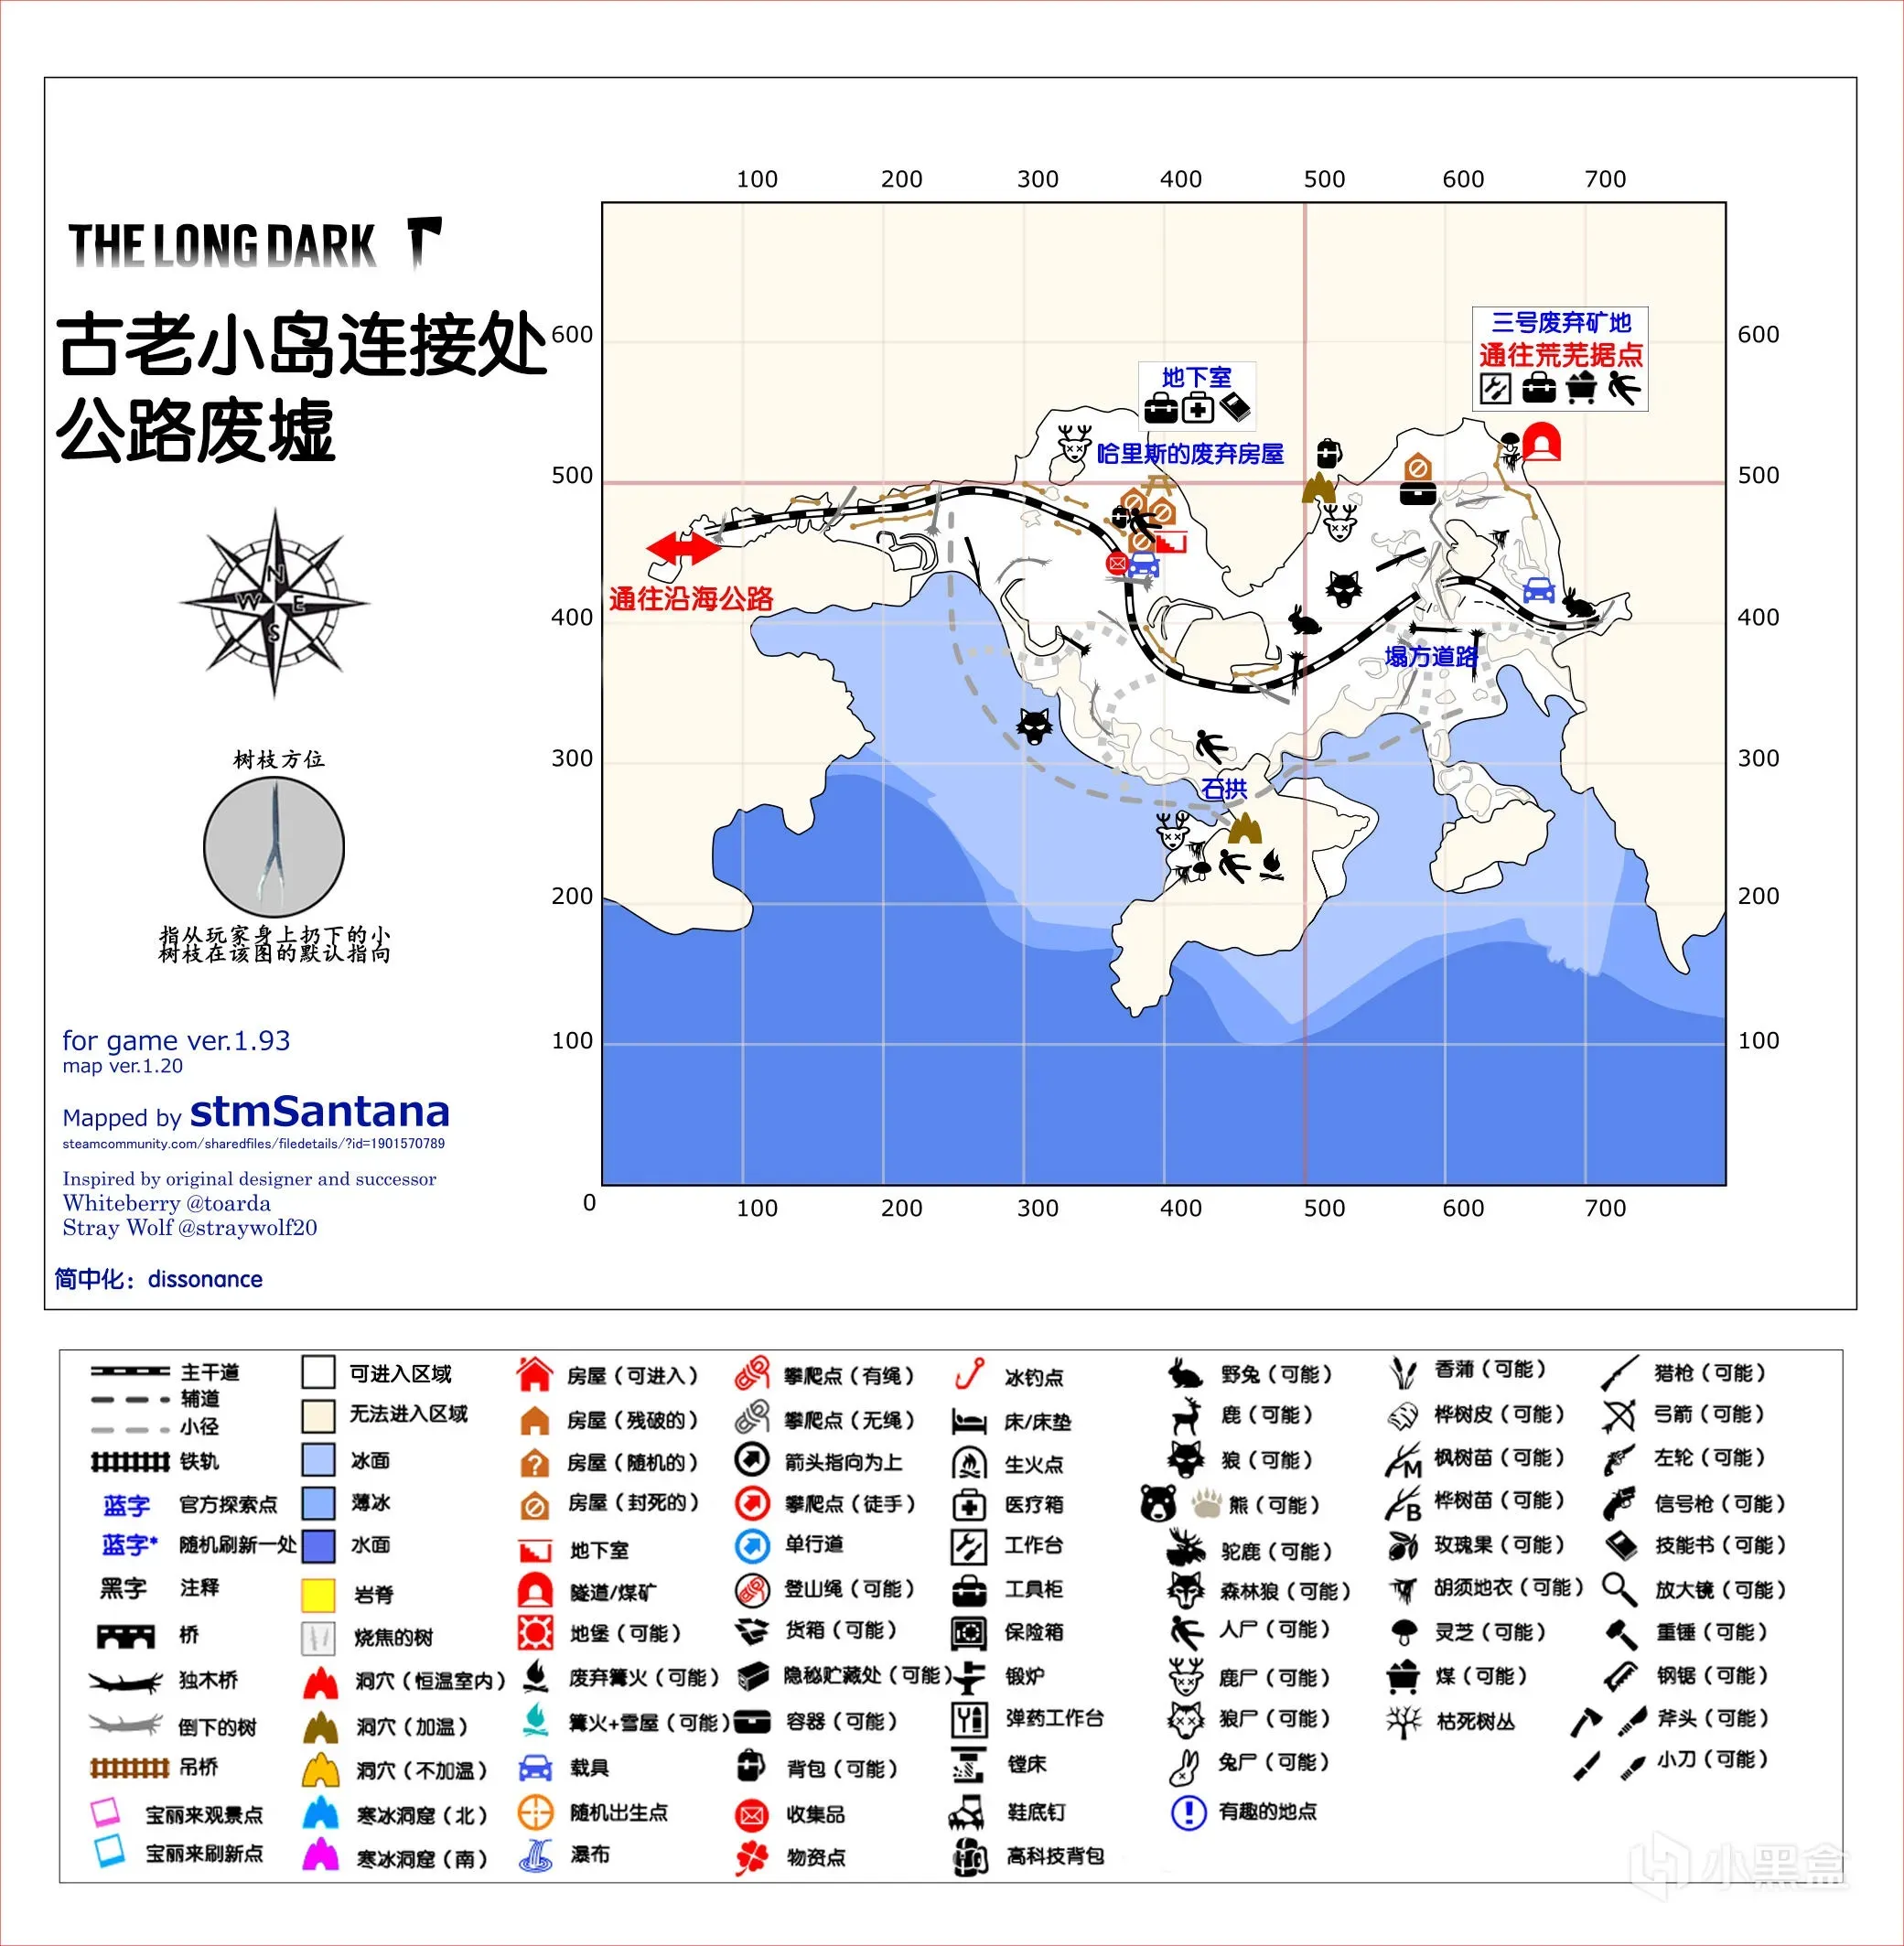
Old Island Connector, also known as Crumbling Highway, a connector map. Traditional Chinese name 舊島連接區 & 破碎公路. A classic two-part connector map name; both names count as official, though I lean toward calling it Crumbling Highway.
Geography: between Coastal Highway and Desolation Point. The structure is similar to Coastal Highway, except the highway is cut off in the middle.
Climate: as a connector map, passing through generally inherits the weather of Coastal Highway or Desolation Point.
Important resources: Abandoned Mine No. 3 has lots of coal spawn points, and flotsam spawns near the thin ice.
Other: the terrain is narrow and complex, and multiple wolves spawn. Neither the ice nor the mountainside is safe; cross carefully and slowly so you don’t run into a wolf around a corner.
Base recommendations: none. A place without even a bed doesn’t deserve to be a base.
Keeper’s Pass South and North (connector maps)
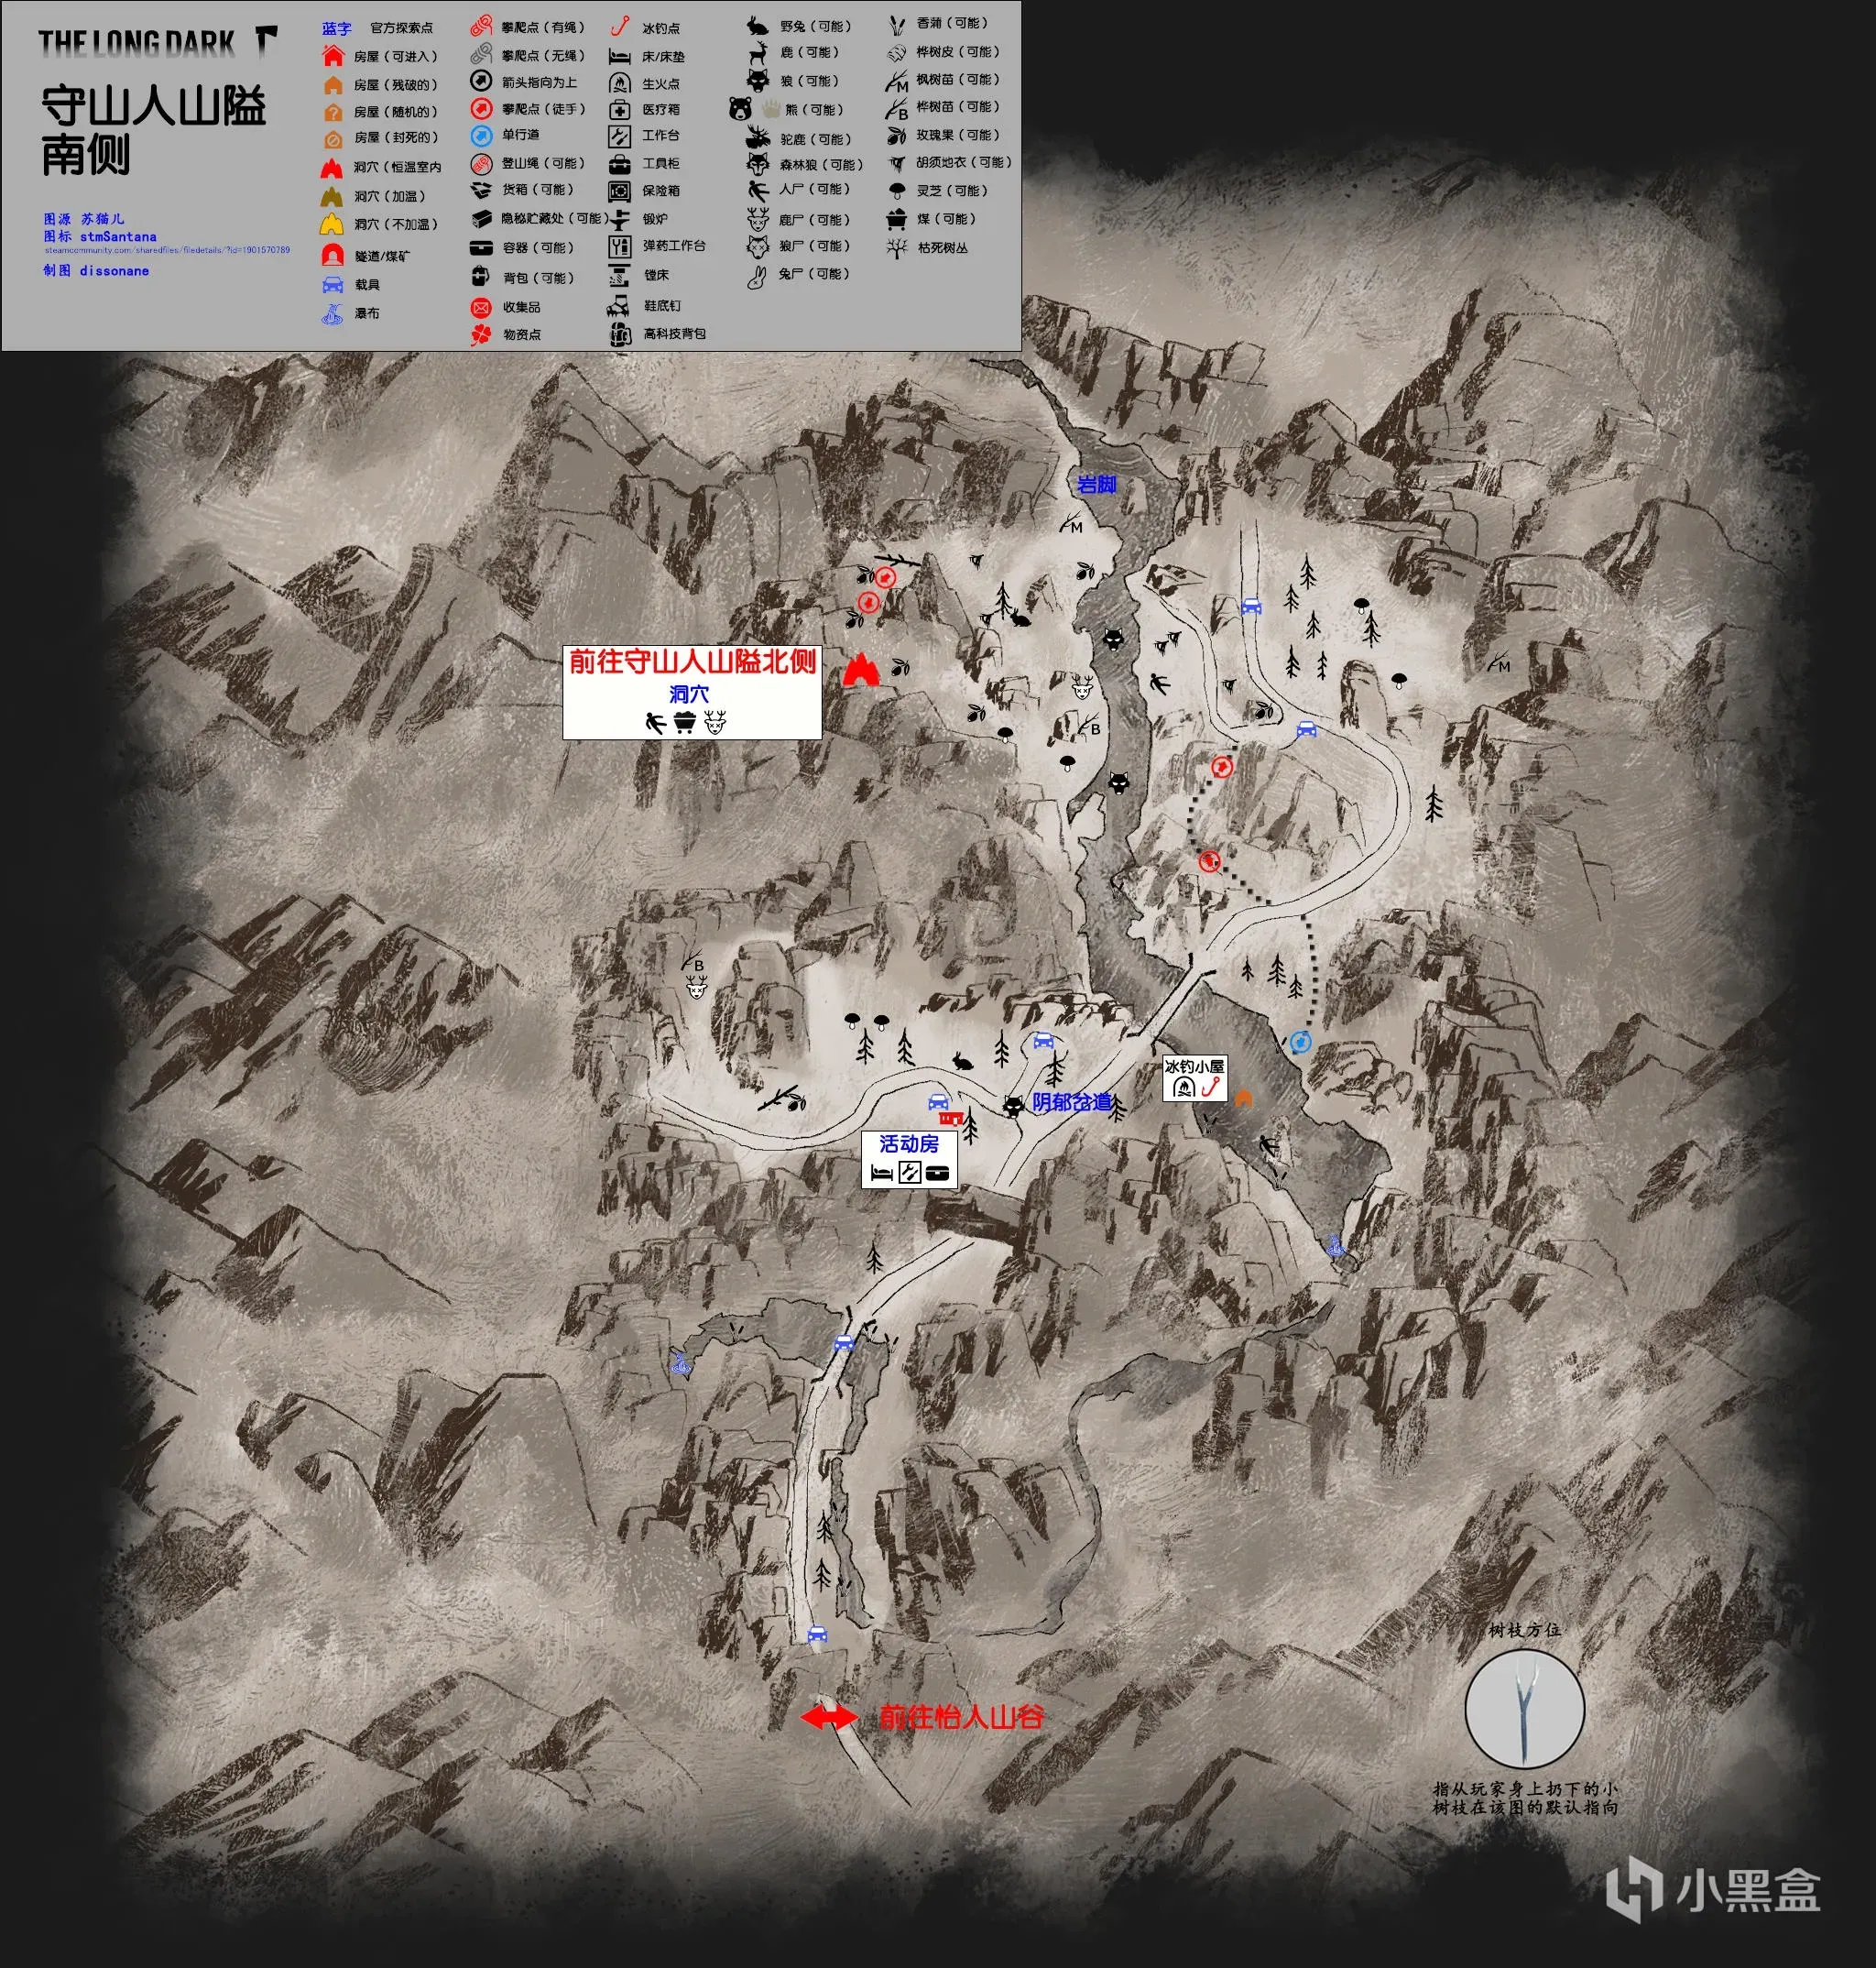 Keeper’s Pass South is a fairly short connector map, with a house, ice fishing huts and wolves. There aren’t many side paths, but watch the thin ice on the river.
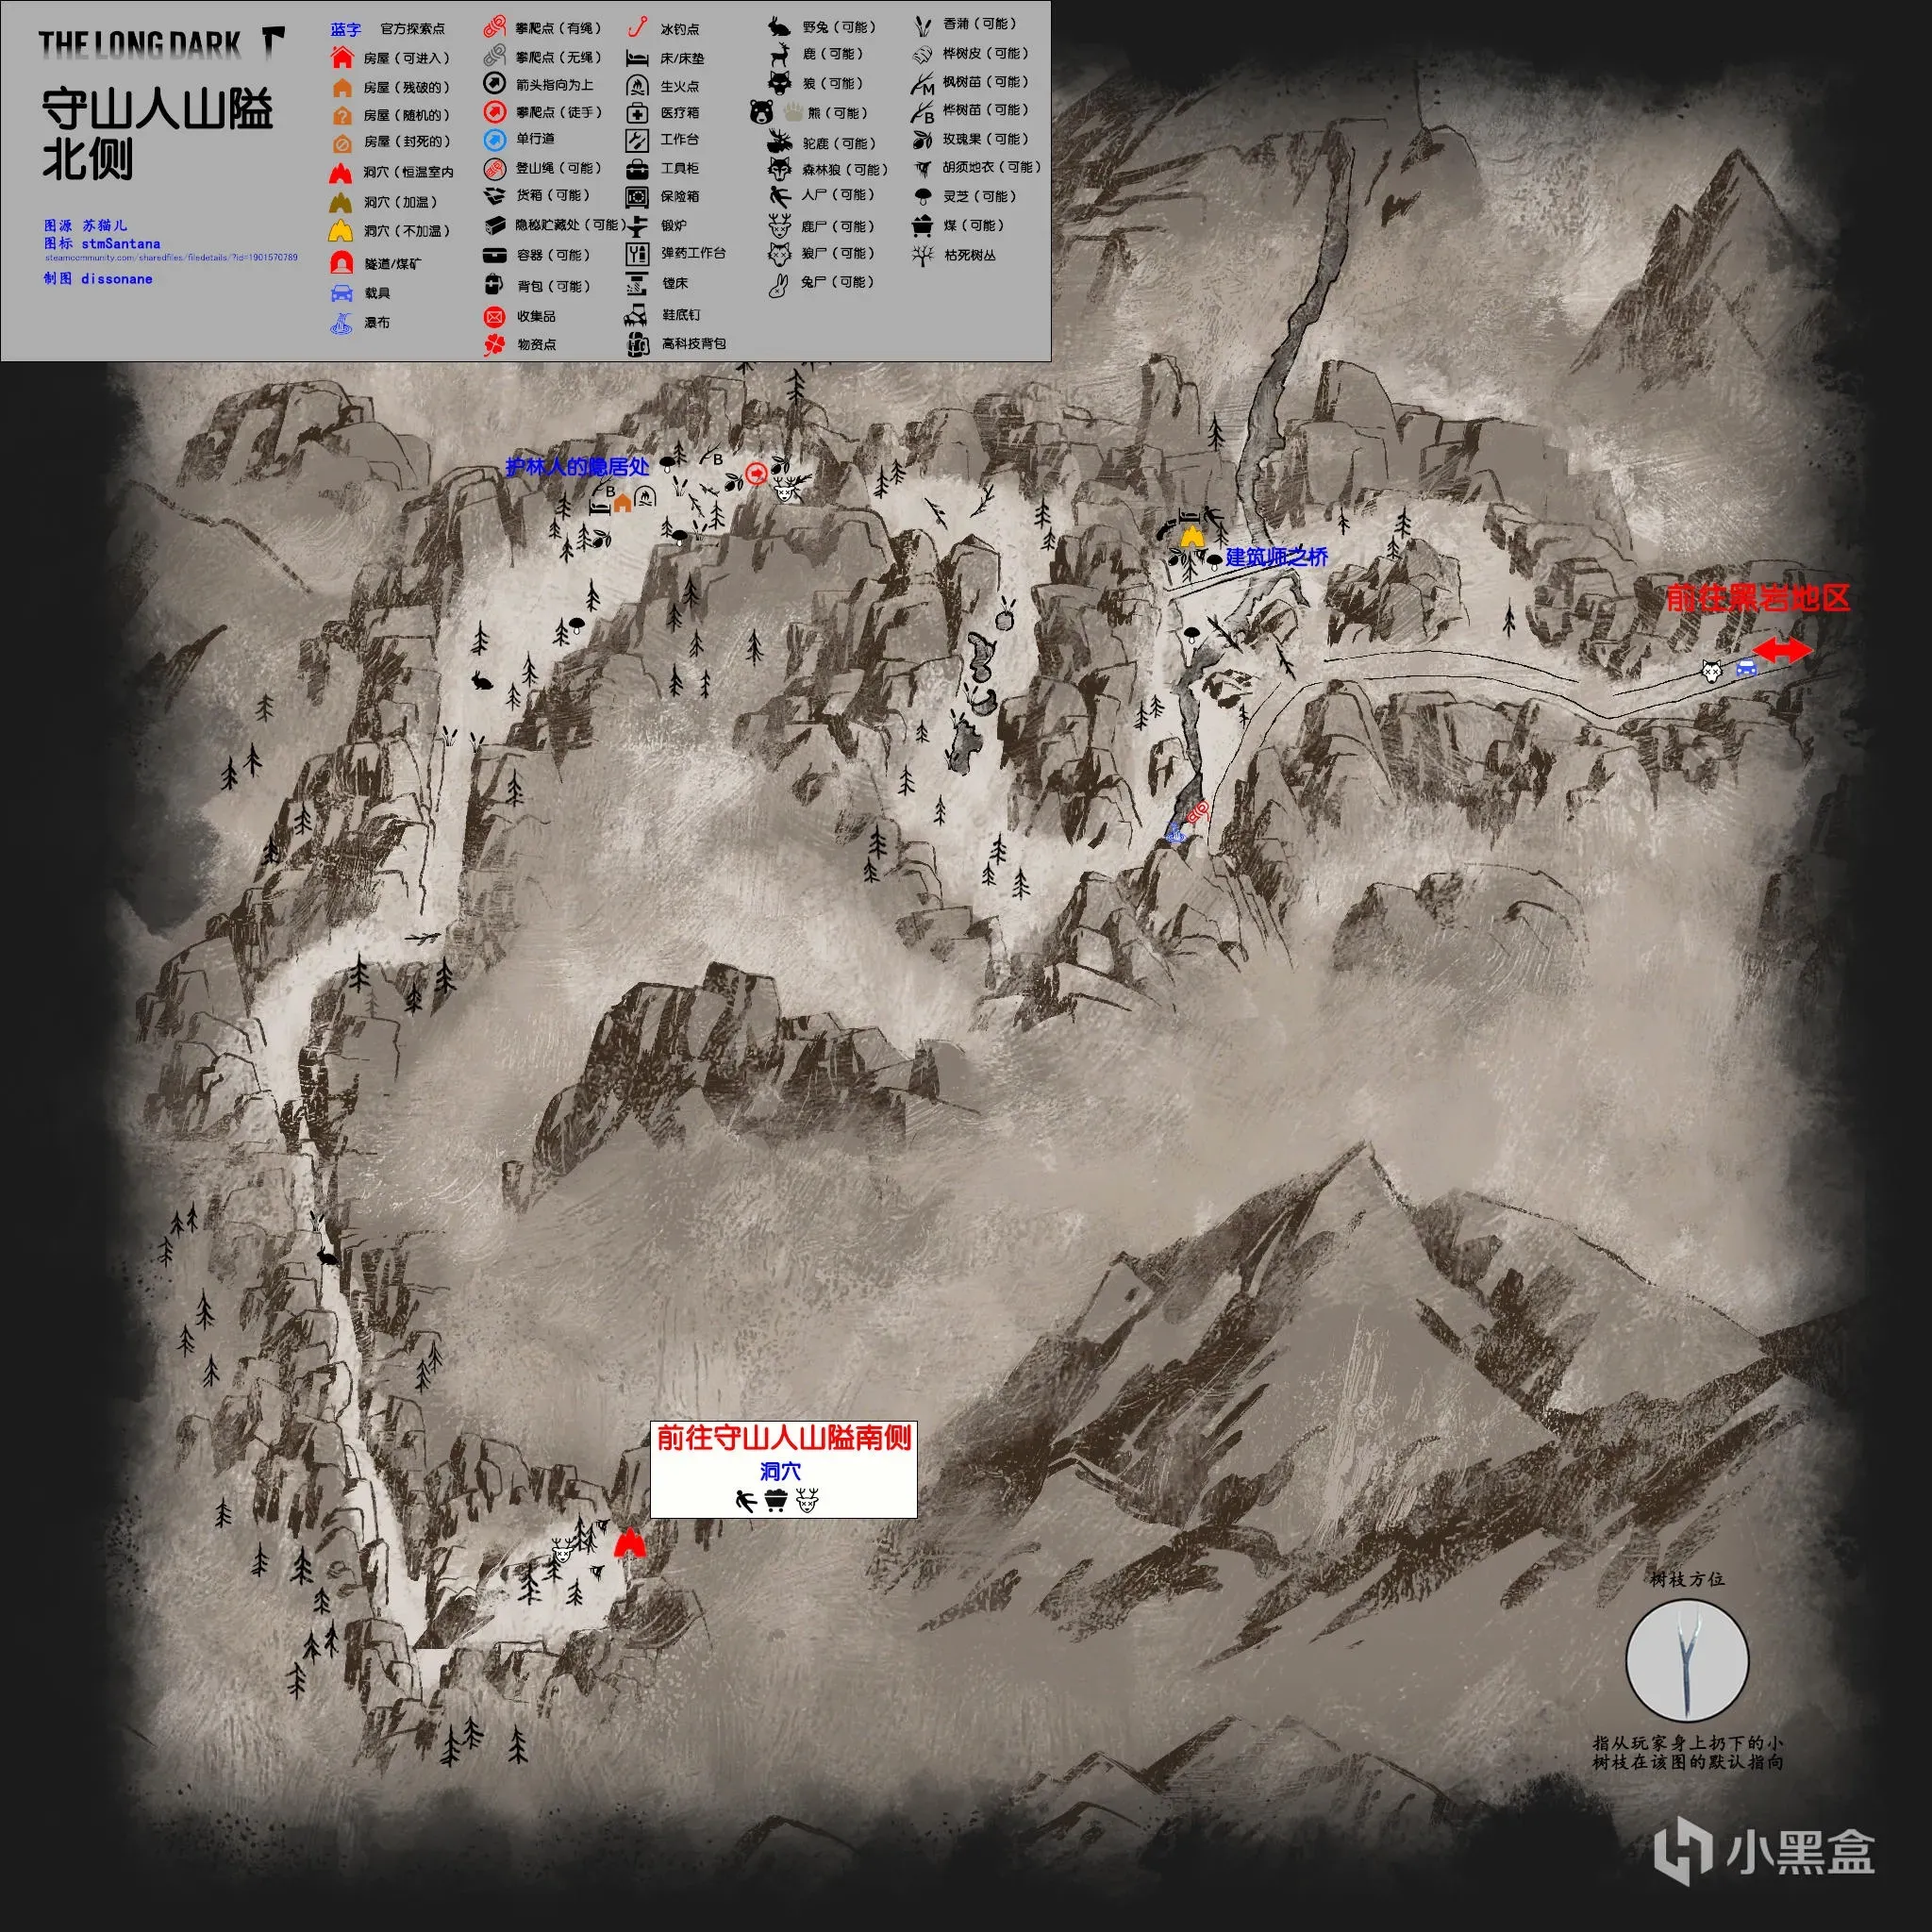
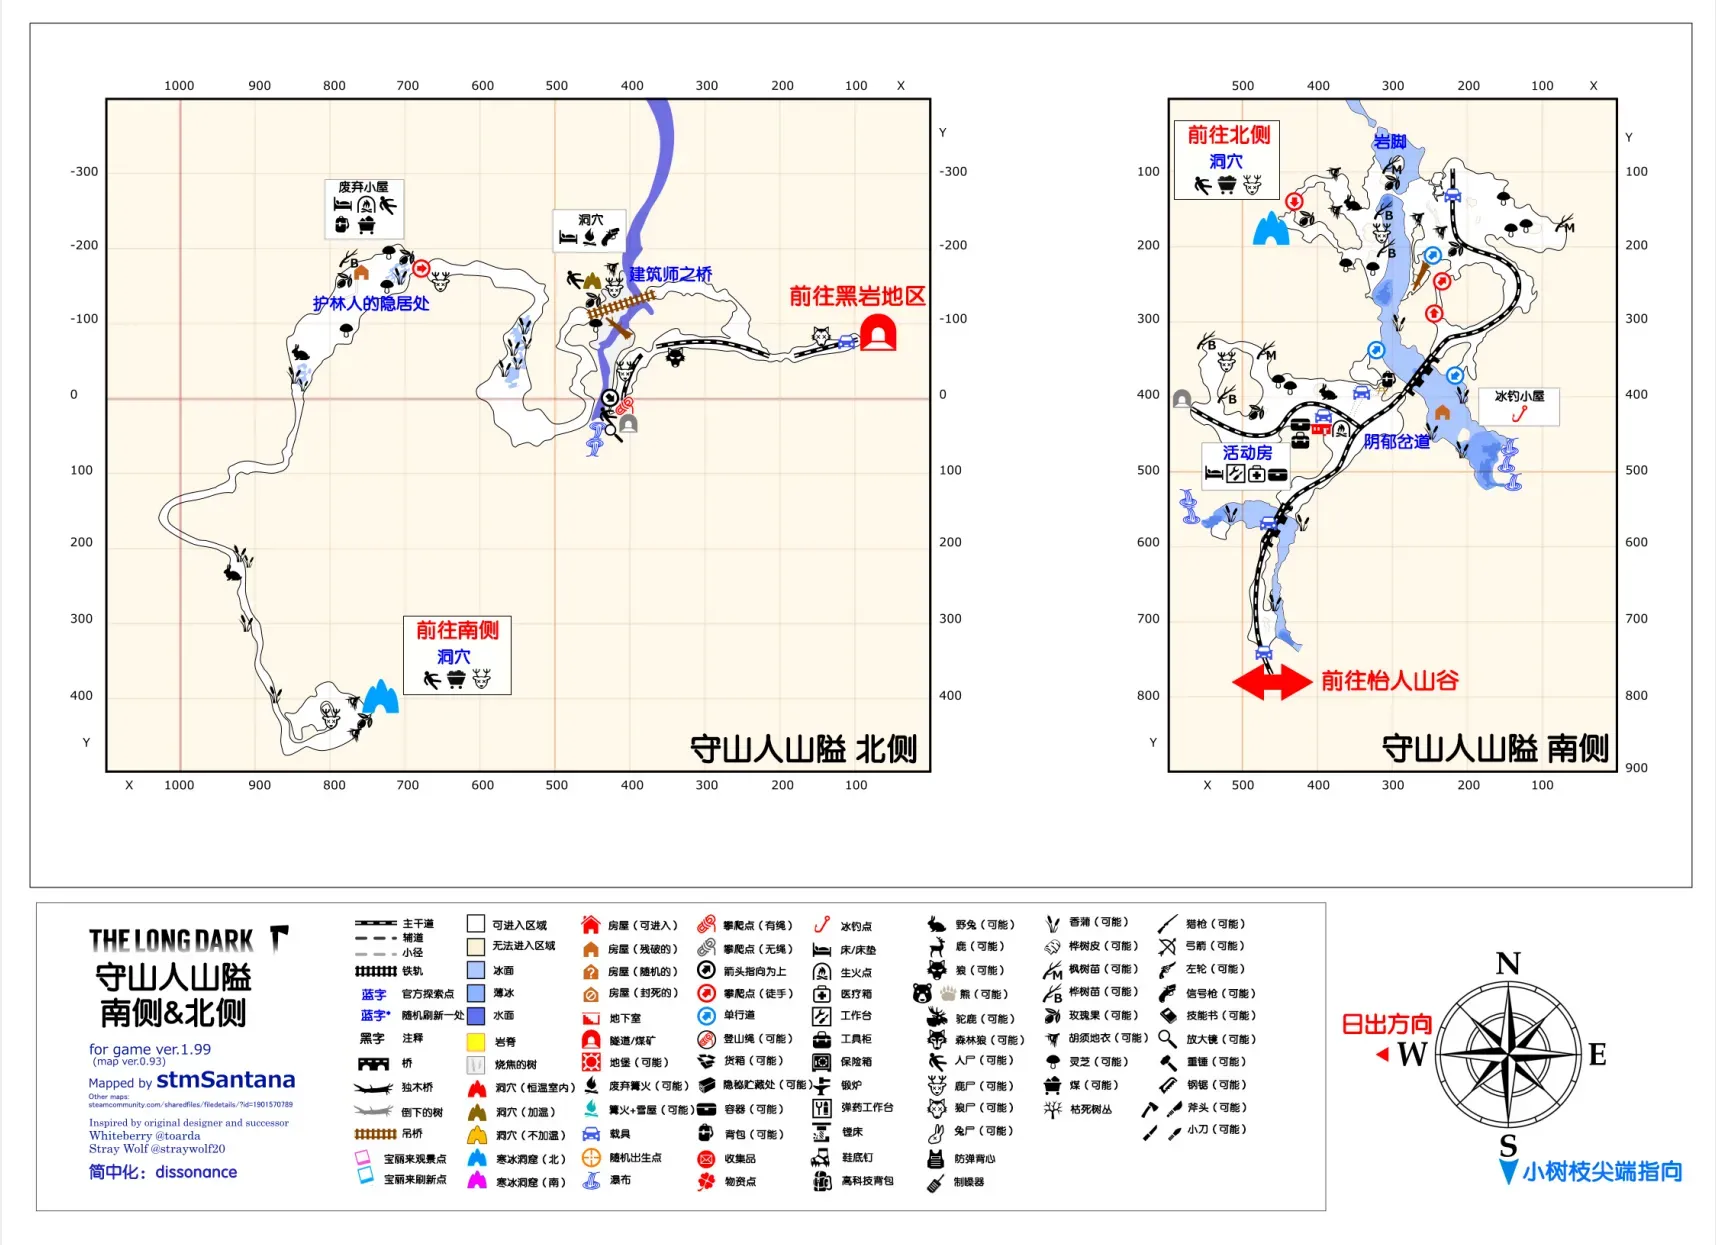 Keeper’s Pass North is a long, tedious connector map. It’s where Mackenzie escapes at the start of chapter 4. Although there are no wolves the whole way, the total distance is very long and there’s no warming point along the way. Under the architect’s bridge there’s a non-warm cave with a flare gun case inside; on non-Interloper it comes with rounds, but on Interloper there’s only the gun. You can slope-climb down, but in normal play you can only climb a rope to get back up.
Far Territory Branch Road (connector map)